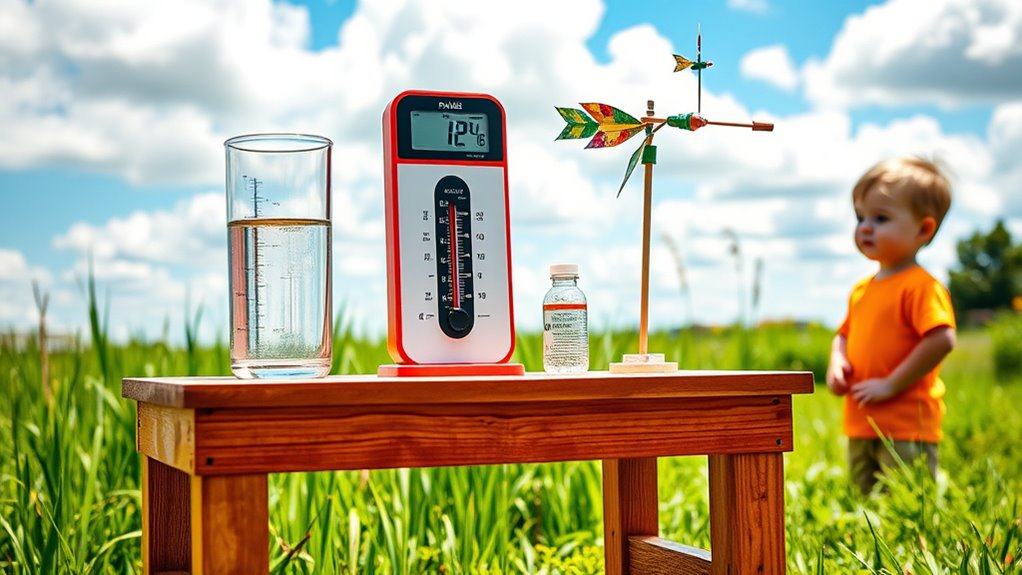

Building a weather station is a fun science project for kids that teaches you about atmospheric measurements like temperature, humidity, and wind speed. Start by gathering simple sensors or instruments, then connect them to a microcontroller like Raspberry Pi or Arduino. You’ll need to calibrate your sensors regularly to guarantee accuracy and organize your data with timestamps. If you keep exploring, you’ll discover how to improve your station and interpret weather patterns more effectively.
Key Takeaways
- Use simple sensors like thermometers, hygrometers, and anemometers to measure weather parameters suitable for kids’ projects.
- Calibrate sensors by comparing with standard instruments to ensure accurate readings.
- Log data regularly with a microcontroller such as Arduino or Raspberry Pi for easy automation.
- Organize and analyze collected data to observe weather patterns and trends over time.
- Enhance the station with real-time displays or internet connectivity for interactive learning experiences.

Building your own weather station is a rewarding project that allows you to monitor local atmospheric conditions firsthand. As you start assembling your station, one of the most important steps is guaranteeing your sensors are properly calibrated. Sensor calibration is essential because it guarantees that the temperature, humidity, wind speed, and other measurements you collect are accurate. You’ll want to compare your sensors’ readings with trusted, standard instruments to make adjustments. For example, if your thermometer reads higher than a known accurate one, you may need to fine-tune it or apply a correction factor in your data analysis. Calibration is not a one-time task; you should periodically check and recalibrate your sensors to maintain data accuracy over time. This process helps you trust your weather data and avoid misleading results.
Once your sensors are calibrated, you’ll need effective data logging techniques to record the atmospheric information consistently. Data logging involves storing the measurements from your sensors at regular intervals, which allows you to analyze trends and patterns later. You can use a microcontroller like a Raspberry Pi or Arduino to automate this process. Set up your data logging software to record data every few minutes, depending on how detailed you want your weather observations to be. Guarantee your data logger is reliable and has sufficient storage capacity, especially if you plan to monitor weather conditions over weeks or months. Organize your data systematically, labeling timestamps and sensor readings clearly, so you can easily interpret the information later. Using a spreadsheet or specialized software makes it easier to visualize changes over time and identify unusual weather patterns.
Furthermore, as you refine your data logging techniques, consider adding features like real-time data display or alerts for specific weather conditions. This way, you can stay updated without constantly checking your station manually. Remember that proper sensor calibration and robust data logging are interconnected; accurate sensors produce trustworthy data, and efficient logging allows you to make the most of that data. Regularly reviewing your calibration and logging methods ensures your weather station remains precise and dependable. With patience and attention to detail, you’ll develop a comprehensive understanding of your local weather, turning your DIY project into an educational and practical tool. As you gain experience, you might even expand your station with additional sensors or connect it to the internet for remote monitoring, enhancing your weather tracking capabilities further.
Frequently Asked Questions
What Safety Precautions Should Kids Take During the Project?
You should always wear safety gear like gloves and goggles to protect yourself during the project. Make sure an adult supervises you at all times, especially when handling sharp tools or electrical parts. Follow safety instructions carefully, and work in a clean, organized space to avoid accidents. Always ask for help if you’re unsure about any step, and never touch equipment that looks unsafe or is not properly insulated.
How Can I Personalize My Weather Station Design?
You can personalize your weather station by choosing a custom color scheme that reflects your style. Add decorative station accessories like fun flags, stickers, or themed signs to make it unique. Experiment with different shapes for your sensors or station housing to stand out. Incorporate your favorite colors and playful decorations to make your weather station both functional and a fun reflection of your personality.
What Are Common Mistakes to Avoid When Building?
Don’t let your project turn into a sci-fi flick — avoid common mistakes like poor wiring and neglecting sensor calibration. Double-check your wiring connections to prevent errors and guarantee accurate readings. Calibrate sensors properly to avoid skewed data, which can lead to incorrect weather predictions. Remember, precision is key; even small mistakes can cause big inaccuracies. Keep your build neat, test thoroughly, and your weather station will be a reliable tool.
How Often Should I Calibrate the Sensors?
You should calibrate your sensors regularly, ideally following a consistent frequency schedule, such as once a month or after any major weather event. Sensor calibration guarantees accurate readings, so keep an eye on any discrepancies and recalibrate as needed. Regular calibration helps maintain the reliability of your weather station, giving you precise data for your observations and experiments. Stay diligent with your sensor calibration schedule for the best results.
Can This Project Be Adapted for Older Students or Adults?
Yes, you can definitely adapt this project for older students or adults. Incorporate advanced sensors for more precise data collection and challenge them to analyze the data critically. Encourage using data analysis tools and software to interpret weather patterns, making the project more complex and educational. This approach helps develop their scientific skills, understanding of meteorology, and hands-on experience with advanced technology.
Conclusion
Building your own weather station is a fun, hands-on way to learn about the weather. Did you know that the average wind speed on Earth is about 11 miles per hour? By creating your station, you can track real-time weather data and see how it changes day by day. Keep exploring, and you might even discover patterns or surprises in your local climate. It’s a great project to spark curiosity and become a young meteorologist!