
TL;DR
The most impactful way to quiet a noisy rig or improve sound quality in a tiny space is to move it into a closet or separate room. Proper placement, acoustic dampening, and ventilation are key to making a closet setup work well without turning it into a heat trap or echo chamber.
Ever wonder why some closet studios sound surprisingly clear while others turn into echo chambers? The secret isn’t just in the foam or panels — it’s in where you put your gear and how you treat the space around it. Acoustic dampening, placement, and the ‘rig in the closet’ setup.
In this guide, I’ll show you how to tame noise, position your mic for perfect recordings, and set up your closet as a functional, quiet studio. Whether you’re recording vocals, streaming, or just want a clutter-free workspace, this is your blueprint for success.
Acoustic dampening
& the rig in the closet.
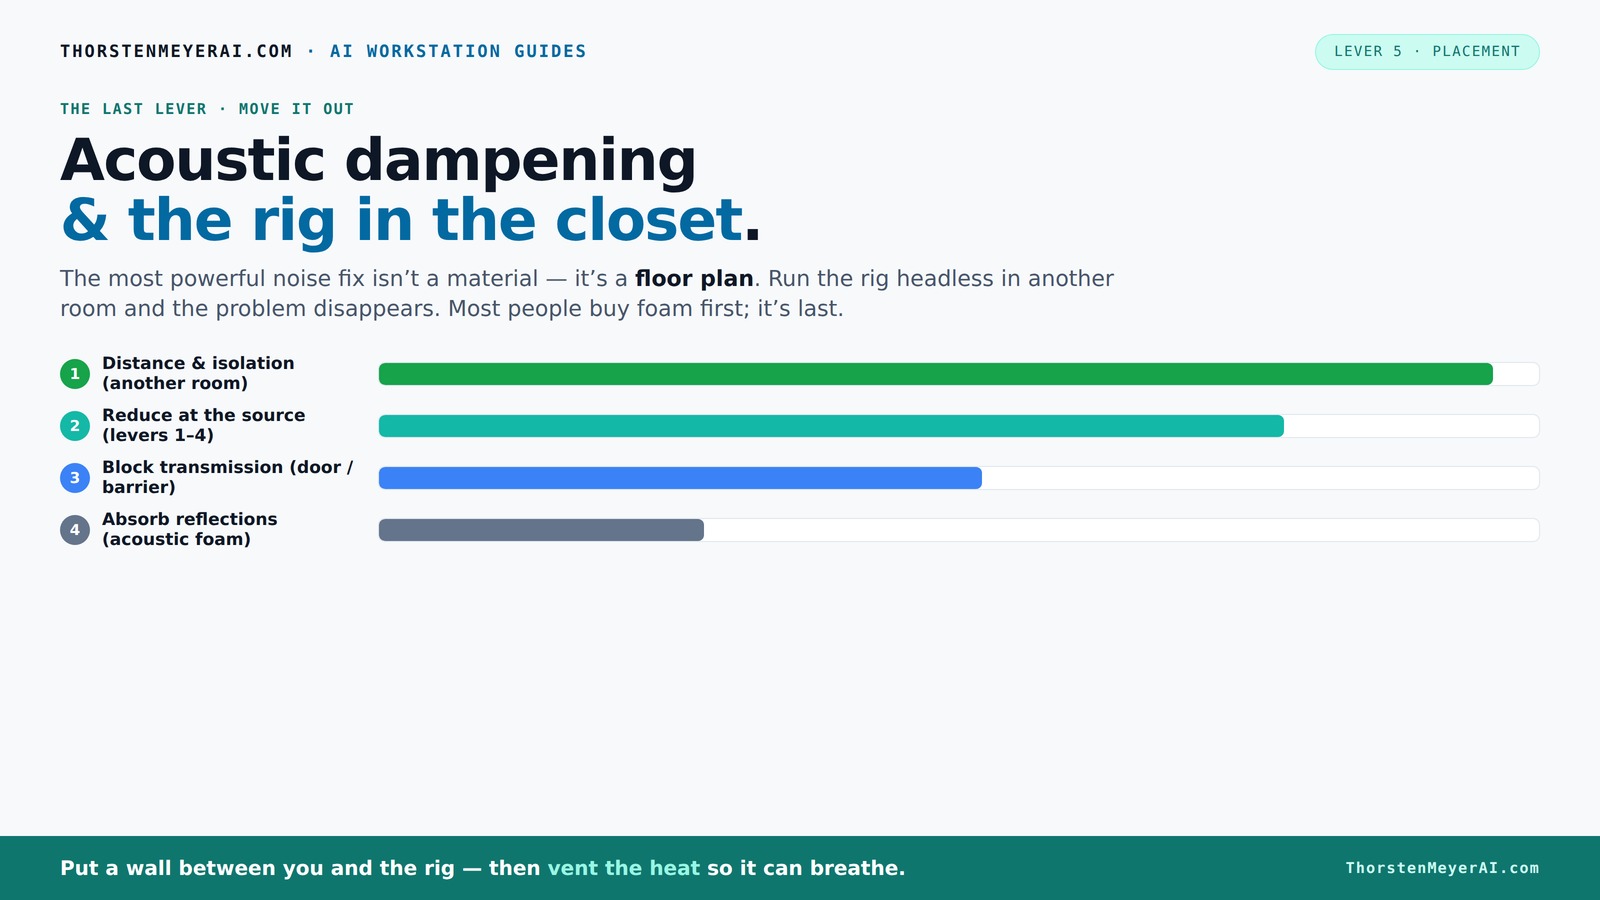
The most powerful noise fix isn’t a material — it’s a floor plan. A rig you can’t hear because it’s in another room beats any amount of foam. Tap the approaches in Part 1 to see what actually works.
(another room)
(levers 1–4)
(door / barrier)
(acoustic foam)
Contain the noise, not the heat
Key Takeaways
- Moving your rig into another room or closet is the most effective noise reduction method—distance is king.
- Ventilation is critical in enclosed spaces; without airflow, heat buildup destroys the benefits of a 'rig in the closet' setup.
- Acoustic dampening reduces echo but does not block sound transmission; combine with barriers for best results.
- Place your microphone at reflection points and treat corners to improve clarity and reduce low-frequency muddiness.
- DIY materials like blankets, foam panels, and rugs can make effective, budget-friendly acoustic treatments.
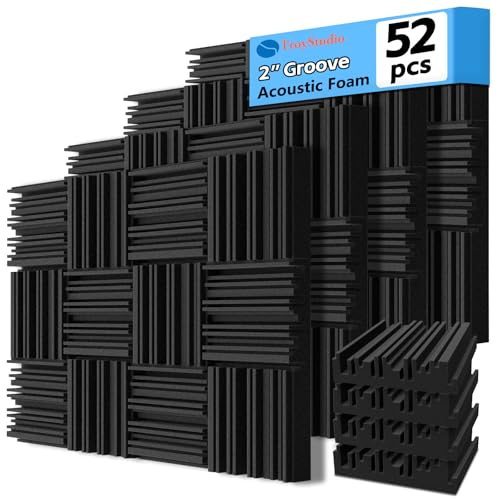
TroyStudio Thick Acoustic Foam Panels, 12 X 12 X 2 Inch 52 Pcs Broadband Sound Absorbing Foam, Dense Soundproof Padding Tile, Recording Studio Foam Absorber, Groove Decorative 3D Wall Ceiling Panel
- Size and Pack Quantity: 12x12x2 inches, 52 panels
- Coverage Area: 52 square feet
- Material: High-density polyurethane foam
As an affiliate, we earn on qualifying purchases.
As an affiliate, we earn on qualifying purchases.
Why Moving Your Rig Is the Easiest, Most Powerful Noise Fix
The best way to cut down noise? Put the machine in another room. It’s like turning down the volume at its source. You don’t need fancy foam or barriers — just a wall and a network cable.
Think about it: your laptop isn’t next to your noisy gaming PC. Why should your AI rig be right on your desk? A closet, basement, or spare room can become a quiet sanctuary. Once it’s out of sight and earshot, the noise practically vanishes.
Plus, with a solid network connection, you access your rig just like it’s in the same room. No more fan noise or heat cooking up your workspace. Family safety and tech tips.
Why does this work so well? Because sound diminishes with distance. The farther the source, the less noise reaches your listening or recording area. This tradeoff means you might need longer cables or a bit of planning, but the reduction in noise often outweighs the inconvenience. It’s a simple principle with profound results — sometimes, the best solution is to remove the problem entirely.
The 'Rig in the Closet' Setup — How to Keep It Cool and Quiet
Putting a high-powered machine in a closet sounds perfect — but there’s a catch. Sealed spaces trap heat. A GPU pulling 600W of heat can turn your closet into a sauna in no time.
To make this work, ventilation is king. You need at least passive vents or, better, a quiet exhaust fan. Some builders go further with soundproofed cabinets that combine foam lining with ducted airflow, keeping things cool and silent at the same time.
For example, a DIY creator built a closet rig with a small exhaust fan controlled by a thermostat. It kept the temperature steady and the noise low, even during long training runs. Check out their setup for ideas.
Proper airflow prevents overheating, which can cause thermal throttling or hardware failures. Yet, adding ventilation introduces potential noise pathways. The tradeoff is designing a system that maintains airflow while minimizing sound leaks. This often involves ducting, soundproofing around vents, or using quieter fans. For more tips, see acoustic dampening and ventilation setup.
Acoustic Dampening vs. Soundproofing — What’s the Difference and Why It Matters
Acoustic dampening and soundproofing aren’t the same. Dampening reduces echoes and reflections inside a space — think of it as softening the walls. Soundproofing blocks sound from escaping or entering — like building a wall that keeps noise in or out.
For a closet studio, dampening helps reduce reverb and echo, making your recordings clearer. Soundproofing keeps outside noise out, which is trickier in tiny spaces. You’ll need dense barriers, sealing gaps, and maybe even soundproof doors.
Why does this distinction matter? Because each approach addresses different problems. Dampening improves the quality of your recordings by controlling internal reflections. Soundproofing prevents external noise from seeping in or your sound from disturbing neighbors. For detailed strategies, visit soundproofing and dampening tips.
Where to Place Your Microphone for the Best Closet Recordings
The placement of your mic can make or break your recording. The goal is to minimize reflections from the walls and capture a direct, clear sound. Learn more about optimal placement at microphone placement techniques.
Start by placing the mic about 6-12 inches from your mouth, angled slightly away from reflective surfaces. Position it in a spot where it avoids direct contact with hard walls or reflective surfaces, like a corner or wall behind you.
Use the 'reflection point' technique: sit where your reflection hits the mic, then place absorbing material at that point to reduce echo. For example, a small foam panel behind the mic or on the wall opposite your mouth can dramatically improve clarity.
Why does this matter? Because reflections and standing waves can cause phase issues, muffling your sound or creating comb-filter effects that distort your voice. Proper placement ensures your voice is captured naturally, with minimal coloration. This increases clarity and reduces the need for extensive post-processing, saving time and effort during editing.
Best Placement of Absorption and Treatment in a Tiny Closet
Acoustic dampening isn’t just about sticking foam on the walls. It’s about smart placement. Focus on reflection points: behind the mic, the wall opposite, and the ceiling. For more on acoustic treatment, see treatment placement tips.
For small closets, 2-inch foam panels are usually enough. Cover the wall behind your mic and the first reflection point on the side walls. Add bass traps if you notice low-end buildup or standing waves, especially in larger closets.
Don’t forget the door — sealing gaps with weatherstripping or hanging an acoustic blanket can cut unwanted noise leaks. Rugs or carpets on the floor help tame footfalls and reflections from the ground.
Why does this matter? Because improper placement of acoustic treatment can lead to uneven sound, with some frequencies overly damped and others unaffected. Strategic placement ensures you tame the most problematic reflections without deadening the entire space, preserving natural vocal warmth and clarity. The goal is a balanced environment where your voice sounds natural yet clear, minimizing the need for heavy EQ or post-processing.
Corners Matter — But They’re Not the Only Issue
Corners are hotspots for low-frequency buildup. Installing bass traps in corners can absorb those deep rumbles — think of it as quieting the bass drum in your room.
But don’t stop there. Hard surfaces near your mic or reflection points can cause flutter echoes and harshness. Covering these with foam or blankets smooths out the sound.
For example, a DIY closet studio added bass traps in all four corners and hung acoustic blankets on the walls. The difference was night and day — clearer vocals and less muddy low end. Proper corner treatment prevents low-frequency resonances that can cause muddiness or boominess, which are hard to fix later. Covering only the corners might leave mid and high frequencies reflective, so complementing corner traps with wall treatments is essential for a balanced sound. Recognizing these issues helps you target your treatment effectively, avoiding over- or under-absorbing certain frequencies.
Balancing Absorption and Natural Vocal Sound
Too much dampening makes your voice sound dead — like singing in a padded cell. The goal is to tame reflections without stripping away natural warmth.
Start with a few key panels at reflection points, then listen. If your voice sounds too dull, add a little more space around the mic or introduce diffusers to scatter sound naturally.
For example, a voiceover artist added foam behind their mic but kept a small open area in front, preserving some natural brightness while reducing echo. It’s about finding the right balance for your voice and space. Over-treating can rob your recordings of life and presence, making them sound sterile or muffled. Conversely, under-treatment leaves echo and reflections that muddy your sound. Achieving this balance involves listening critically, making incremental adjustments, and understanding how different treatments affect your specific voice and room acoustics. Natural-sounding recordings often depend on a delicate balance — too dead, and your voice loses its character; too live, and clarity suffers.
Budget-Friendly DIY Materials That Work Well
You don’t need a fortune to make a closet studio sound better. Simple DIY solutions include thick blankets, old mattresses, moving pads, and thick curtains.
For acoustic treatment, 2-inch foam panels are affordable and effective for small spaces. Cover key reflection points and corners for best results. Use weatherstripping or draft stoppers on doors and gaps.
Rugs, carpets, and blankets absorb footfalls and ground reflections. Combine these with a few DIY bass traps made from rockwool or dense foam, and you’re good to go.
For example, a streamer used old blankets and foam mattress toppers to create a makeshift treatment that cut echo by 70%. No need for expensive studio gear. The key is strategic placement: focus on reflection points, corners, and gaps to maximize your budget-friendly materials’ effectiveness. This approach balances cost with performance, giving you a capable treatment that can be tailored to your space’s unique challenges.
Common Mistakes That Ruin Your Closet Studio
Over-treating or under-treating can both sabotage your setup. Covering every inch with foam can deaden your voice, while ignoring gaps or reflective surfaces keeps the echo alive.
Another mistake? Not sealing gaps around the door or vents. Small cracks act like sound leaks. Also, placing the mic directly against a wall or corner amplifies reflections and low-end buildup.
Check your setup: sit in your usual spot, record a quick clip, and listen for harshness or echoes. Adjust placement or treatment accordingly. Recognizing these pitfalls helps you refine your environment, avoiding common errors that compromise sound quality. Properly sealing gaps prevents external noise intrusion and internal sound leaks, while strategic placement of treatments ensures you’re not over or underdoing it. The goal is a balanced, controlled space that enhances your recordings without introducing new problems.
When Is a Closet Too Small to Work?
If your closet is tiny — less than 3 feet wide — it might be too cramped for effective treatment or comfortable recording. Low ceilings and narrow spaces can cause standing waves and make everything sound boxy.
If you notice a lot of low-frequency boom or muffled sound, consider moving to a slightly larger room or adding more bass traps. Sometimes, a small closet can work if you leave some open space or add diffusers.
For example, a podcaster found that a very small closet caused more echo than clarity. Moving to a slightly larger room with better treatment made a big difference.
Assess your space: if it’s too tight, you might need to consider expanding or choosing a different location. Remember, a tiny space can be more challenging to treat effectively, and the acoustic issues may outweigh the convenience of a small closet. Sometimes, the best solution is to find a slightly larger, more manageable space that allows for better treatment and comfort, leading to higher quality recordings.
Frequently Asked Questions
Is acoustic dampening the same as soundproofing?
Not quite. Acoustic dampening reduces echoes and reflections inside a space, making recordings clearer. Soundproofing blocks sound from entering or leaving, which is harder to do in small spaces without proper barriers and sealing.Where should I place my mic in a closet booth?
Position the mic about 6-12 inches from your mouth, angled slightly away from reflective surfaces. Place it at a reflection point and avoid placing it directly against walls or in corners to reduce echo.Do I need foam, blankets, or bass traps?
Start with foam panels on reflection points and bass traps in corners if low-end muddiness occurs. Blankets and rugs are useful DIY options, especially for sealing gaps and reducing ground reflections.How much wall coverage is enough?
Cover key reflection points with 2-inch foam panels, especially behind the mic and on side walls. Use bass traps selectively in corners. More coverage improves clarity but avoid deadening the sound.Should I treat the walls, ceiling, door, or floor first?
Prioritize treating reflection points on walls and ceiling first. Seal gaps around the door with weatherstripping or blankets. Floor treatment helps with footfalls but isn’t as critical as wall reflections.Conclusion
Your closet can become a surprisingly effective studio — if you treat it like a small acoustic space, not just a storage closet. Prioritize moving your gear away first, then focus on ventilation and strategic treatment to tame both noise and reflections.
Imagine a quiet, professional-sounding space with your gear tucked away. That’s the power of proper placement and treatment. Your best recordings and streams are just a few smart choices away.