Cooking
Bloody Mary Shrimp Cocktail
Perfectly blending cocktail and appetizer, Bloody Mary Shrimp Cocktail tantalizes taste buds with its zesty kick. But what secret ingredient makes it irresistible?
Bloody Mary Shrimp Cocktail is a tasty twist on two classic favorites. It combines juicy shrimp with the zesty flavors of a Bloody Mary drink. You'll love how it blends the tang of tomato, the kick of vodka, and the spice of hot sauce with tender seafood. This appetizer gained popularity in the 1960s and has been a party favorite ever since. It's easy to make and looks impressive in a chilled glass. You can adjust the spice level to suit your taste and even make a non-alcoholic version. Get ready to impress your guests with this unique and flavorful dish. There's more to discover about this delightful fusion!
Key Takeaways
- Combines traditional shrimp cocktail with Bloody Mary cocktail flavors for a unique appetizer.
- Features a zesty tomato-based sauce with vodka, Worcestershire sauce, and spices.
- Served in chilled cocktail glasses with shrimp arranged around the rim for an elegant presentation.
- Can be prepared in advance, making it ideal for parties and social gatherings.
- Customizable recipe allows for adjustments in spice levels and additional garnishes to suit preferences.
History
Throughout the history of cocktail culture, the Bloody Mary Shrimp Cocktail has emerged as a delightful fusion of two classic appetizers. You might be familiar with the traditional shrimp cocktail, which has been a party favorite since the early 1900s. It's typically served chilled with a tangy cocktail sauce.
The Bloody Mary, on the other hand, is a popular brunch cocktail that dates back to the 1920s. The genius idea to combine these two beloved classics came about in the 1960s when creative hosts were looking for new ways to spice up their appetizers. They realized that the flavors of a Bloody Mary – tomato juice, vodka, and various spices – could make an excellent accompaniment to chilled shrimp.
This innovative combination quickly caught on, becoming a hit at cocktail parties and social gatherings. Over the years, you've probably seen various iterations of this dish. Some recipes call for marinating the shrimp in Bloody Mary mix, while others use it as a dipping sauce.
Regardless of the method, this fusion has stood the test of time, remaining a popular choice for hosts and partygoers alike.
Recipe
This classic Bloody Mary Shrimp Cocktail combines the zesty flavors of a Bloody Mary cocktail with succulent shrimp, creating a perfect appetizer for any occasion. The tangy tomato-based sauce is infused with vodka, Worcestershire sauce, and a blend of spices, providing a delightful kick to complement the tender shrimp.
Served chilled in elegant cocktail glasses, this dish not only tastes fantastic but also makes for an impressive presentation. The shrimp can be cooked ahead of time and marinated in the sauce, allowing the flavors to meld together for an even more delicious result. This recipe is easily customizable, so feel free to adjust the spice level or add extra garnishes to suit your taste preferences.
- 1 pound large shrimp, peeled and deveined
- 1 cup tomato juice
- 1/4 cup vodka
- 2 tablespoons lemon juice
- 1 tablespoon Worcestershire sauce
- 1 tablespoon prepared horseradish
- 1/2 teaspoon hot sauce (such as Tabasco)
- 1/4 teaspoon celery salt
- 1/4 teaspoon black pepper
- Ice cubes
- Celery sticks and lemon wedges for garnish
Begin by cooking the shrimp in a pot of boiling salted water for 2-3 minutes until they turn pink and curl slightly. Immediately transfer them to an ice bath to stop the cooking process.
In a separate bowl, whisk together the tomato juice, vodka, lemon juice, Worcestershire sauce, horseradish, hot sauce, celery salt, and black pepper. Add the cooled shrimp to the sauce and refrigerate for at least 30 minutes to allow the flavors to meld.
To serve, divide the shrimp and sauce among chilled cocktail glasses, garnish with celery sticks and lemon wedges, and enjoy.
For best results, use fresh, high-quality shrimp and adjust the seasoning to your liking. You can make the sauce a day in advance to intensify the flavors.
If you prefer a non-alcoholic version, simply omit the vodka or replace it with additional tomato juice. For a spicier kick, increase the amount of hot sauce or add a pinch of cayenne pepper.
Remember to chill the cocktail glasses before serving to keep the dish refreshingly cold.
Cooking Steps
You're about to embark on a culinary adventure with this Bloody Mary Shrimp Cocktail!
First, you'll prepare the zesty cocktail sauce and cook the shrimp to perfection.
Then, you'll assemble the dish, garnish it with crisp celery spears, and serve it in chilled glasses for a refreshing presentation.
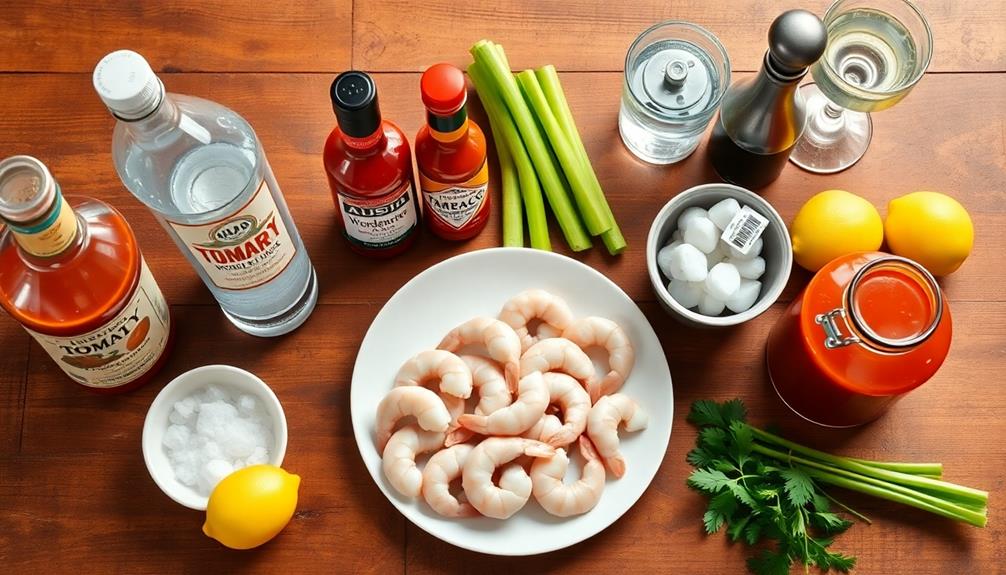
Step 1. Prepare Cocktail Sauce Ingredients
Ready to kick your shrimp cocktail up a notch? Let's gather the ingredients for your Bloody Mary-inspired cocktail sauce. You'll need ketchup, prepared horseradish, Worcestershire sauce, hot sauce (like Tabasco), fresh lemon juice, and vodka. Don't forget celery salt and freshly ground black pepper for that classic Bloody Mary flavor.
For the best results, use high-quality ingredients. Choose a premium ketchup as your base, and look for fresh horseradish root if you can find it. If not, jarred prepared horseradish works well too.
When it comes to hot sauce, feel free to experiment with different varieties to suit your taste buds. The vodka adds a subtle kick, but you can omit it if you prefer.
Measure out your ingredients before you start mixing. This will make the process smoother and ensure you don't accidentally add too much of any one component.
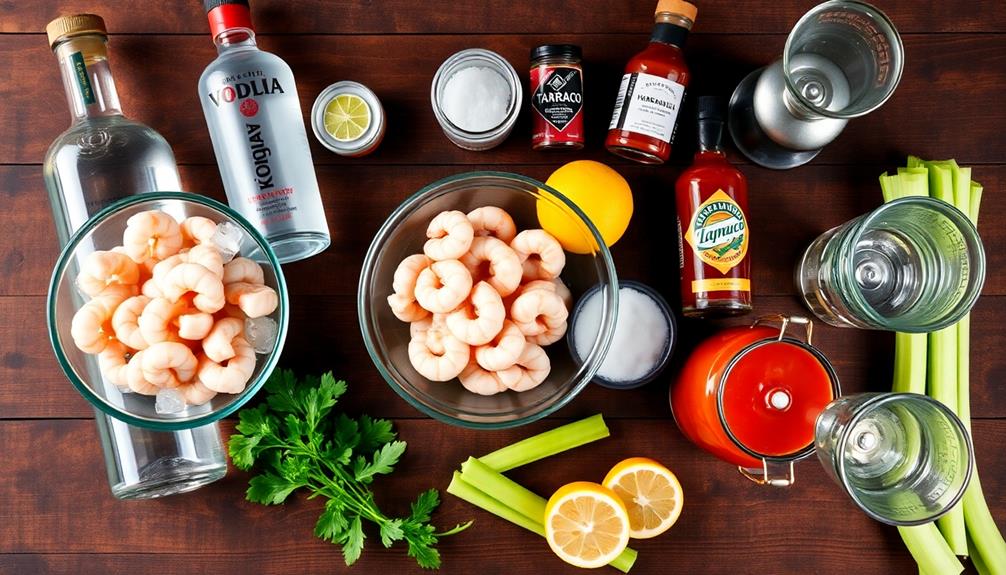
Step 2. Cook and Chill Shrimp
With the cocktail sauce ingredients prepped, it's time to focus on the star of the show – the shrimp.
You'll want to start with fresh, raw shrimp that's been deveined and peeled, leaving the tails on for easy handling. Fill a large pot with water and add a generous pinch of salt. Bring the water to a rolling boil over high heat. While you're waiting, prepare a large bowl of ice water.
Once the water's boiling, carefully add your shrimp to the pot. They'll cook quickly, so keep a close eye on them. After about 2-3 minutes, or when they've turned pink and curled into a C-shape, they're done.
Using a slotted spoon, transfer the cooked shrimp immediately to the ice water. This "shock" stops the cooking process and keeps your shrimp tender.
Let the shrimp chill in the ice bath for about 5 minutes. Then, drain them well and pat dry with paper towels.
Arrange the cooled shrimp on a plate lined with fresh paper towels and refrigerate until you're ready to serve. This chilling time allows the flavors to develop and ensures your shrimp are perfectly cold for your Bloody Mary Shrimp Cocktail.
Step 3. Assemble Shrimp and Sauce
Assembling your Bloody Mary Shrimp Cocktail is a breeze once you've prepared the sauce and chilled the shrimp.
Start by selecting attractive glasses or small bowls for serving. Spoon a generous amount of the zesty Bloody Mary sauce into each container, filling them about halfway.
Next, arrange the chilled shrimp around the rim of each glass, hooking them securely. You'll want to use about 4-5 large shrimp per serving, depending on the size of your glasses.
Make sure the tails are hanging over the edge for a visually appealing presentation.
For an extra touch, garnish your cocktails with a wedge of lemon or lime on the rim. You can also add a celery stick, which guests can use to stir their sauce and adds a nice crunch.
If you're feeling adventurous, try adding a small skewer of olives or a slice of crispy bacon for added flavor and flair.
Step 4. Garnish With Celery Spears
To elevate your Bloody Mary Shrimp Cocktail, garnish each serving with a crisp celery spear. This classic addition not only adds a fresh crunch but also complements the flavors of your dish perfectly.
Start by selecting firm, bright green celery stalks from your refrigerator. Wash them thoroughly under cool running water to remove any dirt or debris.
Next, trim off the leafy tops and the tough bottom ends of the celery stalks. Cut the stalks into spears about 6 inches long, making sure they're slightly taller than your serving glasses. If you'd like, you can use a vegetable peeler to remove some of the stringy fibers from the outer edges of the celery, which will make it easier to eat.
Once your celery spears are ready, simply place one in each glass alongside the shrimp and sauce. For an extra touch, you can lightly salt the celery or even spread a thin layer of cream cheese on it.
This garnish isn't just for show – it's a tasty, crunchy addition that your guests can use to scoop up extra sauce. Enjoy!
Step 5. Serve in Chilled Glasses
Chilled glasses are essential for serving your Bloody Mary Shrimp Cocktail. To get them ready, place your chosen glasses in the freezer for about 15-20 minutes before you're ready to serve.
If you're short on time, you can fill the glasses with ice and cold water for a few minutes instead. This quick chill will help keep your cocktail cold and refreshing.
When you're ready to serve, take the glasses out of the freezer or dump out the ice water. Carefully pour your prepared Bloody Mary mixture into each glass, leaving some room at the top for the shrimp and garnishes.
If you've made the mixture in advance, give it a quick stir before pouring to make sure all the flavors are well combined.
Now it's time to add your cooked and chilled shrimp to the glasses. You can hang them on the rim or place them directly in the drink.
Don't forget to add your celery spears and any other garnishes you've prepared. The contrast between the cold glass and the flavorful cocktail will make your Bloody Mary Shrimp Cocktail even more enjoyable!
Final Thoughts
This cocktail's unique twist on a classic appetizer is sure to impress your guests.
You've now learned how to create a delicious Bloody Mary Shrimp Cocktail that combines the zesty flavors of a Bloody Mary with succulent shrimp. Remember, the key to success lies in balancing the flavors and presentation.
Don't be afraid to experiment with different garnishes or spice levels to suit your taste. You can even make a non-alcoholic version by omitting the vodka for a family-friendly option.
If you're planning a party, consider preparing the sauce and cooking the shrimp in advance to save time.
As you serve this appetizer, you'll notice how the chilled glasses enhance the overall experience.
The contrast between the cool cocktail and the warm, spicy flavors creates a delightful sensation for your taste buds.
It's a great conversation starter and a fun way to kick off any gathering.
Frequently Asked Questions
Can I Make This Cocktail Non-Alcoholic?
You can definitely make a non-alcoholic version! Try using tomato juice as the base, and add spices like Worcestershire sauce, hot sauce, and lemon juice. You'll get the same tangy, savory flavor without the alcohol.
How Long Can I Store Leftover Bloody Mary Shrimp Cocktail?
You shouldn't store leftover shrimp cocktail for long. It's best to consume it within 1-2 days when refrigerated. Make sure you keep it in an airtight container and store it at or below 40°F (4°C) to maintain freshness.
What Are Some Good Side Dishes to Serve With This?
You'll want to serve light, refreshing sides that complement the dish. Try crisp salads, crusty bread, or grilled vegetables. For a fancier spread, include crostini, cheese platters, or bruschetta. Don't forget lemon wedges for squeezing!
Is It Safe to Eat Raw Shrimp in This Cocktail?
You shouldn't eat raw shrimp in a cocktail. It's not safe and can cause foodborne illness. Always cook shrimp thoroughly before consuming. If you're making a shrimp cocktail, use pre-cooked or properly cooked shrimp for safety.
Can I Use Frozen Shrimp Instead of Fresh?
Yes, you can use frozen shrimp instead of fresh. They're often pre-cooked and ready to thaw, making them convenient and safe. Just make sure you defrost them properly in the refrigerator before using them in your recipe.
Cooking
Haunted Haystack Cookies
Delightfully spooky and deliciously crunchy, these Haunted Haystack Cookies will have your guests begging for the recipe – and you’ll find it right here.
Haunted Haystack Cookies are a spooktacular Halloween treat that'll fill your home with delightful aromas. These crunchy cookies blend shredded coconut and crispy chow mein noodles for a unique, subtly sweet taste. Originating in 19th century New England, they've evolved over decades to capture the essence of autumn. You'll love the crisp exterior and soft, chewy center – perfect for entertaining guests at your Halloween festivities. With easy-to-follow instructions and creative variations, you can make these festive cookies that are sure to become a new family tradition. If you're craving more Halloween baking inspiration, just keep reading!
Key Takeaways
- Haunted Haystack Cookies are a traditional Halloween treat featuring a combination of shredded coconut and crispy chow mein noodles for a unique texture.
- The cookies have a crisp exterior and a soft, chewy center, appealing to a wide range of taste preferences.
- The recipe includes essential ingredients like butter, brown sugar, egg, and vanilla, along with flour, baking soda, and salt for structure.
- Baking tips include preheating the oven, chilling the dough, and avoiding overmixing to maintain the cookies' shape and texture.
- Haunted Haystack Cookies can be served at Halloween parties, given to trick-or-treaters, and customized with various candy toppings or drizzled chocolate for added flavor and presentation.
History
The origin of Haunted Haystack Cookies can be traced back to the late 19th century, when resourceful New England bakers sought to incorporate the abundant autumn harvest into their seasonal confections.
As the crisp fall air arrived, these innovative cooks turned to the readily available corn, nuts, and dried fruits to create a delightful treat resembling a whimsical haystack. The result was a delightfully crunchy and subtly sweet cookie that captured the essence of the harvest season.
Over the decades, the Haunted Haystack Cookie evolved, with bakers experimenting with different ingredient combinations and decorative techniques.
Some added a touch of spice, while others nestled hidden surprises within the cookie's golden depths.
Today, these beloved confections remain a beloved autumn tradition, filling homes with the comforting aromas of fall and invoking nostalgia for simpler times.
Whether enjoyed as a cozy afternoon snack or a festive dessert, the Haunted Haystack Cookie continues to delight and inspire bakers of all ages.
Recipe
Haunted Haystack Cookies are a spooky and delightful treat perfect for Halloween festivities. These cookies are made to resemble a haunted haystack, with a crisp exterior and a soft, chewy center. The addition of chocolate chips and shredded coconut creates a delightfully haunting yet delicious combination.
Preparing these cookies is a fun activity the whole family can enjoy. The process is simple, and the end result is a batch of cookies that are sure to impress your guests and satisfy your sweet tooth.
Ingredients:
- 1 cup unsalted butter, softened
- 1 cup brown sugar
- 1 egg
- 1 teaspoon vanilla extract
- 1 1/2 cups all-purpose flour
- 1 teaspoon baking soda
- 1/2 teaspoon salt
- 1 cup semisweet chocolate chips
- 1 cup shredded coconut
Directions:
Preheat your oven to 375°F (190°C). In a large mixing bowl, cream together the softened butter and brown sugar until light and fluffy. Beat in the egg and vanilla extract until well combined.
In a separate bowl, whisk together the all-purpose flour, baking soda, and salt. Gradually add the dry ingredients to the wet ingredients, mixing until just combined. Fold in the chocolate chips and shredded coconut.
Scoop heaping tablespoons of the dough onto a parchment-lined baking sheet, spacing them about 2 inches apart. Bake for 10-12 minutes, or until the edges are golden brown and the centers are still slightly soft. Allow the cookies to cool on the baking sheet for 5 minutes before transferring them to a wire rack to cool completely.
For an extra haunting touch, you can sprinkle a pinch of black food coloring or cocoa powder onto the cookies before baking to create a spookier appearance. Enjoy your Haunted Haystack Cookies with a glass of milk or a hot cup of coffee for a truly delightful Halloween treat.
Cooking Steps
First, you'll need to preheat your oven to 350°F.
Next, mix the dry ingredients together, then stir in the chocolate chips.
Step 1. Preheat Oven to 350°F
Preheat your oven to 350°F, the perfect temperature for baking these delightful Haunted Haystack Cookies. This essential first step ensures your oven is nice and toasty, ready to transform the simple ingredients into a spooky Halloween treat.
Proper preheating is key – you'll want to give your oven plenty of time to reach the ideal baking temperature. Set a timer for at least 15 minutes to allow the oven to fully heat up. This will help your cookies bake evenly, with a crisp exterior and a soft, chewy interior.
Don't be tempted to skip this preparatory stage – rushing the preheat can lead to uneven baking or even a total cookie catastrophe! Take the extra few minutes to get your oven up to temperature, and you'll be rewarded with freshly baked haunted haystacks that are sure to delight.
Once your oven is ready, you can move on to mixing up the dough and shaping those spooky cookies.
Step 2. Mix Dry Ingredients
In a medium-sized bowl, whisk together the all-purpose flour, baking soda, and a pinch of salt. This dry mixture forms the base of your ghostly haystack cookies. Make sure to stir them well, so the ingredients are evenly distributed.
Did you know that adding a bit of essential oils for flavor can elevate your baking experience?
Next, grab some brown sugar and granulated sugar, then add them to the bowl. Whisk everything together until the sugars are fully incorporated. The combination of brown and white sugar will give your cookies a delightful chewiness and crisp edges.
Don't forget to add a dash of ground cinnamon for a warm, haunting flavor. Blend it all together until the dry ingredients are thoroughly mixed.
With the foundations set, you're one step closer to baking up a batch of spooky, yet delicious haystack cookies. Just wait until you see how these simple dry ingredients transform into a hauntingly good treat.
Step 3. Add Chocolate Chips
After whisking the dry ingredients, it's time to fold in the chocolate chips. Adding chocolate chips to your cookies can elevate your dessert, similar to how Crab Cakes are served with sauces to enhance their flavors.
Using a large spoon or spatula, gently incorporate the chocolate chips into the cookie dough. Avoid overmixing, as this can cause the chips to melt and create an uneven distribution.
Take your time and make sure the chips are evenly dispersed throughout the dough. The chocolate chips will add pockets of rich, melty goodness to your Haunted Haystack Cookies. Be careful not to break the chips as you mix them in.
Gentle, folding motions work best to maintain the integrity of the chocolate. Once the chips are incorporated, your cookie dough is ready for the next step.
The combination of the buttery, crunchy haystack base and the gooey chocolate chips will create a truly delightful treat. Get ready to enjoy the haunting deliciousness of these spooky cookies!
Step 4. Roll Dough Into Balls
With the chocolate chips now folded into the dough, it's time to start shaping your Haunted Haystack Cookies. Scoop out a heaping tablespoon of the dough and roll it between your palms to create a smooth, round ball.
Be gentle, as you don't want to overwork the dough and make the cookies tough. Place each ball onto the prepared baking sheets, spacing them about 2 inches apart. This'll give the cookies room to spread as they bake.
Once you've rolled all the dough into balls, it's a good idea to give them a quick chill in the fridge for 30 minutes. This firms up the dough, which helps the cookies hold their shape better during baking.
When you're ready, preheat your oven and pop those trays right in. In no time, you'll have a batch of delightfully haunted-looking cookies, ready to be devoured.
Step 5. Bake for 8-10 Minutes
Preheat your oven to 375°F (190°C).
Once your dough is rolled into delightful little balls, it's time to bake them to perfection. Gently place the dough balls on a parchment-lined baking sheet, spacing them about 2 inches apart. This allows the cookies to spread and develop their signature haystack shape without crowding each other.
Now, pop the baking sheet into the preheated oven and set a timer for 8-10 minutes. Keep a close eye on them, as these cookies can go from perfectly golden to overly crisp in a matter of moments. The cookies are ready when the edges have turned a lovely light brown and the centers are still slightly soft.
Once the timer goes off, carefully remove the baking sheet from the oven. Allow the cookies to cool on the sheet for a few minutes before transferring them to a wire rack.
This cooling period helps solidify the haystacks' whimsical shape. With a little patience, your haunted haystack cookies are now ready to delight and spook your friends and family!
Final Thoughts
Haunted Haystack Cookies are a delightful Halloween treat that'll have your guests clamoring for more. These spooky, crunchy cookies are sure to delight and impress, making them the perfect addition to your holiday festivities.
The unique combination of shredded coconut and crispy chow mein noodles creates a texture that's both satisfying and fun.
Once you've baked and assembled these haunted haystacks, don't forget to let your creativity shine. Experiment with different candy toppings or add a drizzle of melted chocolate for an extra touch of decadence. The possibilities are endless when it comes to customizing these festive cookies.
Ultimately, Haunted Haystack Cookies are a delightful way to celebrate the spooky season. They're easy to make, visually stunning, and sure to be a hit with all your trick-or-treaters.
Frequently Asked Questions
Are the Cookies Actually Haunted?
No, the cookies aren't actually haunted. That's just a fun name to get you excited about baking them!
While the cookies may look a bit spooky, they're completely normal and safe to eat. The "haunted" part is just part of the festive theme, meant to make baking them more fun and engaging.
How Long Do the Cookies Last?
The shelf life of your homemade cookies can vary, but they'll usually last 3-5 days when stored properly.
Keep them in an airtight container at room temperature, and they'll stay fresh and delicious.
If you notice any changes in texture, smell, or appearance, it's best to toss them out.
With a little care, you can enjoy your cookies for several days after baking.
Just be sure to savor them before they disappear!
Can the Recipe Be Made Vegan?
You can absolutely make the Haunted Haystack Cookies recipe vegan!
Just substitute the butter for a plant-based alternative like coconut oil or vegan margarine. Instead of eggs, you can use a flax or chia seed "egg" (1 tablespoon ground flax or chia mixed with 3 tablespoons water).
With a few simple swaps, you can enjoy these festive treats without any animal products.
Have fun experimenting and let your creativity shine!
Why Are They Called "Haunted Haystack Cookies"?
Haunted haystack cookies get their spooky name from their resemblance to little ghostly haystacks. The crunchy, peak-y cookies are meant to look like piles of hay, giving them a rustic, haunted vibe that's perfect for Halloween.
As you bake them, the cookies puff up into tall, ghostly shapes that'll send a shiver down your spine – in the best way possible! The haunting look is all part of the fun.
Do the Cookies Contain Any Supernatural Ingredients?
No, these cookies don't contain any supernatural ingredients.
The name "haunted haystack cookies" simply refers to their appearance – they're meant to look like spooky piles of hay, perfect for Halloween parties or fall celebrations.
While they may look a bit spooky, they're made with regular baking essentials like flour, butter, and sugar.
Cooking
Midnight Black Bean Dip
Dive into the depths of a rich, Latin-inspired midnight black bean dip that offers a tantalizing fusion of flavors and textures. Explore the possibilities.
Originating from Latin American culinary traditions, the rich and flavorful midnight black bean dip showcases the versatility of this humble legume with its deeply pigmented hue and robust, earthy taste. You'll love how the slow-simmered black beans combine with zesty spices and creamy avocado for a mouthwatering snack or appetizer. Prepare it in a snap with minimal effort, then serve with tortilla chips or fresh veggies. The midnight black bean dip's symbolic unity and global popularity hint at the cultural significance and endless creative possibilities waiting to be explored.
Key Takeaways
- Midnight Black Bean Dip is a Latin American-inspired recipe featuring a rich, flavorful blend of black beans, avocado, and aromatic spices.
- The dip's distinctive midnight hue and robust taste stem from the use of nutrient-dense black beans, a staple ingredient in Latin American cuisine.
- This versatile appetizer can be served warm or at room temperature, with lime wedges for added zest, and pairs well with tortilla chips, pita, or fresh vegetables.
- Preparation is quick and straightforward, making it an ideal option for entertaining or as a simple, healthy snack.
- The combination of fiber-rich black beans, creamy avocado, and zesty seasonings offers a satisfying flavor profile with potential health benefits.
History
The origins of midnight black bean dip can be traced back to the vibrant culinary traditions of Latin America. For centuries, the humble black bean has been a staple ingredient in the region's diverse and flavorful dishes.
As people from different cultures and backgrounds mingled, they began sharing their cherished recipes, leading to the development of this beloved dip.
Over time, the recipe evolved, with each community adding their own unique twist. The midnight hue of the dip comes from the richly pigmented black beans, which lend a striking visual appeal and a robust, earthy flavor.
This dip has become a symbol of the unity and creativity that have long defined Latin American cuisine.
Today, midnight black bean dip is a beloved snack and appetizer, enjoyed around the world. Its versatility allows it to be paired with an array of accompaniments, from crisp tortilla chips to fresh vegetables.
Whether served at lively gatherings or savored in quiet moments, this dip continues to bring people together through the power of shared culinary traditions.
Recipe
Midnight Black Bean Dip is a rich and flavorful appetizer that's perfect for any occasion. The combination of black beans, spices, and creamy avocado creates a dip that's both indulgent and healthy. This recipe is easy to prepare and can be made ahead of time, making it a great option for entertaining or a quick snack. Butter, particularly when used in compound forms, can enhance the richness of dips and spreads, adding an extra layer of flavor butter enhances flavor.
The key to this dip is the slow-simmered black beans, which develop a deep, earthy flavor. The addition of cumin, chili powder, and garlic powder enhances the natural sweetness of the beans, while the creamy avocado adds a luxurious texture.
Ingredients:
- 2 cans (15 oz each) black beans, rinsed and drained
- 1 ripe avocado, pitted and mashed
- 2 cloves garlic, minced
- 1 teaspoon cumin
- 1 teaspoon chili powder
- 1/2 teaspoon salt
- 1/4 cup chopped cilantro (optional)
- Lime wedges for serving
Cooking Instructions:
In a medium saucepan, combine the black beans, avocado, garlic, cumin, chili powder, and salt. Cook over medium heat, stirring occasionally, until the flavors are well-combined and the dip is heated through, about 10 minutes.
Remove from heat and stir in the chopped cilantro, if using.
Serve the Midnight Black Bean Dip warm or at room temperature, with lime wedges on the side. This dip can be made a day in advance and refrigerated until ready to serve. When ready to serve, simply reheat gently on the stove or in the microwave. Enjoy!
Cooking Steps
First, drain and rinse the black beans to remove any excess liquid.
Next, sauté the aromatics like onions and garlic until they're fragrant and tender.
Then, blend the beans in a food processor or blender until they reach a smooth, creamy texture.
Step 1. Drain and Rinse Black Beans
Start by draining and rinsing the black beans. Place a colander in the sink and pour the canned black beans into it. Give the beans a good rinse under cool running water.
This step helps remove any excess salt or impurities from the canning process. Once the beans are fully rinsed, give the colander a gentle shake to remove any excess water. You don't want too much liquid in your dip, so be sure to drain the beans thoroughly.
With the beans now clean and ready to use, you can move on to the next step in creating your delicious Midnight Black Bean Dip. This simple preparation ensures your dip will have the best possible flavor and consistency.
Take your time with this step, as properly draining and rinsing the beans sets the foundation for the rest of the recipe.
Step 2. Sauté Aromatics Until Fragrant
Next, sauté the aromatics until fragrant. In a large skillet or saucepan, heat a tablespoon of olive oil over medium heat.
Once the oil is shimmering, add the diced onion, minced garlic, and a pinch of salt. Stir the mixture frequently, allowing the flavors to meld and the vegetables to soften, about 5 minutes.
You'll know the aromatics are ready when they release their aroma and turn slightly translucent. Be careful not to let the garlic burn, as that can create a bitter taste. Adjust the heat as needed to prevent scorching.
Once the onions and garlic are fragrant and tender, you're ready to move on to the next step. This sautéing process lays the foundation for the delicious black bean dip, so take your time and enjoy the enticing scents wafting through your kitchen.
Step 3. Blend Beans Until Smooth Texture
With the aromatic base ready, you can now blend the beans until they reach a smooth, creamy texture.
Transfer the sautéed onions, garlic, and spices to a food processor along with the drained and rinsed black beans. Pulse the mixture a few times to break down the solids, then let the machine run continuously for 1-2 minutes, scraping down the sides as needed.
Blend until the dip reaches a silky, uniform consistency, with no visible whole beans remaining.
Taste the dip and adjust the seasoning as necessary, adding more salt, cumin, or chili powder to suit your preferences. The goal is a well-balanced flavor that highlights the earthy black beans.
For an even creamier texture, you can drizzle in a bit of olive oil while the processor is running.
Once you've achieved the desired consistency, transfer the dip to a serving bowl and prepare to enjoy your homemade Midnight Black Bean Dip.
Step 4. Stir in Seasonings and Spices
With the beans now blended to a smooth, creamy texture, you'll want to stir in a few key seasonings and spices to round out the flavor profile.
Start by adding a teaspoon of ground cumin, which will lend an earthy, aromatic note. Turmeric, known for its potent relief for osteoarthritis pain, can also add a vibrant color and health benefits to your dip.
Next, sprinkle in a half-teaspoon of chili powder for a subtle kick of heat. Don't forget to include a quarter-teaspoon of garlic powder, as it'll provide a savory, umami-rich background.
For a touch of acidity and brightness, stir in a tablespoon of freshly squeezed lime juice. Finally, season the dip with a pinch of salt and black pepper to taste, balancing the flavors and bringing everything together.
Give the mixture a good stir until all the seasonings are evenly incorporated. Now your midnight black bean dip is ready to be served with your favorite tortilla chips, crackers, or fresh vegetables.
Get ready for taste buds to be delighted!
Step 5. Transfer to Serving Bowl
Once the seasonings have been thoroughly incorporated, go ahead and transfer the midnight black bean dip into a serving bowl. This is the final step before it's time to dig in!
Gently scoop the rich, creamy dip from the saucepan and place it in your desired serving dish. You'll want something with a bit of depth to hold all that delicious bean goodness.
Arrange the dip in the bowl, smoothing the top with the back of a spoon. If you're feeling fancy, you can even create a little well in the center to hold any extra toppings you'd like to add, like diced tomatoes, chopped cilantro, or a drizzle of tangy lime crema.
Once plated, your midnight black bean dip is ready to serve. Surround the bowl with an assortment of crisp tortilla chips, pita wedges, or veggie sticks, and let your guests scoop and dip to their heart's content.
This dip is sure to disappear fast, so you might want to make a double batch!
Final Thoughts
The Midnight Black Bean Dip's final thoughts are simple – this recipe offers a delightfully rich and savory dip that's sure to impress your guests. The deep, earthy flavors of the black beans perfectly complement the zesty seasonings, creating a mouthwatering treat that's both satisfying and unique.
For those looking to enhance their culinary experience, consider pairing this dip with a fermented vegetable plate for added flavor and health benefits. Whether you're hosting a party or simply looking for a tasty snack, this dip is sure to be a hit.
Don't be afraid to get creative with your serving suggestions, too – the possibilities are endless! Pair it with crispy tortilla chips, fresh veggies, or even spread it on toast for a heartier meal.
And the best part? This recipe is incredibly easy to whip up, so you can enjoy the delicious results without spending hours in the kitchen.
Frequently Asked Questions
Can I Substitute Different Types of Beans?
Absolutely! You can substitute different types of beans in this recipe. Pinto, kidney, or even garbanzo beans would work well.
Just keep in mind that the flavor and texture may vary slightly. The key is to choose beans that you enjoy and that complement the other ingredients.
Don't be afraid to experiment – the great thing about dips is that they're highly customizable to your tastes. Have fun with it!
How Long Does the Dip Keep in the Fridge?
The dip will keep in the fridge for 3-5 days.
Just make sure to store it in an airtight container.
This way, the flavors will stay fresh and you can enjoy the dip throughout the week.
Be sure to give it a good stir before serving, as the ingredients may separate a bit over time.
With proper storage, you can savor every last bite of your homemade dip.
Can I Make This Dip Ahead of Time?
Yes, you can absolutely make this dip ahead of time!
In fact, it's a great recipe to prep in advance. The flavors will actually improve as the dip sits in the fridge, allowing the spices to meld together.
You can make it up to 3 days ahead and store it in an airtight container. This makes it a super convenient appetizer or snack to have on hand whenever you need it.
Just give it a good stir before serving for the best texture and taste.
Is This Dip Suitable for Vegetarian or Vegan Diets?
Absolutely, this dip is perfect for vegetarian and vegan diets! Since it's made with plant-based ingredients like black beans, it's a delicious and satisfying option for folks avoiding meat and dairy.
The blend of spices and seasonings gives it plenty of flavor, and you can serve it with crunchy veggies or tortilla chips for a tasty, protein-packed snack or appetizer.
Go ahead and whip up a batch – your veggie-loving friends will thank you!
Can I Adjust the Spice Level to My Preference?
You can absolutely adjust the spice level of this dip to suit your personal taste!
Start with the recommended amounts of spices, then add more if you want a bolder flavor. Go slowly and taste as you go, so you don't accidentally make it too spicy.
That way, you can get the perfect balance of heat that you enjoy. Have fun experimenting and finding your perfect spice level!
Cooking
Cobweb Cotton Candy
Navigating the ethereal strands of cobweb cotton candy, a century-old confectionary delight that captivates with its unique visual appeal and customizable flavors.
Cobweb cotton candy's delicate, ethereal strands have captivated dessert lovers for over a century. Tracing its origins to innovative 19th-century confectioners, the iconic sugary treat was patented in 1897 and grew popular at carnivals and state fairs. To make it, you'll heat sugar, corn syrup, and water until it reaches 300°F, then spin the liquefied mixture into fine, feathery strands. Wrap these around decorations like sprinkles for the signature cobweb effect, and serve immediately to enjoy the cloud-like texture. With its unique visual appeal and customizable flavors, it's no wonder cobweb cotton candy continues to enchant both children and adults – and there's more to discover about this delightful confection.
Key Takeaways
- Cobweb cotton candy is a delicate, ethereal dessert with a visually striking, web-like appearance, distinguishing it from traditional cotton candy.
- The recipe involves heating sugar, corn syrup, and water to a precise temperature, then spinning the mixture into fine, intricate strands.
- Careful handling and timing are essential to maintain the fluffy texture and prevent the sugar from hardening, ensuring an optimal eating experience.
- Cobweb cotton candy can be customized with vibrant colors and unexpected flavors, appealing to both children and adults for various events.
- Mastering the techniques and exploring different variations of cotton candy, such as incorporating seasonal flavors or experimenting with shapes, can lead to unique and captivating creations.
History
The origins of cobweb cotton candy can be traced back to the late 19th century, when enterprising confectioners began experimenting with new and innovative ways to create delicate, airy treats.
This period marked a significant transformation in the culinary arts, as artisans sought to blend creativity with technical skill, reminiscent of the way modern artists emphasize the importance of imagination in creativity creative expression in art.
One such pioneering individual was William Morrison, an American candy maker who, in 1897, patented a machine that could spin sugar into fine, gossamer-like strands. This invention laid the groundwork for the delightful confection we now know as cobweb cotton candy.
Over the next few decades, the popularity of this fluffy sugar delight continued to grow, with carnival vendors and state fair concessionaires showcasing their creative spinning techniques.
The delicate, web-like appearance of the candy soon earned it the nickname "cobweb cotton candy," a moniker that has endured to this day.
As the 20th century progressed, the art of crafting cobweb cotton candy evolved, with improvements in machinery and techniques allowing for increasingly intricate and mesmerizing displays of spun sugar.
Recipe
Cotton candy is a delightful and airy confection that has been captivating the hearts and taste buds of people for generations.
This whimsical treat, often associated with carnivals and fairs, can now be enjoyed in the comfort of your own home with the enchanting Cobweb Cotton Candy recipe.
Capturing the essence of the classic cotton candy, this recipe adds a touch of elegance and sophistication with the incorporation of an intricate cobweb design. By carefully shaping the spun sugar, you can create a visually stunning dessert that's sure to impress your guests and delight your senses.
Ingredients:
- 1 cup granulated sugar
- 1/4 cup light corn syrup
- 1/4 cup water
- Food coloring (optional)
Cooking Instructions:
In a medium saucepan, combine the sugar, corn syrup, and water. Bring the mixture to a boil over medium-high heat, stirring constantly until the sugar has dissolved.
Continue cooking, without stirring, until the temperature reaches 300°F on a candy thermometer. Carefully pour the hot sugar mixture into the center of a cotton candy machine and turn it on.
Allow the sugar to spin, creating delicate strands of cotton candy. Using your fingers, gently shape the cotton candy into a cobweb design, creating intricate patterns and shapes.
Tips:
For best results, work quickly as the cotton candy will start to harden and become difficult to manipulate.
If you desire a specific color, add a few drops of food coloring to the sugar mixture before heating. Serve the Cobweb Cotton Candy immediately for maximum enjoyment and be prepared to be enchanted by the ethereal and whimsical presentation.
Cooking Steps
First, you'll need to heat the sugar until it's completely liquefied.
Once it's ready, you'll spin the sugar into fine, wispy strands.
Then, gather your desired edible decorations and wrap the spun sugar around them.
Serve your creation immediately for the best texture and flavor.
Step 1. Heat Sugar Until Liquefied
With your sugar ready, begin heating it in a heavy-bottomed saucepan over medium heat.
Keep a close eye on the sugar, stirring occasionally, as it will quickly liquefy and start to caramelize. You'll know it's ready when the sugar turns a light golden color and reaches 300-320°F on a candy thermometer.
Once the sugar is fully melted, remove the saucepan from the heat to prevent burning.
The molten sugar will be incredibly hot, so take care not to let it splash or drip on your skin.
Carefully pour the liquid sugar into the center of your cotton candy machine, allowing it to spin and transform into delicate, wispy strands.
Work quickly, as the sugar will harden and become difficult to work with as it cools.
With patience and practice, you'll soon be creating fluffy, ethereal cobweb cotton candy right in your own kitchen.
Step 2. Spin Sugar Into Fine Strands
Now that you have your molten sugar ready, it's time to transform it into the delicate, wispy strands of cotton candy. You'll need a special tool called a cotton candy maker. This device has a spinning head that heats the sugar and forces it through tiny holes, creating those delicate, hair-like fibers.
First, fill the center of the cotton candy maker with your liquefied sugar. Turn on the machine, and watch as the sugar is rapidly heated and spun. The centrifugal force pushes the sugar through the perforated walls, forming incredibly thin, airy strands.
Gently guide these strands with your hands, gathering them around a paper cone or paper floss stick. Be careful, as the sugar is still very hot! Continue spinning and collecting the cotton candy until you've reached your desired amount.
The key is to work quickly, as the sugar will harden and become difficult to spin if it cools too much. With a little practice, you'll be spinning up fluffy, cloud-like cotton candy in no time!
Step 3. Gather Desired Edible Decorations
To create the perfect cobweb cotton candy, you'll want to gather a few edible decorations. Look for delicate, wispy strands of sugar that will complement the fluffy, ethereal texture of your cotton candy.
Crunchy crystallized sugar pieces or delicate sprinkles in coordinating colors can add visual interest and a satisfying crunch.
Consider using edible glitter or lustre dust to give your cotton candy a magical, shimmering effect. These decorative elements can be scattered over the top of your creation or carefully placed to form intricate patterns.
You might also try incorporating small, edible flowers or fresh herbs for a touch of natural beauty.
Be mindful of the flavors and textures you choose, as they should enhance the sweetness and airy quality of the cotton candy.
With a little creativity and attention to detail, you can transform your cobweb cotton candy into a true work of art, delighting both the eyes and the palate.
Step 4. Wrap Spun Sugar Around Decorations
Once you've gathered your desired edible decorations, it's time to start spinning the cotton candy.
You'll want to work quickly, as the spun sugar cools rapidly. Dip your fingertips into the hot, liquefied sugar, then gently pull the strands upward and outward, allowing them to fall and twist around your decorations.
Be careful – the sugar is extremely hot, so work cautiously. As the strands cool, they'll become delicate and airy, forming a delicate "cobweb" effect around your chosen items.
Experiment with different techniques, like swirling the sugar or making quick, darting motions, to create unique patterns.
Don't be afraid to layer the cotton candy, wrapping it around the decorations multiple times for a fuller, fluffier look.
With a bit of practice, you'll be spinning professional-looking cotton candy creations in no time.
Just remember to work quickly and safely to achieve the best results.
Step 5. Serve Immediately for Best Texture
With the cotton candy created, it's crucial to serve it immediately for the best possible texture. Cotton candy is delicate and prone to absorbing moisture, so you'll want to enjoy it right away for that perfect fluffy, melt-in-your-mouth consistency.
Don't wait – the sugar strands will start to stiffen and lose their airy appeal the longer they sit.
When you're ready, carefully lift the spun sugar from the decorations and transfer it to a serving plate or bowl. Handle it gently, as the threads can easily break apart.
If you've wrapped it around anything, simply peel it off the decoration, trying to maintain the cobweb-like shape as much as possible.
Serve the cotton candy immediately, encouraging your guests to dig in and savor the delicate, cloud-like texture. The longer it sits, the more the sugar will begin to harden, so make sure everyone gets a chance to enjoy it at its prime.
With a little speed and care, you can ensure your homemade cotton candy is as light and delightful as possible.
Final Thoughts
As you've discovered the captivating world of cobweb cotton candy, you can't help but feel a sense of wonder and excitement. This delicate, ethereal treat has captured the hearts and imaginations of dessert enthusiasts everywhere.
While the process may seem daunting at first, the end result is truly worth the effort. With a little practice, you'll be whipping up these airy, delicate confections like a pro, impressing friends and family with your culinary skills.
As you continue to explore the world of cotton candy, don't be afraid to experiment and put your own unique spin on this classic delight. Whether you choose to incorporate vibrant food colorings or unexpected flavors, the possibilities are truly endless.
Frequently Asked Questions
Is Cobweb Cotton Candy Safe to Eat?
You might be wondering if cobweb cotton candy is safe to eat.
Well, the good news is that regular cotton candy is generally considered safe, as long as it's stored properly and consumed in moderation.
However, the "cobweb" version may have additional ingredients or preparation methods that could make it risky.
It's best to check with the vendor or manufacturer to ensure it meets food safety standards before indulging.
When in doubt, it's always better to err on the side of caution.
Can I Make Cobweb Cotton Candy at Home?
Yes, you can make cobweb cotton candy at home! It's a fun and creative way to dress up your classic cotton candy.
All you need is a cotton candy machine, some food coloring or flavoring, and a little bit of patience.
Start by making your regular cotton candy, then use a fork or skewers to carefully stretch and shape it into delicate, weblike strands.
With a bit of practice, you can create an impressive edible cobweb right in your own kitchen.
How Long Does Cobweb Cotton Candy Last?
Homemade cotton candy typically lasts 1-2 days when stored properly.
To maximize its freshness, keep it in an airtight container at room temperature. Avoid refrigerating, as this can cause the delicate spun sugar to absorb moisture and become sticky.
With a little care, you can enjoy your fluffy, handcrafted cotton candy for a couple of days before it starts to lose its light, airy texture.
Just be sure to savor it while it's at its best!
Where Can I Buy Cobweb Cotton Candy?
Finding cobweb cotton candy can be tricky, but there are a few options to consider.
Many local fairs, festivals, and carnivals may offer this unique treat. You can also check with specialty candy shops or online retailers that specialize in hard-to-find confections.
While not as widely available as regular cotton candy, cobweb cotton candy is out there if you're willing to do a bit of searching.
With a little persistence, you're sure to track down this delightful fluffy delight.
What Are the Potential Health Benefits of Cobweb Cotton Candy?
While cobweb cotton candy may seem like an indulgent treat, it actually offers some potential health benefits!
The airy, wispy texture of this candy can help satisfy your sweet tooth without overwhelming your system with heavy sugars.
Plus, the intricate webbing provides a fun, interactive experience that can engage your senses and make snacking more enjoyable.
-
Parenting Styles3 months ago
Worst Parenting Style: Impact on Child Development
-
Parenting Styles3 months ago
2023 Indiana Parenting Time Guidelines Update
-
Vetted3 months ago
15 Best Parenting Books of All Time Every Parent Should Read
-
Education3 months ago
Foster Parent Pay in the US: Unveil Earnings
-
Vetted3 months ago
15 Best Co-Parenting Books Every Parent Should Read for Successful Co-Parenting
-
Education3 months ago
Empowering Parents Through Digital Education Guide
-
Vetted3 months ago
15 Best Books on Step Parenting Every Blended Family Needs to Read
-
Parenting Styles3 months ago
Cultural Differences: American Parenting Vs Chinese Parenting