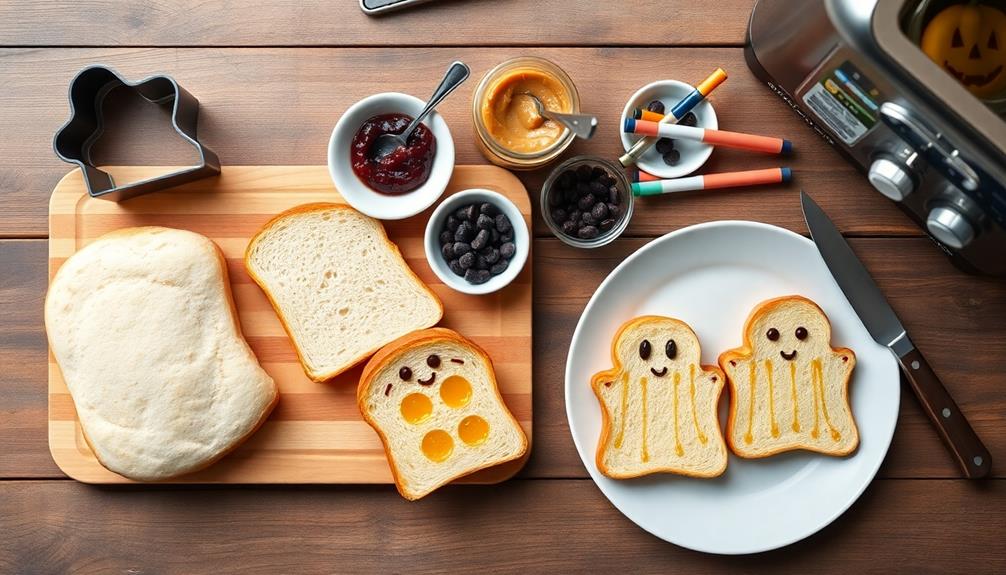
Ghost Toast is a spooky breakfast treat that'll haunt your taste buds with delight! You'll start by cutting white bread into ghost shapes, then toasting them until golden brown. Add raisin eyes and a mouth for a ghoulish grin. Serve with "Witch's Brew" syrup (regular syrup with food coloring) for extra Halloween flair. This fun meal originated in the early 2000s and has become a popular tradition for families. It's not just for October, though – you can adapt the shapes for other holidays too. With simple ingredients and a dash of creativity, you'll transform ordinary toast into a magical morning experience. There's more to uncover about this hauntingly good treat!
Key Takeaways
- Ghost Toast is a Halloween-themed breakfast treat made from white bread cut into ghost shapes and toasted.
- Key ingredients include white bread, butter, and decorative elements like raisins for eyes and spooky syrup.
- Preparation involves cutting bread into ghost shapes, toasting until golden, and adding facial features with edible decorations.
- Serving suggestions include warm presentation, creative toppings, and pairing with themed syrups for a festive Halloween breakfast.
- The treat allows for versatility in design, flavors, and can be adapted for various holidays beyond Halloween.

Halloween Cookie Cutters Set – 12 Pieces Stainless Steel Halloween Cookie Cutters Shape,Pumpkin, Ghost, Bat and Cat Cookie Cutter Shapes for Halloween Food Party Decorations
【12 PIECES HALLOWEEN COOKIE CUTTER SET】- The cookie cutter set is used for baking and decorating party supplies,…
As an affiliate, we earn on qualifying purchases.
As an affiliate, we earn on qualifying purchases.
History

Ghost Toast, a whimsical breakfast treat, popped up in the early 2000s as a fun way to celebrate Halloween. You might've first seen it on cooking shows or in parenting magazines, where it quickly caught on as an easy and creative breakfast idea. The concept was simple: use cookie cutters to make ghostly shapes in bread, then toast it to perfection.
As social media gained popularity, Ghost Toast's fame grew. Food bloggers and Pinterest enthusiasts shared their own spooky variations, adding colorful toppings or creating elaborate ghost scenes on plates. You could find Ghost Toast popping up in school cafeterias and at Halloween parties across the country.
Over time, Ghost Toast evolved beyond just a Halloween treat. You'll now see heart-shaped versions for Valentine's Day, bunny shapes for Easter, and even star-spangled toast for the Fourth of July.
The versatility of this simple idea has made it a year-round favorite for parents looking to add a touch of fun to their kids' breakfasts. Today, Ghost Toast remains a beloved breakfast tradition, reminding us that a little creativity can make any meal more enjoyable.

5 Pcs Simulation Artificial Bread Fake Bread Realistic Food Model for Kitchen Home Party Halloween Decoration (Toast)
Size:Length:Approx. 14cm/5.5Inch.Width: Approx.11.5cm/4.5Inch.Thickness: Approx.1.5cm/0.6Inch
As an affiliate, we earn on qualifying purchases.
As an affiliate, we earn on qualifying purchases.
Recipe

Ghost Toast is a whimsical and spooky breakfast treat that's perfect for Halloween mornings or any time you want to add a touch of playfulness to your meal. This simple yet creative dish transforms ordinary toast into adorable ghost shapes, complete with expressive faces that are sure to delight both children and adults alike.
The beauty of Ghost Toast lies in its versatility. You can customize the ghosts' expressions to suit your mood or the occasion, and experiment with different spreads and toppings to create unique flavor combinations. Whether you prefer a classic butter and jam combo or something more adventurous like avocado and cream cheese, these ghostly creations are bound to bring a smile to your face.
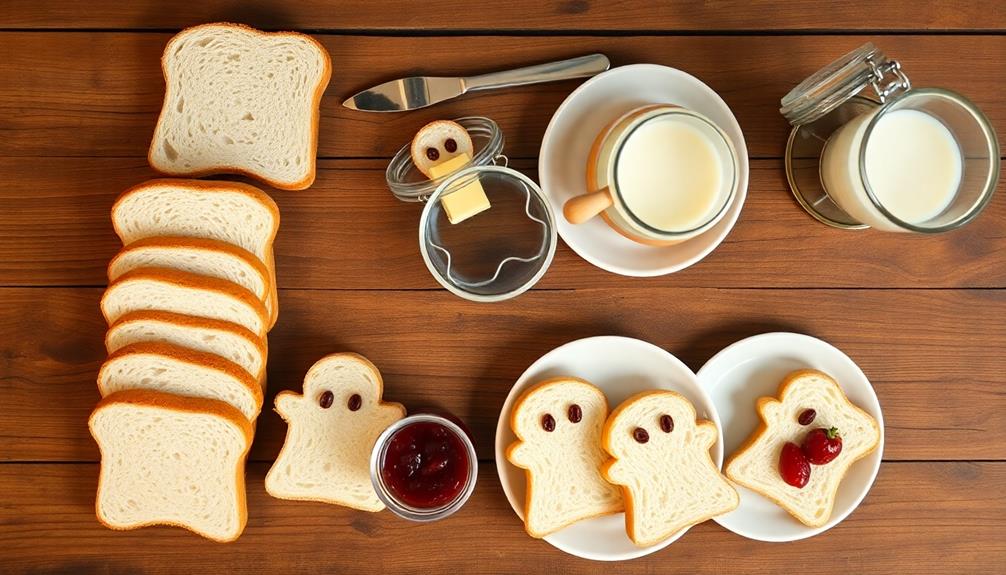
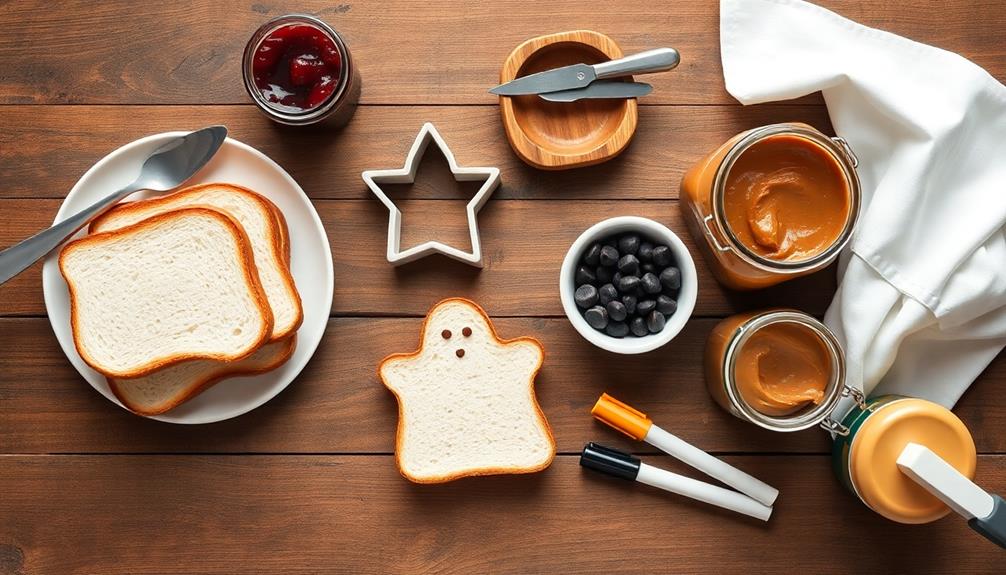
- White bread slices
- Butter or margarine
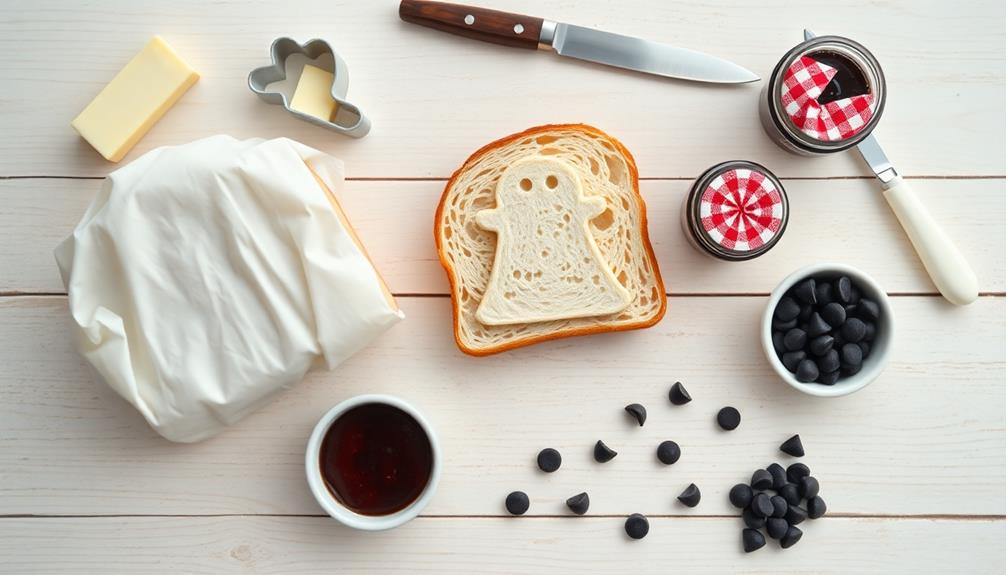
- Cookie cutter or knife
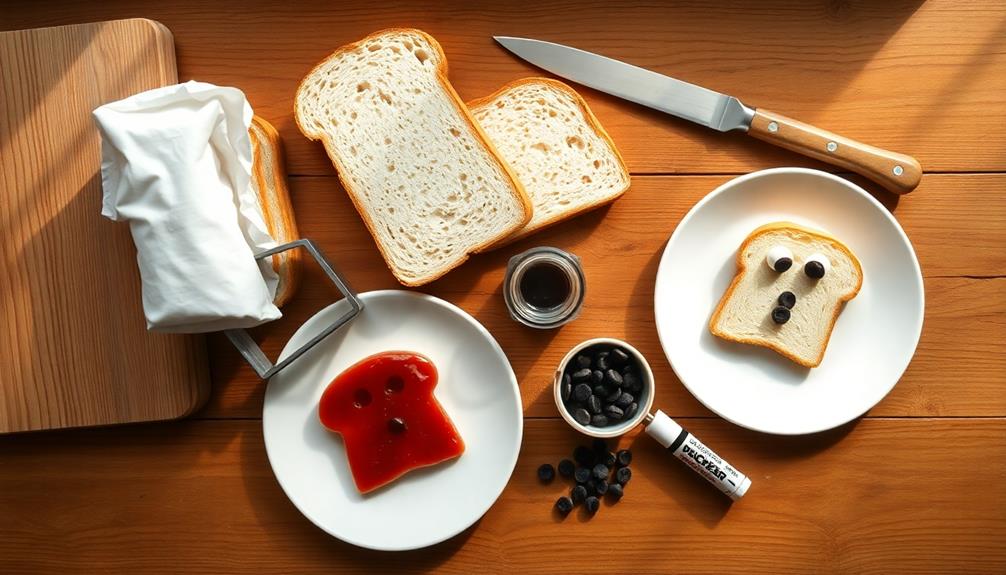
- Edible decorations (e.g., raisins, chocolate chips, or food-safe markers)
- Optional spreads (jam, peanut butter, cream cheese, etc.)
To make Ghost Toast, start by toasting the bread slices to your desired level of crispness. While the toast is still warm, use a ghost-shaped cookie cutter or a sharp knife to cut out ghost shapes from the bread. Spread butter or margarine on the ghosts while they're still warm.
For the faces, use edible decorations like raisins or chocolate chips to create eyes and mouths, or draw them on with food-safe markers. If desired, add your favorite spreads or toppings to enhance the flavor.
For best results, serve Ghost Toast immediately while it's still warm and crispy. If you're preparing them for a party or special occasion, you can make the ghost shapes in advance and store them in an airtight container, then toast and decorate them just before serving.
Experiment with different types of bread, such as whole wheat or sourdough, to create varied textures and flavors. Remember, the key to perfect Ghost Toast is to have fun and let your creativity shine through in the decorations and flavor combinations.

Treedoa Edible Markers for Cookie Decorating,12Pcs Food Coloring Pens Double Side Food Grade Edible Pens with Fine&Thick Tip Food coloring Pens for Cakes,Easter Eggs,Fondant,Cookies,Frosting,Macarons
12 Colorful Edible Food Pens: This edible markers contains 12 vibrant and beautiful colors that can be used…
As an affiliate, we earn on qualifying purchases.
As an affiliate, we earn on qualifying purchases.
Cooking Steps

To create your spooky ghost toast, you'll start by preparing the bread slices and carefully cutting out ghost shapes.
Next, you'll toast these ghostly cutouts evenly, ensuring they're crisp but not burnt.
Step 1. Prepare Bread Slices
Before diving into the ghostly transformation, you'll need to prepare your bread slices. Start by selecting your favorite type of bread – white bread works best for this spooky treat, but you can use whole wheat if you prefer.
You'll want to choose slices that are fresh and not too thin, as they'll need to hold up to the cutting process.
Next, grab a sharp knife and a cutting board. Carefully remove the crusts from each slice of bread, creating perfect squares. Don't toss those crusts away, though! You can save them for other recipes or turn them into breadcrumbs later.
Once you've got your crustless squares, it's time to get creative. Using your knife, gently cut out simple ghost shapes from the bread. You can make them tall and thin or short and round – it's up to you!
Just be sure to leave enough bread around the edges so your ghosts don't fall apart. If you're feeling extra artistic, you can even add little arms or wavy bottoms to your ghost shapes.
Step 2. Cut Ghost Shapes Carefully

Now that you've prepared your bread slices, it's time to focus on cutting those ghostly shapes. Grab a sharp knife or kitchen scissors, whichever you're more comfortable using.
You'll want to work carefully and slowly to create the perfect ghost outline. Start by cutting a rounded top for the ghost's head, then gently curve down the sides to form the body. Don't worry if it's not perfect – each ghost can have its own unique shape!
For added flair, you can cut small indentations at the bottom to create a wavy effect, giving your ghost a more ethereal look. If you're feeling creative, try cutting different sizes of ghosts from your bread slices.
Remember to leave enough space around each ghost shape so it doesn't fall apart when you toast it later. Any leftover bread scraps can be saved for breadcrumbs or a tasty snack.
Once you've cut out your ghost shapes, place them on a clean surface. Take a moment to admire your handiwork – you're one step closer to creating a spooky breakfast treat that's sure to delight!
Step 3. Toast Ghost Shapes Evenly
Every ghost shape deserves a golden-brown finish for the perfect spooky breakfast. To achieve this, you'll need to toast your ghost shapes evenly.
Start by preheating your toaster or toaster oven to a medium setting. If you're using a regular oven, set it to 350°F (175°C).
Place your ghost-shaped bread pieces on a baking sheet or directly on the toaster rack, making sure they're not overlapping. Keep an eye on them as they toast, as different appliances may vary in cooking time. You're aiming for a light golden color, which usually takes about 2-3 minutes in a toaster or 5-7 minutes in an oven.
For extra-even toasting, flip the ghosts halfway through. This step isn't necessary, but it'll give you that perfect, uniform color.
Once they're done, carefully remove your ghostly creations using tongs or a spatula. Let them cool for a minute before decorating.
Step 4. Add Raisin Eyes
Adding raisin eyes to your ghost toast brings these spooky treats to life. You'll need a small handful of raisins and a pair of tweezers to make this step easier.
Start by selecting two raisins of similar size for each ghost toast. Gently press the raisins onto the surface of the toast, placing them where you want the eyes to be. The natural stickiness of the raisins should help them adhere to the bread.
If you're having trouble getting the raisins to stick, you can use a tiny dab of honey or peanut butter as "glue." Just be careful not to use too much, or it might affect the taste.
For an extra creepy touch, you can position the eyes at slightly different angles to give your ghosts a quirky, off-kilter look. Don't worry if the raisins aren't perfectly round – irregular shapes can add character to your ghost faces.
Step 5. Serve With Spooky Syrup
On top of your ghostly creation, a spooky syrup can elevate the breakfast treat to new heights of Halloween fun. To make this eerie addition, you'll need to whip up a quick and easy syrup that's both tasty and visually striking.
Start by mixing 1 cup of sugar with 1 cup of water in a small saucepan. Heat the mixture over medium heat, stirring until the sugar dissolves completely. Once it's clear, remove the pan from the heat and let it cool for a few minutes.
Now, here's where the spooky magic happens. Add a few drops of black or purple food coloring to the syrup and stir well. You can also mix in a dash of vanilla extract for extra flavor.
Pour your creation into a clear bottle or jar for a dramatic effect. When you're ready to serve, drizzle the syrup over your ghost toast in a zigzag pattern or create spooky designs. The dark syrup against the white "ghost" will look fantastic and taste delicious.
Don't forget to give your syrup a spooky name, like "Witch's Brew" or "Phantom Flavor," to complete the Halloween breakfast experience.

Portland Syrups Pumpkin Spice Syrup – Organic Pumpkin & Ginger Coffee Syrup for Lattes, Mocktails, & Baking – Rich Flavor – Organic Cane Sugar – Natural Ingredients – 12 oz Bottle, 12 Servings
AUTHENTIC PUMPKIN SPICE FLAVOR: Portland Syrups Pumpkin Spice Syrup is crafted with real organic pumpkin, cinnamon, brown sugar,…
As an affiliate, we earn on qualifying purchases.
As an affiliate, we earn on qualifying purchases.
Final Thoughts
Ghost Toast is a delightful breakfast treat that's sure to bring smiles to your family's faces. It's a fun and easy way to add some Halloween spirit to your morning routine, even when it's not October.
You'll find that this simple recipe is versatile, allowing you to experiment with different types of bread, toppings, and even cookie cutter shapes.
Remember, the key to perfect Ghost Toast is in the details. Make sure your bread is evenly toasted and your ghost shapes are clearly defined.
Don't be afraid to get creative with your presentation, using fruit, nuts, or even edible glitter to enhance the spooky effect. If you're making Ghost Toast for a party or special occasion, consider preparing the cutouts in advance to save time.
As you enjoy your ghostly creation, take a moment to appreciate how a simple breakfast item can be transformed into something magical.
Ghost Toast isn't just about the taste; it's about the experience of creating and sharing a fun meal with those you care about.
Frequently Asked Questions
Is Ghost Toast Suitable for People With Gluten Intolerance?
If you're gluten intolerant, you'll need to be cautious with ghost toast. It's typically made with regular bread containing gluten. However, you can find or make gluten-free versions using alternative flours for a safe, spooky treat.
Can Ghost Toast Be Prepared the Night Before?
You can prepare ghost toast the night before, but it's best enjoyed fresh. If you must, mix the ingredients and refrigerate overnight. In the morning, simply toast the bread and assemble quickly for a spooky breakfast treat.
What Are Some Popular Variations of Ghost Toast?
You'll find several popular ghost toast variations. Try spooky faces with different toppings, colorful ghost shapes, or mini ghost sandwiches. You can also experiment with various bread types, spreads, and add-ons to create your own unique spin.
How Long Does Ghost Toast Stay Fresh After Cooking?
You'll want to eat your ghost toast within 1-2 days for the best taste and texture. If you've stored it properly in an airtight container at room temperature, it can stay fresh for up to 3-4 days.
Are There Any Vegan Alternatives for Making Ghost Toast?
You can easily make vegan ghost toast using plant-based alternatives. Try using vegan bread, dairy-free spreads, and plant-based cheese. Get creative with toppings like avocado, hummus, or fruit slices to create spooky, ghost-like designs on your toast.