Ghostly meringue cookies are a spooky and delicious treat perfect for Halloween parties. You'll love making these light, airy confections that melt in your mouth. They're made with egg whites, sugar, and cream of tartar, piped into ghost shapes, and decorated with mini chocolate chips for eyes. You'll need to beat the egg whites until stiff peaks form, gradually add sugar, and pipe the meringue onto baking sheets. Bake them at a low temperature for about an hour to achieve a crisp exterior and slightly chewy interior. These gluten-free treats are sure to impress your guests with their eerie appearance and sweet flavor. Let's explore how to create these haunting delights!
Key Takeaways
- Ghostly Meringue Cookies are light, airy treats shaped like ghosts, perfect for Halloween parties.
- Main ingredients include egg whites, sugar, cream of tartar, and vanilla extract, with chocolate chips for decoration.
- The meringue is piped into ghost shapes and baked at a low temperature (200°F/93°C) for about an hour.
- These cookies have a crisp exterior, slightly chewy interior, and melt-in-your-mouth texture with a sweet flavor.
- Creativity is encouraged in shaping and decorating, with options for color variations and different flavorings.

Piping Bags and Tips Set, 100Pcs 12 Inch Pastry Bags, Icing Bags Disposable for Cakes Decorating Kit Supplies with 1 Reusable Piping Bags, 1 Couplers, 12 Frosting Tips, 2 Bag Ties, 3 Cake Scraper
- Complete Decorating Kit: Includes piping bags, tips, scrapers, coupler, ties
- High-Quality Material: Thickened, anti-burst, anti-slip design
- Versatile Use: Suitable for pros and beginners alike
As an affiliate, we earn on qualifying purchases.
As an affiliate, we earn on qualifying purchases.
History

For centuries, meringue has delighted taste buds with its light, airy texture and sweet flavor. You might be surprised to learn that this delectable treat has a rich history dating back to the 17th century. It's believed that meringue was first created in the Swiss village of Meiringen, which is where it got its name.
As you explore the history of meringue, you'll discover that it quickly gained popularity across Europe. In the 18th century, it became a favorite dessert in French and Italian kitchens. Chefs began experimenting with different shapes and flavors, creating elaborate meringue-based desserts for royal banquets and high-society events.
You'll find that meringue's versatility has contributed to its enduring appeal. It's been used as a topping for pies, a base for mousses, and even as a standalone treat.
The ghostly meringue cookies you're interested in are just one of many creative adaptations of this classic confection. Today, you can enjoy meringue in various forms, from simple cookies to complex pavlovas, all thanks to its long and fascinating culinary journey.
Recipe

Ghostly Meringue Cookies are a delightful and spooky treat perfect for Halloween parties or any eerie-themed gatherings. These light and airy confections are made primarily from whipped egg whites and sugar, resulting in a crisp exterior and a slightly chewy interior.
These adorable ghost-shaped cookies aren't only visually appealing but also gluten-free, making them suitable for those with dietary restrictions. The meringue can be flavored with vanilla extract or other essences to add depth to their taste, and a few carefully placed chocolate chips create the ghostly eyes and mouths.
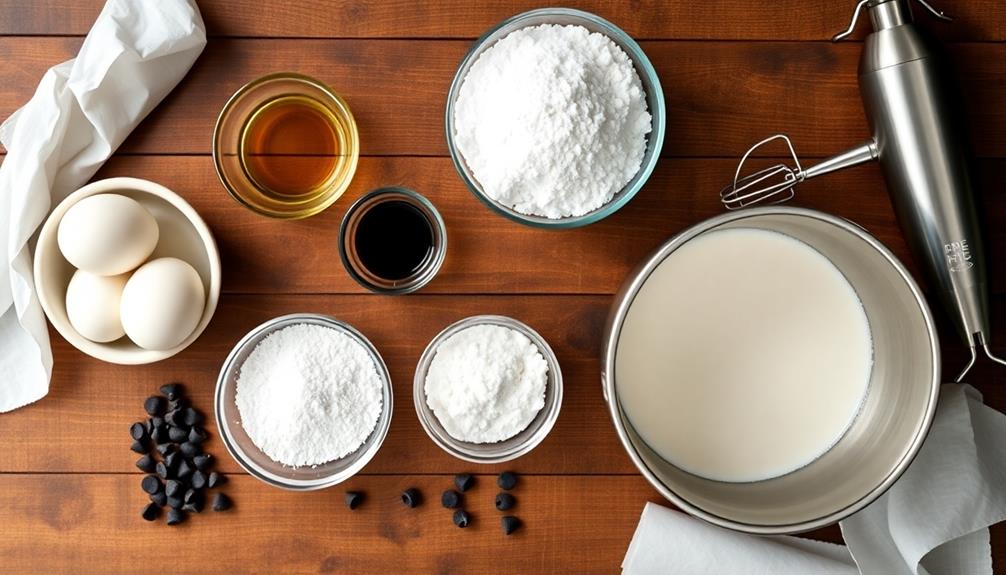
- 4 large egg whites, at room temperature
- 1 cup granulated sugar
- 1/4 teaspoon cream of tartar
- 1/2 teaspoon vanilla extract
- Mini chocolate chips for decorating
Preheat the oven to 200°F (95°C) and line two baking sheets with parchment paper. In a large, clean bowl, beat the egg whites on medium speed until foamy. Add the cream of tartar and continue beating while gradually adding the sugar.
Increase the speed to high and beat until stiff, glossy peaks form. Gently fold in the vanilla extract. Transfer the meringue to a piping bag fitted with a large round tip and pipe ghost shapes onto the prepared baking sheets. Add mini chocolate chips for eyes and mouths.
Bake for 2 hours, then turn off the oven and let the meringues cool completely inside without opening the door.
For best results, make these cookies on a dry day, as humidity can affect the meringue's texture. If you don't have a piping bag, you can use a zip-top bag with a corner snipped off.
To ensure your meringues are crisp throughout, avoid opening the oven door during baking and cooling. Store the cookies in an airtight container at room temperature for up to a week, but be aware that they may soften over time, especially in humid environments.
Cooking Steps

You'll start by preheating your oven to 225°F and beating egg whites until they're foamy.
Next, gradually add sugar while continuing to beat the mixture until it's glossy and stiff.
Step 1. Preheat Oven to 225°F

Before diving into the ghostly meringue-making process, start by setting up your oven.
You'll want to preheat it to 225°F (107°C), which is significantly lower than most baking temperatures. This low heat is crucial for creating the perfect meringue texture.
While your oven's warming up, it's a good time to gather your ingredients and equipment.
Don't rush this step; a properly preheated oven is key to success. If you're using a conventional oven, give it about 15 minutes to reach the right temperature. For convection ovens, you might need a bit less time, but it's always better to be patient.
Step 2. Beat Egg Whites Until Foamy

The foundation of your ghostly meringues begins with perfectly beaten egg whites. Start by carefully separating your eggs, making sure no yolk sneaks into the whites. You'll want to use room temperature eggs, as they'll whip up better than cold ones.
Pour the egg whites into a clean, dry mixing bowl. It's crucial that your bowl and beaters are free from any grease or residue, which can prevent the whites from foaming properly.
Now, it's time to start beating! Use an electric mixer on medium speed and watch as the egg whites transform. At first, they'll look thin and watery, but don't worry – that's normal. As you continue beating, you'll see bubbles forming and the mixture becoming frothy. This is exactly what you're looking for!
The egg whites will start to increase in volume and turn opaque. You'll know they're ready when they're light and foamy, with soft peaks that barely hold their shape when you lift the beaters. This process usually takes about 1-2 minutes, but keep an eye on them. You don't want to overbeat at this stage!
Step 3. Add Sugar Gradually

Once your egg whites are foamy, it's time to gradually add the sugar. You'll want to do this slowly, about a tablespoon at a time. As you add each spoonful, keep beating the mixture with your electric mixer. This gradual process helps the sugar dissolve completely, creating a smooth and glossy meringue.
Continue adding sugar and mixing until you've used all of it. You'll notice the mixture becoming thicker and shinier with each addition. It's important to be patient during this step, as rushing could result in a grainy texture.
Once you've added all the sugar, keep beating the meringue for a few more minutes. You're aiming for stiff, glossy peaks that hold their shape when you lift the beaters.
To test if your meringue is ready, try the upside-down bowl test. Carefully turn your mixing bowl upside down – if the meringue stays put, you've nailed it! If it slides or feels loose, keep beating for another minute or two.
Step 4. Pipe Meringue Into Ghost Shapes

Piping meringue into ghost shapes is where the real Halloween magic happens. To start, fit a large piping bag with a round tip, about 1/2 inch in diameter. Carefully spoon your meringue mixture into the bag, making sure not to deflate it. You'll want to fill the bag about two-thirds full for easier handling.
Now, let's create those spooky ghosts! On a baking sheet lined with parchment paper, hold the piping bag vertically and squeeze gently. Start with a wider base, then slowly lift the bag as you continue to pipe, forming a tapered ghost shape. For best results, aim for ghosts that are about 2-3 inches tall.
Don't worry if they're not perfect – each ghost can have its own unique personality!
Once you've piped all your ghosts, it's time to add some character. Use mini chocolate chips or small dots of black icing to create eyes. If you're feeling extra creative, you can even give your ghosts different expressions.
Step 5. Bake for 1 Hour
At this stage, your ghostly creations are ready for their transformation in the oven. Preheat your oven to 200°F (93°C), ensuring it's at the right temperature before you begin.
Place your baking sheet with the piped meringue ghosts into the preheated oven, positioning it in the center rack for even heat distribution.
Now, set your timer for 1 hour. During this time, the low, gentle heat will slowly dry out your meringues, creating a crisp exterior while maintaining a slightly chewy interior.
It's important not to open the oven door during baking, as this can cause temperature fluctuations and affect the final texture of your ghosts.
As they bake, you'll notice your meringues gradually becoming more opaque and developing a slight sheen.
Don't worry if they start to look a bit pale – that's exactly what you want for spooky ghosts! The slow baking process allows the sugar to crystallize properly, giving your ghosts that perfect melt-in-your-mouth texture.
Final Thoughts

These ghostly meringue cookies are a delightful treat that's perfect for Halloween parties or any spooky-themed event. You'll love how easy they're to make and how impressive they look on your dessert table.
Remember, patience is key when working with meringue, but the results are well worth the effort.
Don't be afraid to get creative with your ghost shapes. You can make them tall and wispy or short and round, each with its own unique personality. If you're feeling extra adventurous, try adding a drop of food coloring to create pastel-colored ghosts.
For a fun twist, you can also use dark chocolate chips for the eyes instead of regular ones.
These cookies are best enjoyed the day they're made, but you can store them in an airtight container for up to three days. Just be sure to keep them in a cool, dry place to maintain their crisp texture.
With their light, airy texture and sweet flavor, these ghostly meringue cookies are sure to be a hit with both kids and adults alike.
Frequently Asked Questions
Can I Use a Different Type of Food Coloring for the Ghostly Effect?
You can definitely use different food coloring for the ghostly effect. Try gel or liquid colors, but be cautious with the amount. White food coloring can enhance the ghostly appearance, while pastels create a softer, ethereal look.
How Long Do These Meringue Cookies Stay Fresh When Stored Properly?
You'll find that properly stored meringue cookies can stay fresh for up to two weeks. Keep them in an airtight container at room temperature. They'll maintain their crisp texture and delightful taste if you avoid moisture exposure.
Are There Any Dairy-Free Alternatives for Making Ghostly Meringue Cookies?
You can easily make dairy-free meringue cookies using aquafaba, the liquid from canned chickpeas. It's a great egg white substitute. You'll whip it with sugar and vanilla, just like traditional meringues. They're just as light and crispy!
Can I Add Flavoring Extracts to Customize the Taste of the Cookies?
Yes, you can add flavoring extracts to customize your cookies' taste. You'll find many options like vanilla, almond, or peppermint. Just be careful not to overdo it, as a little goes a long way with extracts.
What Piping Tips Work Best for Creating Different Ghost Shapes and Designs?
You'll find round tips like #12 or #1A perfect for classic ghost shapes. For wispy details, try star tips #18 or #32. Don't forget the versatile leaf tip #352 for creating unique, swirly ghosts. Experiment to find your favorites!