Graveyard Pudding Cups are a spooky Halloween treat you can easily make at home. You'll need chocolate pudding, crushed cookies, and gummy worms. Start by preparing the pudding and crushing the cookies for the "dirt" topping. Fill clear cups with pudding, then sprinkle on the cookie crumbs. Add gummy worms for a creepy touch, and get creative with cookie tombstones or candy decorations. It's a fun project for kids and adults alike, perfect for Halloween parties. You can customize these treats with different pudding flavors or spooky add-ons. There's more to uncover about this hauntingly delicious dessert's history and presentation tips.
Key Takeaways
- Graveyard Pudding Cups are Halloween-themed desserts made with chocolate pudding, crushed cookies, and decorative candies.
- The no-bake treat is easy to prepare, making it ideal for children to assist in the kitchen.
- Key ingredients include chocolate pudding, crushed chocolate sandwich cookies for "dirt," and gummy worms for decoration.
- Presentation involves layering pudding and cookie crumbs in clear cups, then adding candy decorations for a spooky graveyard effect.
- The dessert is customizable, allowing for creative variations with different cookies, candies, and additional Halloween-themed decorations.
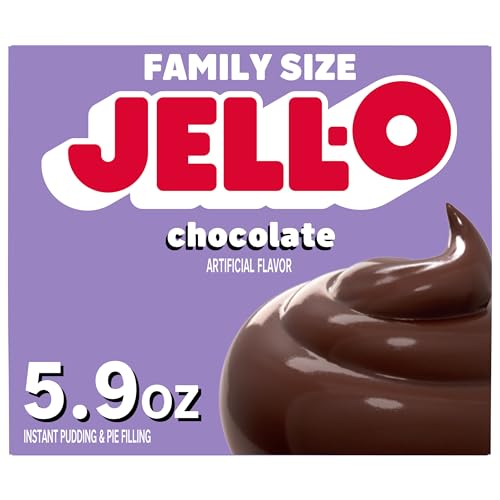
Jell-O Chocolate Instant Pudding & Pie Filling Mix, 5.9 oz Box, As Seen on TikTok
One 5.9 oz box of Jell-O Chocolate Artificially Flavored Instant Pudding & Pie Filling Mix
As an affiliate, we earn on qualifying purchases.
As an affiliate, we earn on qualifying purchases.
History

The history of graveyard pudding cups is shrouded in mystery, with no clear origin story. You might wonder when these spooky treats first appeared on Halloween tables, but it's hard to pinpoint an exact date.
What we do know is that they've become increasingly popular over the past few decades as a fun, creepy dessert for Halloween parties.
You'll find that graveyard pudding cups are part of a larger trend of Halloween-themed foods that gained traction in the late 20th century. As Halloween celebrations grew more elaborate, creative cooks started inventing new ways to make festive treats.
These pudding cups likely evolved from simpler desserts, combining chocolate pudding with cookie crumbs to resemble dirt and graves.
While you can't trace their history to a single inventor, you'll notice that graveyard pudding cups have become a Halloween staple. They're easy to make, visually appealing, and perfect for getting kids involved in holiday preparations.
As Halloween continues to evolve, these spooky desserts remain a beloved tradition, adapting with new variations and decorations each year.
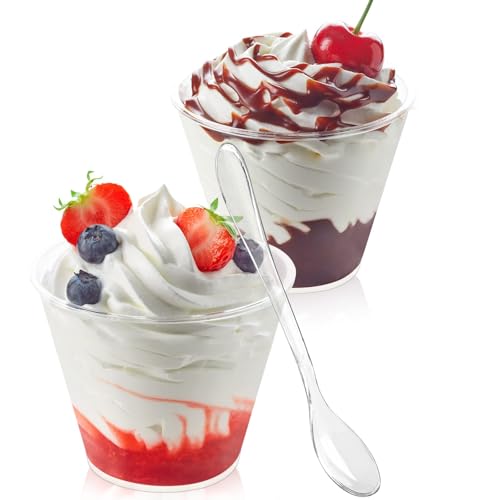
50 Pack 5 oz Plastic Dessert Cups with Spoons, Mini Mousse Cup Round Pudding Cups Party Serving Bowl for Cocktails Appetizers Fruit Parfait and Trifle
Great Value Pack: Package includes 50pcs clear plastic dessert cups with 50pcs clear tasting spoons, perfect catering supplies…
As an affiliate, we earn on qualifying purchases.
As an affiliate, we earn on qualifying purchases.
Recipe
Graveyard Pudding Cups are a spooky and delicious Halloween treat that's perfect for parties or a fun family dessert. These creepy confections combine the rich, creamy texture of chocolate pudding with the crunch of crushed chocolate cookies to create a "dirt" effect. Topped with gummy worms and cookie tombstones, these pudding cups transform into miniature edible graveyards.
This no-bake dessert isn't only visually appealing but also incredibly easy to make, making it an ideal project for kids to help with. The combination of sweet pudding, chocolate cookies, and candy creates a tasty treat that appeals to both children and adults alike. With just a few simple ingredients and some creative assembly, you can bring a touch of Halloween fun to your dessert table.
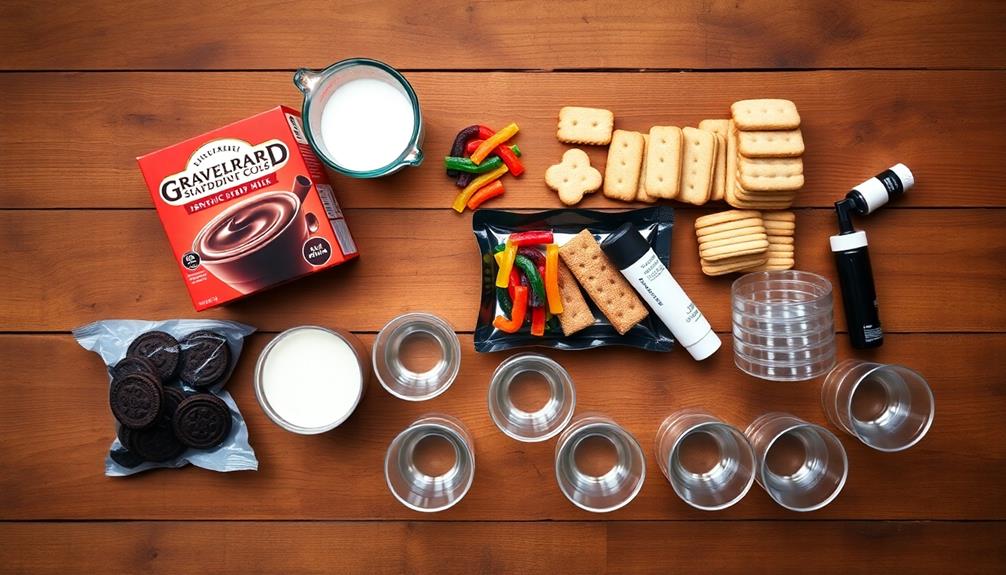
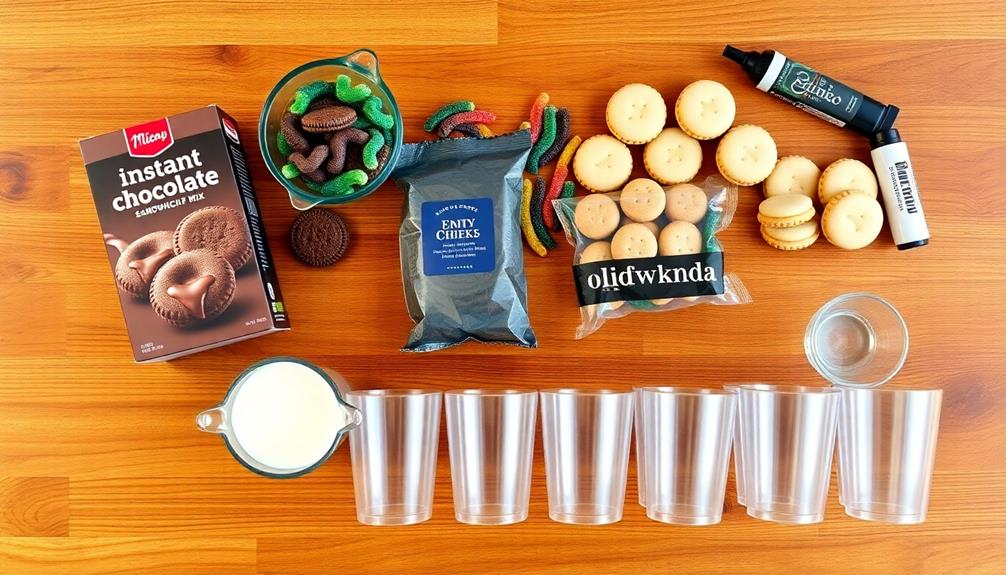
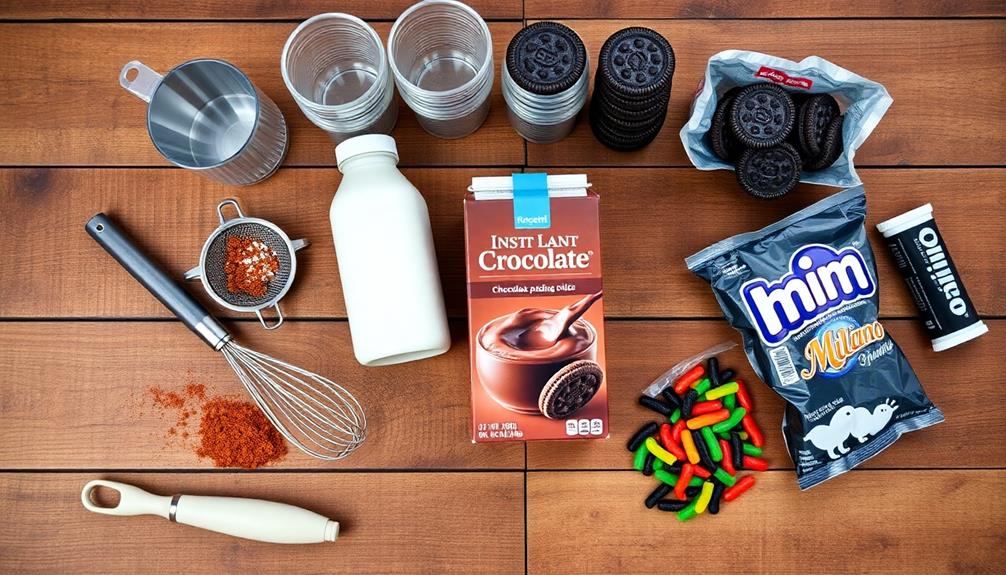
- 1 package instant chocolate pudding mix
- 2 cups cold milk
- 1 package chocolate sandwich cookies
- 1 package gummy worms
- 8 milano cookies or rectangular shortbread cookies
- Black decorating gel or icing
- 8 clear plastic cups
To prepare the Graveyard Pudding Cups, start by making the pudding according to package instructions, usually by whisking the pudding mix with cold milk until smooth. While the pudding sets, crush the chocolate sandwich cookies in a plastic bag until they resemble dirt.
Once the pudding is set, layer it with the crushed cookies in clear plastic cups, alternating between pudding and cookie crumbs. Leave some cookie crumbs for the top layer. Decorate milano cookies with RIP or other spooky messages using black gel icing to create tombstones. Stick these cookie tombstones into the pudding cups and add gummy worms, letting some hang over the edges. Sprinkle remaining cookie crumbs on top to finish the graveyard effect.
For best results, prepare the pudding cups a few hours before serving to allow the flavors to meld and the cookies to soften slightly. If you're making these in advance, wait to add the gummy worms and tombstone cookies until just before serving to prevent them from becoming soggy.
You can also customize the "graves" by using different types of cookies or candy decorations. For a healthier version, consider using sugar-free pudding mix and low-fat milk. Remember, the key to a great presentation is in the details, so have fun with the decorating process!

Trolli Sour Brite Crawlers, Candy, Cherry-Lemon, Strawberry-Grape & Orange-Lime, Sweet and Sour, Gummy Worms, Halloween Treat, 28.8 oz
BOLD & TANGY: Trolli Sour Brite Crawlers (28.8 oz) include cherry-lemon, strawberry-grape & orange-lime flavors. They’re bold &…
As an affiliate, we earn on qualifying purchases.
As an affiliate, we earn on qualifying purchases.
Cooking Steps

You'll start by crushing chocolate sandwich cookies to create a spooky "dirt" topping for your pudding cups.
Next, you'll prepare the chocolate pudding mix according to package instructions, then carefully spoon it into individual cups.
Step 1. Crush Chocolate Sandwich Cookies

To create the perfect graveyard effect, you'll need to crush chocolate sandwich cookies into a fine "dirt" consistency. Start by gathering about 15-20 cookies, depending on the size of your pudding cups.
You've got a few options for crushing the cookies: use a food processor for quick and even results, or go old school with a rolling pin and zip-top bag.
If you're using a food processor, break the cookies into quarters and pulse them in short bursts. Keep an eye on the texture, aiming for fine crumbs with a few slightly larger pieces for variety.
For the rolling pin method, place the cookies in a sturdy zip-top bag, seal it, and crush them by rolling over the bag. This way's a bit more work, but it's fun and gives you more control over the final texture.
Once you've got your cookie "dirt," set it aside in a bowl. You'll use this to top your pudding later, creating that spooky graveyard look.
Step 2. Prepare Chocolate Pudding Mix
Whipping up the chocolate pudding is the next crucial step in creating your spooky graveyard dessert.
You'll need a package of instant chocolate pudding mix and cold milk to get started. In a large mixing bowl, pour the pudding mix and add the required amount of milk according to the package instructions. Grab a whisk and start stirring vigorously, making sure to break up any clumps of powder.
As you whisk, you'll notice the mixture starting to thicken. Keep stirring for about two minutes, or until the pudding is smooth and free of lumps.
If you're feeling ambitious, you can add a drop or two of black food coloring to make the pudding extra dark and spooky. Once it's well-mixed, cover the bowl with plastic wrap and pop it in the fridge for about 5 minutes to set.
This will give you just enough time to gather the rest of your decorating supplies. Remember, the pudding will continue to thicken as it chills, so don't worry if it seems a bit runny at first.
You're now one step closer to creating your deliciously eerie graveyard pudding cups!
Step 3. Add Pudding to Cups
Once the pudding has set for a few minutes, it's time to bring your graveyard to life. Grab your clear plastic cups or small glasses, as these will serve as the perfect containers for your spooky treat.
Using a spoon, carefully scoop the chocolate pudding into each cup, filling it about two-thirds of the way. Make sure to leave enough room at the top for your "dirt" and decorations.
As you're adding the pudding, try to keep the sides of the cups clean. If you accidentally smear some pudding on the sides, don't worry! You can easily wipe it away with a paper towel.
Once you've filled all your cups, give each one a gentle tap on the counter to settle the pudding and remove any air bubbles. This will create a smooth, even surface for your graveyard scene.
If you're making these in advance, cover each cup with plastic wrap and refrigerate. When you're ready to add the toppings, take them out and let them sit at room temperature for a few minutes. This will make it easier to add your graveyard decorations.
Step 4. Add Cookie Crumbs on Top

The next step in creating your spooky graveyard pudding cups is adding the "dirt" layer. You'll need chocolate sandwich cookies for this part, which you'll crush into fine crumbs.
To do this, place the cookies in a resealable plastic bag and use a rolling pin to crush them. Roll over the bag several times, applying pressure evenly to break the cookies into small pieces.
Once you've got your cookie crumbs ready, it's time to sprinkle them over the pudding. Carefully spoon the crumbs onto the surface of each pudding cup, creating an even layer that resembles soil.
Don't be afraid to add a generous amount – you want the pudding to be completely covered. As you're adding the crumbs, gently tap the sides of the cup to help settle them into place. This will create a more natural-looking "dirt" effect.
For an extra spooky touch, you can mix in a few larger cookie pieces to represent rocks or clumps of earth.
Step 5. Add Gummy Worm Decorations

Now that you've created a spooky dirt layer, it's time to add some creepy crawlers into your graveyard scene. Gummy worms are the perfect addition to make your pudding cups come alive with Halloween spirit.
Start by selecting a variety of colorful gummy worms, mixing both long and short ones for added interest.
Gently press some of the worms into the cookie crumb layer, leaving parts of them exposed as if they're wriggling out of the dirt. You can also drape a few worms over the edges of the cup for a more dramatic effect.
Don't be afraid to get creative with their placement – maybe have one peeking out from behind a cookie tombstone or wrapped around a candy pumpkin.
For an extra touch of realism, you can lightly dust some of the exposed parts of the gummy worms with cocoa powder or crushed cookie crumbs. This will make them look like they're covered in dirt.

Tombstone Cookie Cutter 3.5 Inch – Made in the USA – Foose Cookie Cutters Tin Plated Steel Tombstone Cookie Mold
High-Quality Tombstone Cookie Cutter- Foose cookie cutters are manufactured from tin-plated heavy-duty tested and certified food-grade steel. This…
As an affiliate, we earn on qualifying purchases.
As an affiliate, we earn on qualifying purchases.
Final Thoughts

With these spooky Graveyard Pudding Cups, you'll have a hauntingly delicious treat for your Halloween party or fall gathering. They're not just tasty, but they're also fun to make and customize. You can get creative with different cookie tombstones, candy decorations, or even add small plastic figurines for extra spookiness.
Don't forget to experiment with different pudding flavors, too!
Remember, presentation is key. Serve your Graveyard Pudding Cups on a dark-colored platter or tray to enhance the eerie effect. You can even add some fake cobwebs or small plastic spiders around the display for an extra creepy touch.
If you're making these for a party, consider preparing them a few hours in advance and refrigerating them until it's time to serve. This will allow the flavors to meld and the cookies to soften slightly.
Lastly, don't worry if your cups don't look perfect. The charm of these treats lies in their homemade appearance. Have fun with the process, and enjoy sharing these spooky desserts with your friends and family.
Happy Halloween!
Frequently Asked Questions
Can I Substitute the Chocolate Pudding With a Different Flavor?
Yes, you can substitute chocolate pudding with a different flavor. Try vanilla, butterscotch, or even strawberry for a unique twist. Just keep in mind that the color and taste will change, affecting the overall appearance and flavor profile.
How Long Can These Pudding Cups Be Stored in the Refrigerator?
You can store these pudding cups in the refrigerator for up to 3 days. They're best enjoyed within 24 hours, though. Make sure you cover them tightly with plastic wrap to prevent them from drying out or absorbing other flavors.
Are There Any Nut-Free Alternatives for the Crushed Cookie Topping?
You can use nut-free alternatives for the crushed cookie topping. Try crushed chocolate sandwich cookies, graham crackers, or vanilla wafers. You'll get a similar texture and taste without worrying about nut allergies. It's an easy swap!
Can I Make a Larger Batch for a Party or Event?
You can definitely make a larger batch for a party or event. Simply multiply the ingredients by the number of servings you need. You'll want to use a bigger bowl for mixing and prepare more individual cups or a large dish.
What Are Some Creative Ways to Present These Pudding Cups?
You can get creative with presentation! Try arranging the cups on a tiered stand, using mini cauldrons instead of cups, or creating a spooky display with dry ice. Don't forget themed decorations and eerie lighting for added effect.