You'll love creating a Haunted Graveyard Brownie Trifle for your next Halloween party. This spooky dessert combines layers of rich chocolate brownies, creamy pudding, and whipped cream, topped with crushed cookies for a dirt-like effect. The trifle gained popularity in the early 2000s, becoming a Halloween staple. It's easy to make, allowing for store-bought substitutes without sacrificing flavor. You can decorate with gummy worms, cookie tombstones, and candy corn to enhance the graveyard theme. Kids will enjoy helping assemble this visually striking treat. For best results, prepare it a few hours in advance to let the flavors meld. Discover how to make this dessert the centerpiece of your Halloween gathering.
Key Takeaways
- Combines layers of chocolate brownie, pudding, whipped cream, and crushed cookies to create a spooky graveyard-themed dessert.
- Features decorative elements like cookie tombstones, gummy worms, and candy pumpkins for a Halloween aesthetic.
- Can be prepared in advance, with assembly taking place 4 hours before serving for optimal flavor and texture.
- Allows for customization and creativity in decoration, making it ideal for Halloween parties or autumn gatherings.
- Serves as both a visually striking centerpiece and a delicious, crowd-pleasing dessert with varied textures and flavors.

Trifle Bowl with Pedestal and Lid, Large Trifle Serving Dish, Vintage-Style Ribbed Dessert and Cake Stand, for Displaying Pastries, Layered Desserts, Fruits, Salad, Ideal for Parties
- Vintage Ribbed Design: Elegant ribbed pattern with gold knob
- Crystal-Clear Material: Transparent to showcase desserts
- Sturdy Pedestal Base: Provides stability and height
As an affiliate, we earn on qualifying purchases.
As an affiliate, we earn on qualifying purchases.
History
The origin of the Haunted Graveyard Brownie Trifle is shrouded in mystery, much like the spooky desserts it aims to emulate. You might wonder when this creepy confection first appeared on Halloween tables. While the exact date is uncertain, it's likely that this treat emerged in the late 20th century as Halloween celebrations became more elaborate.
The trifle's components have their own rich histories. Brownies, for instance, were created in the late 1800s in the United States. Trifles, on the other hand, have been around since the 16th century in England. The combination of these two desserts, along with Halloween-themed decorations, created the Haunted Graveyard Brownie Trifle we know today.
You'll find that this dessert gained popularity through social media and food blogs in the early 2000s. Home bakers and party hosts loved its spooky appearance and delicious taste. As Halloween parties became more Instagram-worthy, the Haunted Graveyard Brownie Trifle became a staple for those looking to impress their guests with a visually striking and tasty treat.
Recipe

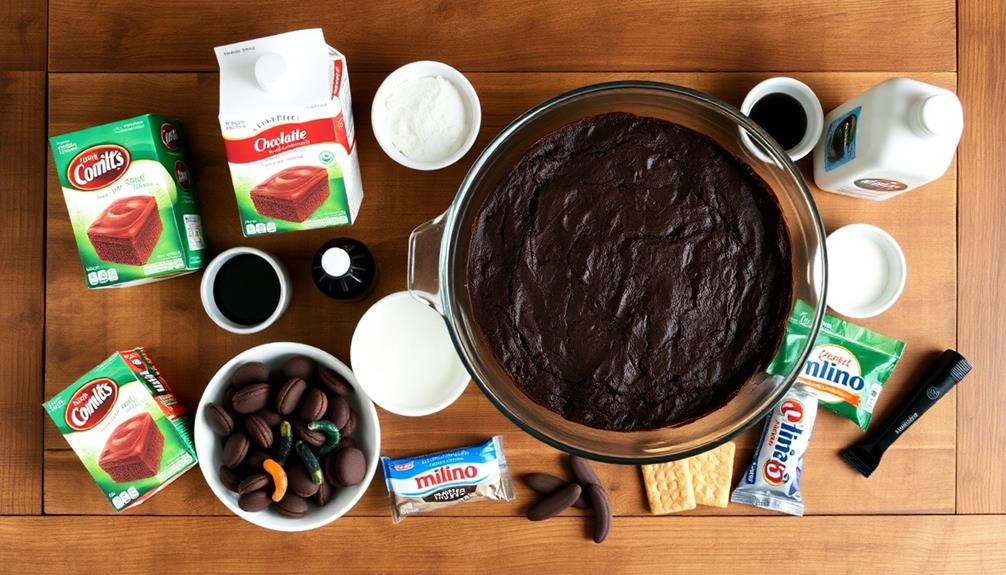
This Haunted Graveyard Brownie Trifle is a spooky and delicious dessert perfect for Halloween parties or any autumn gathering. Layers of rich chocolate brownie, creamy pudding, and whipped cream are adorned with crumbled cookies to resemble dirt, creating a visually striking and tasty treat.
The beauty of this trifle lies in its versatility and ease of preparation. While the recipe below provides a from-scratch approach, you can easily substitute store-bought brownies and instant pudding to save time without sacrificing flavor. The assembly process is fun and can be a great activity to involve children in the kitchen.
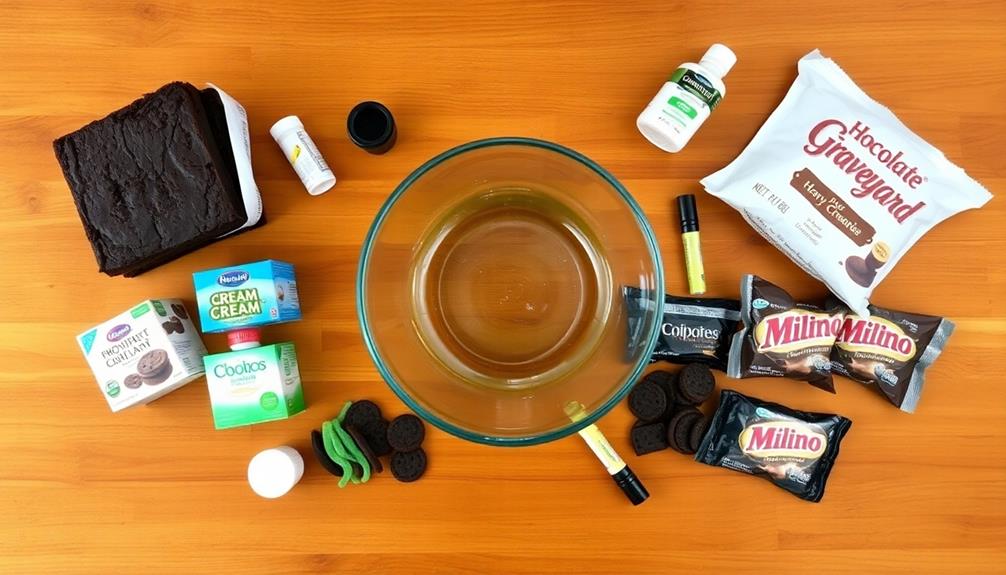
Ingredients:
- 1 batch of prepared chocolate brownies
- 2 packages (3.9 oz each) chocolate instant pudding mix
- 4 cups cold milk
- 2 cups heavy whipping cream
- 1/4 cup powdered sugar
- 1 teaspoon vanilla extract
- 20 chocolate sandwich cookies, crushed
- Gummy worms
- Milano cookies or rectangular shortbread cookies
- Black decorating gel
To prepare the trifle, start by cutting the brownies into small cubes. In a large bowl, whisk together the pudding mix and cold milk until smooth, then refrigerate for 5 minutes to set.
In another bowl, whip the heavy cream with powdered sugar and vanilla until stiff peaks form. In a large trifle dish or clear glass bowl, layer half of the brownie cubes, followed by half of the pudding, a layer of crushed cookies, and half of the whipped cream.
Repeat the layers, ending with whipped cream on top. Sprinkle the remaining crushed cookies over the whipped cream to resemble dirt. Decorate with gummy worms and cookie "tombstones" written on with black gel. Refrigerate for at least 2 hours before serving.
For best results, make this trifle at least 4 hours in advance or the night before serving to allow the flavors to meld. If you're short on time, use store-bought brownies and instant pudding.
To create a more dramatic effect, consider adding food-safe plastic spiders or small Halloween figurines to the trifle. Remember, the key to a great trifle is in the layering, so take your time to create distinct, visible layers for maximum visual impact.
Cooking Steps

Now that you've gathered your ingredients, it's time to bring your Haunted Graveyard Brownie Trifle to life.
You'll start by preparing the brownie mix according to the package instructions, then layer pudding over the cooled brownies in a clear trifle dish.
As you build your spooky dessert, you'll add crushed chocolate cookies for a "dirt" effect, followed by a layer of whipped cream and some creepy candy decorations to complete the graveyard theme.
Step 1. Prepare Brownie Mix

Preparing the brownie mix is your first step in creating this spooky dessert. You'll need a standard boxed brownie mix and the ingredients listed on the package, which usually include eggs, oil, and water.
In a large mixing bowl, combine these ingredients according to the package instructions. It's important to mix thoroughly, but don't overdo it – you want to avoid tough brownies!
Once your batter is ready, pour it into a greased 9×13-inch baking pan. Make sure it's spread evenly to ensure consistent baking.
Before you pop it in the oven, here's a fun twist: use a spoon to create some gentle swirls on the surface. This will give your brownies a more "earthy" look, perfect for the graveyard theme.
Preheat your oven to the temperature specified on the box, typically around 350°F (175°C). Bake the brownies for the recommended time, usually 25-30 minutes.
To check if they're done, insert a toothpick into the center – it should come out with a few moist crumbs. Let them cool completely before moving on to the next step.
Step 2. Layer Pudding Over Brownies

Once your brownies have cooled completely, it's time to add the creepy "mud" layer. In a mixing bowl, whisk together the chocolate pudding mix and cold milk until smooth. Make sure there aren't any lumps, as you want your "mud" to be nice and creamy. Let the pudding set for about 5 minutes to thicken slightly.
Now, take your trifle dish or large clear bowl and carefully spoon half of the pudding over the brownie layer. Use the back of a spoon to spread it evenly, making sure it reaches the edges. This layer will act as the "soil" in your graveyard scene.
If you want to add an extra spooky touch, you can mix in a handful of crushed chocolate cookies to give the pudding a dirt-like texture.
Once you've spread the first layer of pudding, it's time to add some depth to your trifle. Crumble half of the remaining brownies over the pudding, creating a second brownie layer. This will give your trifle more texture and flavor.
Repeat the process with the remaining pudding and brownies, ending with a layer of pudding on top.
Step 3. Add Crushed Chocolate Cookies

To create the illusion of a spooky graveyard, you'll need to add a layer of "dirt" to your trifle. Crushed chocolate cookies are perfect for this! Start by choosing your favorite chocolate sandwich cookies. You'll want about 20 cookies for a standard trifle dish.
Place the cookies in a large, resealable plastic bag. Squeeze out the air and seal it tightly. Now, here's the fun part: use a rolling pin to crush the cookies into fine crumbs. If you don't have a rolling pin, a heavy can works too.
Make sure the crumbs are evenly crushed – you're aiming for a soil-like texture.
Once your cookie "dirt" is ready, sprinkle it generously over the pudding layer. Use a spoon to spread it evenly, covering the entire surface.
Don't worry if some crumbs fall between the brownie pieces – that's part of the graveyard effect! Leave some cookie crumbs aside for the final touches later.
This layer adds a delicious crunch and enhances the spooky atmosphere of your haunted graveyard trifle.
Step 4. Add Whipped Cream Layer

A creamy layer of whipped topping is essential for your haunted graveyard brownie trifle. You'll want to use either homemade whipped cream or store-bought whipped topping for this layer. If you're making your own, whip heavy cream with a bit of sugar and vanilla extract until it forms stiff peaks.
For a spooky twist, you can add a drop of black food coloring to give it a ghostly gray hue.
Once your whipped cream is ready, it's time to add it to your trifle. Using a spatula or large spoon, carefully spread a thick layer of whipped cream over the crushed chocolate cookies. Make sure to spread it evenly, reaching all the way to the edges of your trifle dish.
This layer should be about 1 inch thick, creating a billowy "fog" effect for your graveyard scene. If you're feeling extra creative, you can use a piping bag to create swirls or peaks in the whipped cream, mimicking eerie fog or ghostly shapes.
Step 5. Add Spooky Candy Decorations

Now that your whipped cream layer is in place, it's time to bring your haunted graveyard to life with spooky candy decorations.
Start by creating tombstones using Milano cookies or rectangular sandwich cookies. Stand them upright in the whipped cream, pressing gently to secure them. You can use black icing to write "R.I.P." or funny epitaphs on the cookies for added effect.
Next, add some creepy creatures to your graveyard scene. Gummy worms work great as they peek out from the "dirt" layers. Place plastic spider rings strategically around the trifle for an eerie touch.
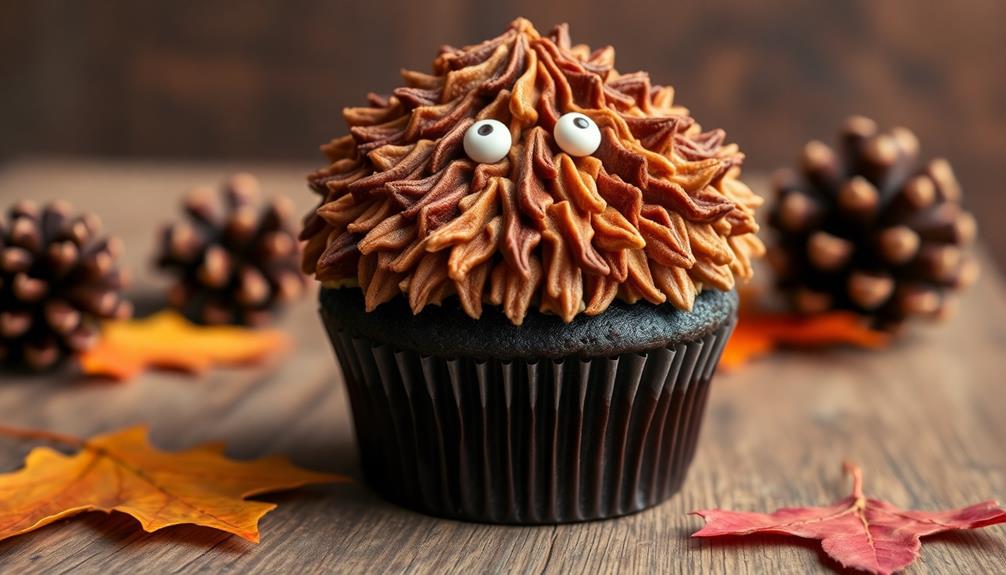
Don't forget to scatter some candy corn or pumpkin-shaped candies to represent a pumpkin patch.
For a final ghoulish touch, create ghost shapes using marshmallows. Melt white chocolate and dip the marshmallows, then add mini chocolate chips for eyes.
Once they're set, place these spooky spirits around your trifle. Remember, the key is to have fun and let your imagination run wild.
Your haunted graveyard brownie trifle is now ready to spook and delight your friends!
Final Thoughts
This Haunted Graveyard Brownie Trifle isn't just a dessert; it's an experience. You've created a spooky masterpiece that's sure to impress your friends and family at any Halloween gathering.
The layers of rich brownie, creamy pudding, and crunchy cookies combine to create a delightful texture and flavor profile that'll have everyone coming back for seconds.
Remember, you can always customize this trifle to suit your tastes. Try different flavors of pudding, add a layer of fruit, or experiment with various candy decorations.
Don't be afraid to get creative and make it your own! If you're short on time, you can use store-bought brownies and pudding to speed up the process.
When serving, make sure to scoop deep to get all the layers in each portion. This dessert is best enjoyed within a day or two of assembly, as the cookies may start to soften over time.
You can prepare the components in advance and assemble just before serving for the best results. Enjoy your haunted creation, and happy Halloween!
Frequently Asked Questions
Can I Use Store-Bought Brownies Instead of Making Them From Scratch?
Yes, you can definitely use store-bought brownies instead of making them from scratch. It's a great time-saver and will still taste delicious in your trifle. Just make sure to choose high-quality brownies for the best results.
How Long Can I Store the Trifle in the Refrigerator?
You can store your trifle in the refrigerator for up to 3 days. It's best to eat it within 24-48 hours for optimal freshness. After that, the layers may start to get soggy, affecting the texture.
Are There Any Non-Alcoholic Substitutes for the Optional Liqueur?
You can easily swap out the liqueur for non-alcoholic options. Try using coffee, chocolate syrup, or fruit juice instead. You'll get similar flavor without the alcohol. Don't forget to adjust the sweetness if needed.
Can I Make This Trifle Ahead of Time for a Party?
You can definitely make this trifle ahead of time for a party. It's best to assemble it a day in advance, allowing flavors to meld overnight. Just add any crispy toppings right before serving to maintain their crunch.
What Are Some Creative Alternatives to Gummy Worms for Decoration?
You've got plenty of spooky options! Try candy bones, licorice bats, marshmallow ghosts, or chocolate spiders. You can also use edible glitter, crushed Oreos for "dirt," or fondant tombstones. Get creative with your Halloween-themed decorations!