A Jack-o'-Lantern fruit platter is a fun and healthy Halloween twist on the traditional carved pumpkin. You'll start by carving a medium-sized pumpkin, then fill it with a colorful array of fresh fruits. Choose vibrant options like grapes, melon chunks, and berries to create a festive display. Line the bottom with lettuce or kale for freshness, and use toothpicks to arrange fruit in creative patterns. Don't forget to add mint leaves for a touch of elegance! This eye-catching centerpiece offers a nutritious alternative to candy and lets you showcase your artistic skills. There's more to discover about this spooky-sweet treat.
Key Takeaways
- A Jack-o'-Lantern fruit platter transforms a carved pumpkin into a festive serving dish for fresh fruits.
- It combines Halloween tradition with healthy snacking, offering a nutritious alternative to candy.
- The platter typically features colorful fruits arranged inside a hollowed-out pumpkin with a carved face.
- Creating this platter involves carving a pumpkin, preparing various fruits, and artfully arranging them inside.
- It serves as both a decorative centerpiece and an interactive, edible Halloween party attraction.

Suuker 4 in 1 Melon Baller Scoop Set, Green
- Multi-Functional Fruit Tool Set: Includes melon baller, carving knife, and scoops
- Premium Materials: Food-grade plastic and corrosion-resistant stainless steel
- Space-Saving Design: Stackable and nestable for easy storage
As an affiliate, we earn on qualifying purchases.
As an affiliate, we earn on qualifying purchases.
History
Tracing its roots back to ancient Celtic traditions, the jack-o'-lantern has evolved from a spooky turnip lantern to a festive Halloween centerpiece. You might be surprised to learn that the original jack-o'-lanterns weren't made from pumpkins at all! In Ireland and Scotland, people carved faces into turnips and potatoes to ward off evil spirits during Samhain, a harvest festival.
When Irish immigrants came to America, they brought this tradition with them. They quickly discovered that pumpkins, native to North America, were much easier to carve than turnips. The larger size and softer flesh of pumpkins made them perfect for creating intricate designs.
Over time, jack-o'-lanterns became a staple of Halloween decorations. The practice of carving pumpkins spread across the United States and beyond, becoming a beloved autumn activity.
Today, you'll find jack-o'-lanterns adorning porches, windowsills, and even dinner tables. The fruit platter version is a modern, edible twist on this age-old tradition, combining the spooky fun of Halloween with a healthy snack option.
Recipe
A Jack-o'-Lantern Fruit Platter is a festive and healthy Halloween-themed dish that doesn't require any actual cooking. This creative presentation of various fruits is perfect for parties, gatherings, or as a fun snack for children during the spooky season. The platter is designed to resemble a carved pumpkin face, using different fruits to create the features.
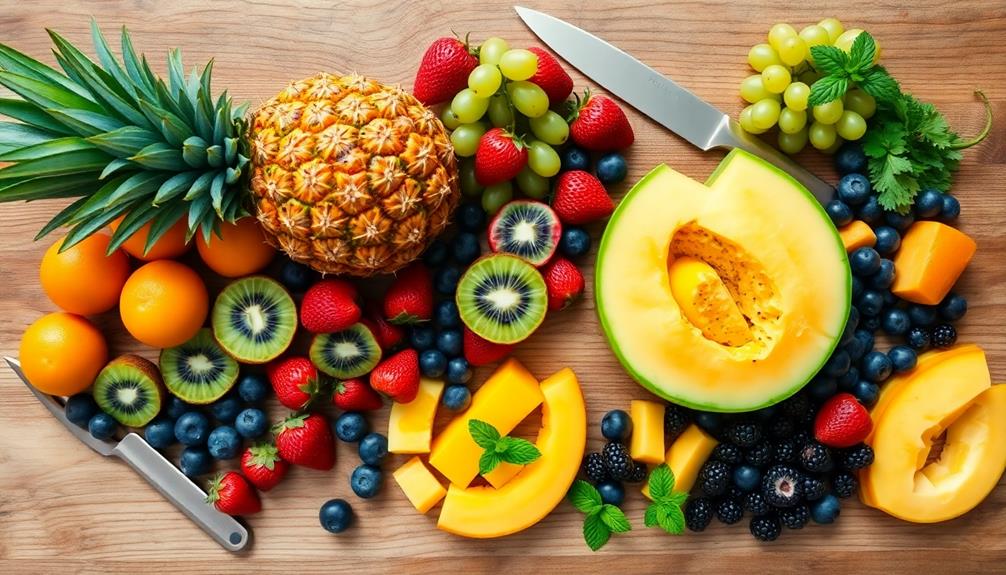
The beauty of this dish lies in its simplicity and versatility. You can use a wide variety of fruits to suit your taste preferences or to accommodate any dietary restrictions. The contrast of colors and textures makes for an eye-catching centerpiece that's as nutritious as it's visually appealing.
- Large round watermelon
- Cantaloupe
- Honeydew melon
- Pineapple
- Grapes (red and green)
- Strawberries
- Blueberries
- Mandarin oranges
- Kiwi fruit
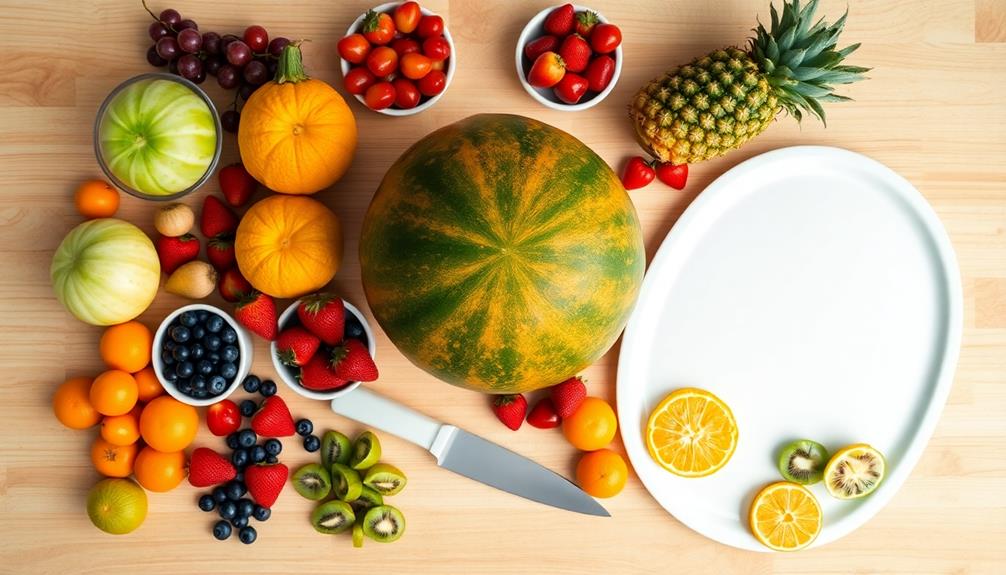
- Sharp knife
- Melon baller (optional)
- Large serving platter
To create the Jack-o'-Lantern Fruit Platter, start by cutting the watermelon in half and scooping out the flesh, reserving it for later use. Carve a Jack-o'-Lantern face into one half of the watermelon rind, creating eyes, a nose, and a mouth.
Cut the other fruits into bite-sized pieces or use a melon baller for round shapes. Arrange the fruit pieces on a large serving platter, using the carved watermelon as the centerpiece. Fill the watermelon with some of the cut fruit, allowing it to spill out slightly for a more dramatic effect. Arrange the remaining fruit around the watermelon in a colorful and appealing pattern.
For best results, prepare the platter shortly before serving to ensure the fruits remain fresh and vibrant. If you need to make it in advance, cover the platter with plastic wrap and refrigerate for up to 4 hours. To prevent browning, brush any cut apples or pears with lemon juice.
Consider adding small containers of yogurt or fruit dip to complement the platter. Remember, the key to a successful Jack-o'-Lantern Fruit Platter is creativity, so feel free to experiment with different fruit combinations and carving designs to make your platter unique and memorable.
Cooking Steps
To create your Jack-o'-Lantern fruit platter, you'll start by thoroughly washing and drying all your fruits.
Next, you'll cut the pumpkin into sections and carefully carve the face details, just like you'd for a traditional Jack-o'-Lantern.
Step 1. Wash and Dry Fruits

Begin by thoroughly washing all the fruits you'll use for your Jack-o'-Lantern platter. This step is crucial to remove any dirt, bacteria, or pesticide residues that might be on the fruit's surface. You'll want to use cool running water and gently rub each piece of fruit with your hands.
For fruits with firmer skins, like apples or pears, you can use a soft-bristled brush to scrub them clean.
Once you've washed everything, it's time to dry the fruits. This step is important because excess water can make your platter soggy and less appealing. You have a few options for drying: you can use a clean kitchen towel, paper towels, or even a salad spinner for smaller fruits.
Make sure to handle the fruits gently to avoid bruising them. If you're using berries, be extra careful as they're delicate and can easily get squished.
After drying, inspect each piece of fruit to ensure it's completely dry and free from any blemishes or soft spots. Now your fruits are clean, dry, and ready for the next step in creating your spooky Jack-o'-Lantern fruit platter!
Step 2. Cut Pumpkin Into Sections

Cutting the pumpkin into sections is your next crucial step. Begin by placing your pumpkin on a stable cutting board. Using a sharp, large knife, carefully cut off the top of the pumpkin, creating a lid. This opening should be wide enough for you to work inside the pumpkin later.
Next, scoop out all the seeds and stringy bits from inside. You can save the seeds for roasting if you'd like!
Now, it's time to divide the pumpkin. Start by drawing lines on the outside of the pumpkin to guide your cuts. You'll want to create about 6-8 equal sections, depending on the size of your pumpkin.
Once you've marked your lines, carefully cut along them, slicing from top to bottom. Remember to keep your fingers away from the blade as you cut. If you're having trouble, ask an adult for help.
As you finish cutting each section, gently pull it away from the pumpkin's center. You should now have a collection of pumpkin "petals" that will form the base of your Jack-o'-lantern fruit platter.
Don't worry if they're not perfectly even – that's part of the charm!
Step 3. Carve Pumpkin Face Details

Now that you've created your pumpkin "petals," it's time to bring your Jack-o'-lantern to life with facial features. Using a sharp paring knife, carefully carve triangular eyes near the top of your pumpkin. Make them slightly different sizes for a quirky look.
For the nose, cut a small triangle or upside-down heart shape in the center.
Next, focus on the mouth. You can go for a classic toothy grin by carving a wide, curved line and adding rectangular teeth. Or, try a simpler smiling curve for a friendlier appearance. Don't forget to smooth out any rough edges with your knife.
To add extra character, consider carving eyebrows or dimples. You can even give your Jack-o'-lantern a winking eye by leaving one eye closed. Remember, it's okay if your carving isn't perfect – imperfections often make your creation more charming!
Once you're satisfied with the face, gently clean up any loose pumpkin bits. Your Jack-o'-lantern is now ready to become the centerpiece of your fruit platter. The carved face will add a fun, spooky touch to your Halloween spread.
Step 4. Arrange Fruit Inside Pumpkin

With your Jack-o'-lantern masterpiece ready, it's time to fill it with a colorful fruit medley. Start by lining the bottom of your pumpkin with a layer of lettuce or kale leaves. This will help keep the fruit fresh and add a nice green backdrop.
Next, choose a variety of fruits that'll create a vibrant display. Grab some grapes, strawberries, orange slices, melon balls, and apple chunks. You can also add berries like blueberries or raspberries for pops of color.
Begin arranging the fruit inside the pumpkin, starting with larger pieces at the bottom. Place grapes in clusters and fan out orange slices along the sides.
As you fill the pumpkin, mix the colors and textures to create an eye-catching arrangement. Don't be afraid to stack fruit pieces on top of each other, creating height and dimension. Fill any gaps with smaller fruits like berries.
If you're feeling creative, use toothpicks to make fruit kebabs and stick them into the pumpkin's flesh.
Remember to leave some fruit peeking out of the pumpkin's mouth for a fun, playful touch. Your Jack-o'-lantern fruit platter is now ready to impress your friends and family!
Step 5. Garnish With Mint Leaves

To add a final touch of freshness and elegance to your Jack-o'-lantern fruit platter, let's garnish it with mint leaves.
You'll want to start by selecting fresh, vibrant mint leaves from your garden or the produce section. Rinse them gently under cool water and pat them dry with a paper towel.
Next, carefully place the mint leaves around the edges of your pumpkin platter. You can tuck them between fruit pieces or lay them on top for a pop of green.
Don't be afraid to get creative! Try making small clusters of three leaves or arrange them in a star pattern. If you're feeling extra fancy, you can even roll a mint leaf and place it upright in the center of the platter.
Final Thoughts

Creating a Jack-o'-Lantern fruit platter offers a fun and healthy way to celebrate Halloween. You've now learned all the steps to make this festive treat, from selecting the right pumpkin to arranging the fruit and adding the final touches.
Remember, the key to a great platter is in the details, so take your time with each step. Don't be afraid to get creative with your design. You can adjust the face of your Jack-o'-Lantern to be scary, funny, or silly – it's up to you!
If you're making this for a party, consider preparing some extra fruit on the side, as guests will likely want refills. This project isn't just about making a cool centerpiece; it's also about encouraging healthy snacking during a holiday that's often centered around candy.
You're providing a nutritious alternative that's just as fun and festive. Plus, you're honing your knife skills and artistic abilities in the process.
Frequently Asked Questions
How Long Can a Jack-O'-Lantern Fruit Platter Last at Room Temperature?
You shouldn't leave a fruit platter at room temperature for more than 2 hours. It's best to refrigerate it promptly. If you're serving outdoors or in warm conditions, consider using ice to keep it cool.
Can I Use Other Fruits Besides Those Traditionally Associated With Halloween?
You can absolutely use other fruits! Don't limit yourself to traditional Halloween options. Get creative and incorporate your favorite fruits. Mix colors, textures, and flavors to make your platter visually appealing and delicious for everyone to enjoy.
What Tools Are Best for Carving Intricate Designs on Fruit?
You'll want sharp, precise tools for intricate fruit carving. Try a paring knife for basic cuts, a melon baller for scooping, and specialized fruit carving knives for detailed work. Don't forget small cookie cutters for easy shapes.
Are There Any Allergen Concerns When Preparing a Jack-O'-Lantern Fruit Platter?
When preparing a fruit platter, you'll want to consider common allergies. Be aware of potential reactions to fruits like kiwi, strawberries, and melon. It's also crucial you're mindful of cross-contamination if you're using nuts or other allergens.
How Can I Prevent Cut Fruit From Browning Quickly on the Platter?
You can prevent cut fruit from browning quickly by brushing them with lemon juice or a mixture of water and honey. You'll also want to keep the fruit chilled and covered until serving time to minimize oxidation.