Connect with us

Cooking

Mummy’s Curse Enchiladas

Learn the secret behind Mummy’s Curse Enchiladas, a spooky twist on Mexican cuisine that’s perfect for Halloween parties. What ancient magic lies within?

Published

on

cursed enchiladas recipe revealed

Mummy's Curse Enchiladas are a spooky twist on Mexican cuisine that originated in Arizona during the late 1990s. You'll love this unique dish that blends ancient Egyptian themes with traditional enchiladas. The recipe features corn tortillas filled with chicken, black beans, and corn, topped with a homemade green sauce and melted cheese. To create the mummy effect, you'll use sour cream to make "cobwebs" and black olives for "eyes." These enchiladas are perfect for Halloween parties or themed gatherings, offering a tasty and visually impressive meal. If you're curious about the history and preparation of this ghoulish delight, there's more to uncover.

Key Takeaways

  • Mummy's Curse Enchiladas blend Mexican cuisine with ancient Egyptian themes, originating in 1990s Arizona.
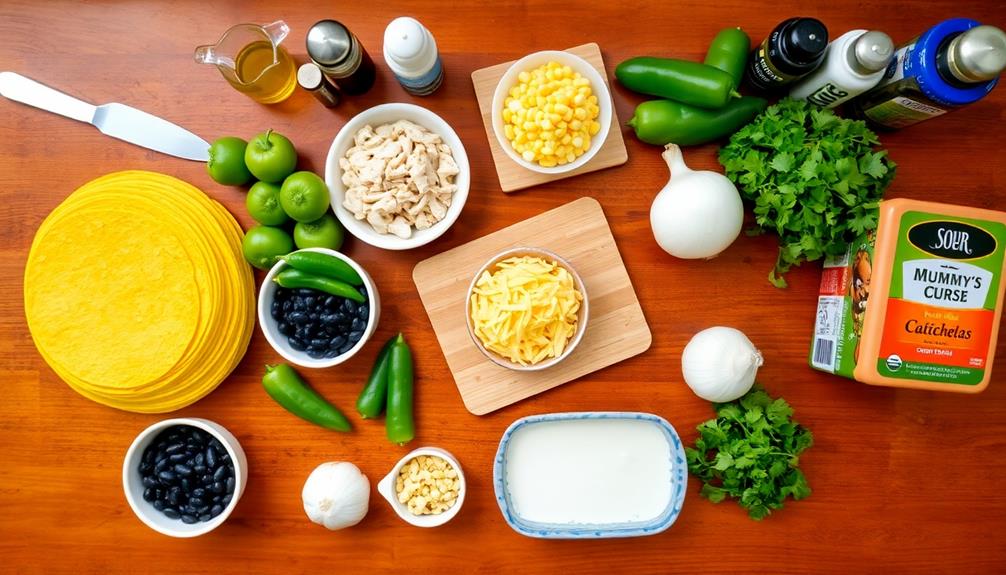
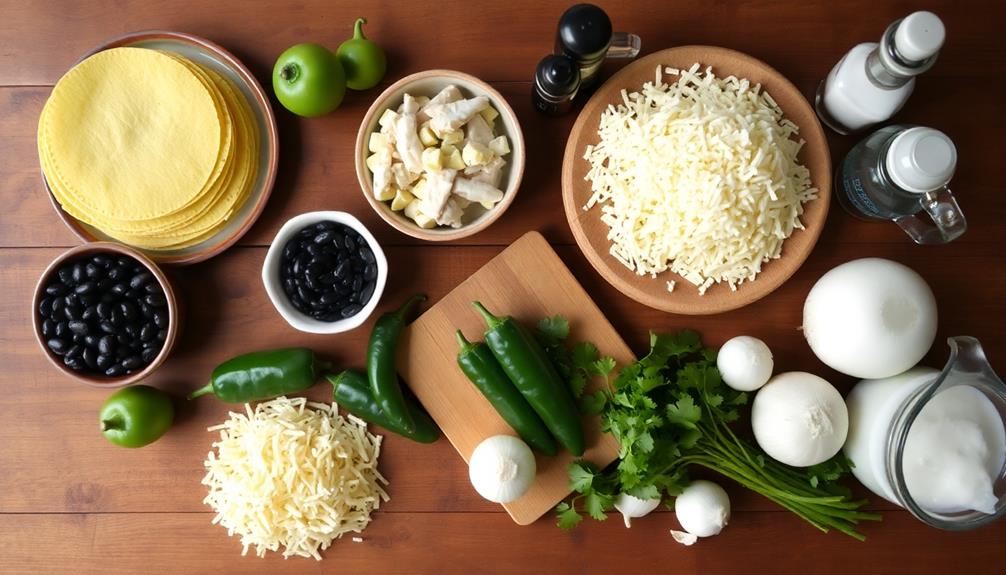
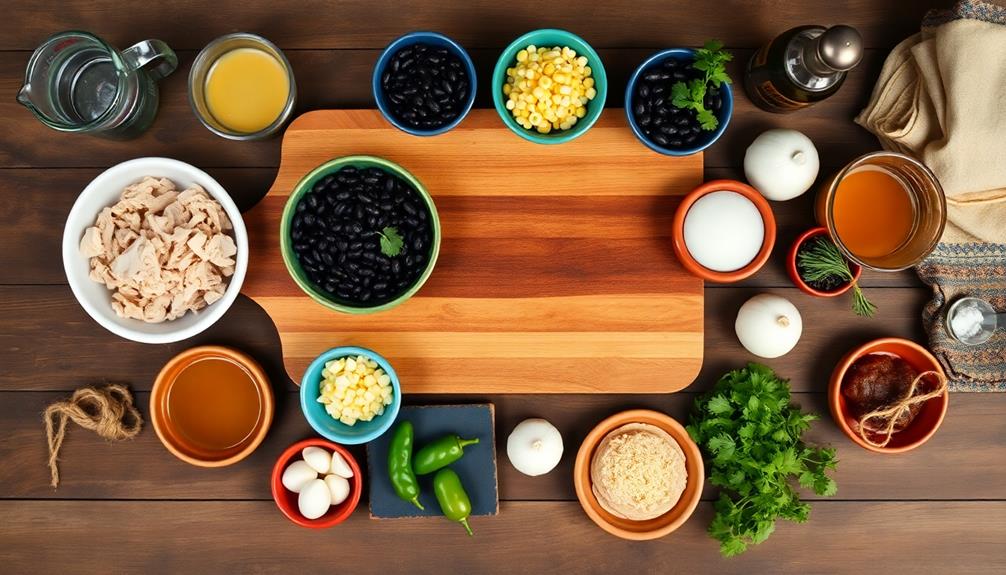
  • The dish features corn tortillas filled with chicken, beans, and corn, topped with homemade green sauce and cheese.
  • Unique presentation includes "cobweb" sour cream designs and olive "eyes" for a spooky Halloween appearance.
  • Preparation involves roasting vegetables for the sauce, rolling enchiladas, and baking until cheese is melted and bubbly.
  • Serving suggestions include pairing with cold beverages like horchata or margaritas to complement the flavors.

History

knowledge of past events

Legends of cursed mummies have long captured our imagination, but their influence on cuisine is a relatively recent phenomenon. You might be surprised to learn that "Mummy's Curse Enchiladas" actually originated in the late 1990s, when a creative chef in Arizona decided to blend ancient Egyptian themes with Mexican cuisine.

The dish quickly gained popularity among local diners, who were intrigued by its unique name and flavors. As word spread, other restaurants began offering their own versions of the enchiladas, each adding their own twist to the recipe. Some chefs even started incorporating Egyptian-inspired spices like cumin and coriander into the traditional enchilada sauce.

You'll find that the popularity of "Mummy's Curse Enchiladas" has grown steadily over the years, with food bloggers and social media influencers helping to spread the word.

Today, you can find variations of this dish in restaurants across the United States and even in some parts of Europe. It's a fun example of how pop culture and history can influence modern cuisine in unexpected ways.

Recipe

cooking instructions and ingredients

Mummy's Curse Enchiladas are a wickedly delicious twist on traditional Mexican cuisine, perfect for Halloween parties or any spooky-themed gathering. These enchiladas are wrapped in bandage-like tortillas, filled with a savory mixture of chicken, black beans, and corn, then smothered in a vibrant green "curse" sauce that's both eerie and flavorful.

The secret to these enchiladas lies in the homemade green sauce, which gets its vivid color from a blend of tomatillos, jalapeños, and cilantro. The sauce isn't only visually striking but also adds a tangy, slightly spicy kick that complements the rich filling. Topped with melted cheese and garnished with sour cream "cobwebs," these enchiladas are sure to cast a spell on your taste buds.

Advertisement
  • 12 corn tortillas
  • 3 cups cooked, shredded chicken
  • 1 can black beans, drained and rinsed
  • 1 cup corn kernels
  • 2 cups shredded Monterey Jack cheese
  • 1 lb tomatillos, husked and rinsed
  • 2 jalapeño peppers, seeded
  • 1 white onion, quartered
  • 4 garlic cloves
  • 1 bunch cilantro
  • 2 cups chicken broth
  • 2 tablespoons vegetable oil
  • Salt and pepper to taste
  • Sour cream for garnish

To prepare the enchiladas, start by making the green sauce. Roast the tomatillos, jalapeños, onion, and garlic under the broiler until charred. Blend these with cilantro and chicken broth until smooth.

In a large skillet, heat oil and simmer the sauce for 10 minutes. Mix the chicken, beans, and corn for the filling. Dip each tortilla in the warm sauce, fill with the mixture, roll, and place seam-side down in a baking dish. Pour the remaining sauce over the enchiladas, top with cheese, and bake at 375°F for 20-25 minutes until the cheese is melted and bubbly.

For best results, warm the tortillas before filling to prevent tearing. To create the "mummy" effect, use a piping bag to drizzle sour cream in a crisscross pattern over the baked enchiladas. For an extra spooky touch, add sliced black olives as "eyes" on each enchilada.

These enchiladas can be prepared ahead of time and refrigerated, just increase the baking time by 10-15 minutes if cooking from cold.

Cooking Steps

step by step cooking instructions

To make your Mummy's Curse Enchiladas, you'll start by rolling your tortillas with the prepared filling.

Next, you'll pour the enchilada sauce over the rolled tortillas, making sure they're well-coated.

Step 1. Roll Tortillas With Filling

roll tortillas with filling

Rolling the enchiladas is the heart of this mummy-inspired dish. You'll want to start by warming your tortillas slightly to make them more pliable. Once they're ready, it's time to fill and roll!

Place a tortilla on a clean surface and spoon about 2-3 tablespoons of your prepared filling down the center. Don't overfill, or you'll have trouble rolling.

Advertisement

Now, here's where the mummy magic happens. Fold one side of the tortilla over the filling, then tuck it under and roll tightly. As you're rolling, imagine you're wrapping up an ancient Egyptian mummy!

Place the rolled enchilada seam-side down in your baking dish. Repeat this process with the remaining tortillas and filling, arranging them snugly in the dish. It's okay if they're touching – they'll stick together a bit during baking, just like a mummy's bandages.

Once all your enchiladas are rolled and placed, you're ready for the next step. Remember, practice makes perfect, so don't worry if your first few rolls aren't picture-perfect. They'll still taste delicious!

Step 2. Pour Enchilada Sauce Over

pour sauce over enchiladas

With your enchiladas snugly nestled in the baking dish, it's time to give them their mummy-like wrapping. Grab your prepared enchilada sauce and get ready to pour it over your rolled tortillas. You'll want to make sure you've got enough sauce to cover every inch of those tasty bundles.

Start at one end of the dish and slowly pour the sauce over the enchiladas. Use a spoon or ladle to help distribute it evenly, making sure to get into all the nooks and crannies. Don't be shy – you want each enchilada to be completely covered in that rich, flavorful sauce. It's like you're giving them a cozy blanket of deliciousness!

As you pour, you'll notice the sauce seeping into the small spaces between the enchiladas. This is great! It'll help keep everything moist and flavorful during baking.

Advertisement

Once you've covered all the enchiladas, give the dish a gentle shake to help the sauce settle. If you see any dry spots, add a bit more sauce to those areas. Your enchiladas should now look like they're ready for their ancient Egyptian debut!

Step 3. Bake Until Cheese Melts

bake cheese until melted

Now that your enchiladas are smothered in sauce, it's time to transform them into golden, cheesy mummies.

Preheat your oven to 375°F (190°C) and make sure the rack is in the middle position. Carefully sprinkle a generous layer of shredded cheese over the saucy enchiladas, covering them completely. This cheesy blanket will melt and create a deliciously gooey top layer.

Place the baking dish in the preheated oven and set a timer for 20 minutes. During this time, the enchiladas will heat through, and the cheese will start to bubble and melt.

Keep an eye on them through the oven window, if possible. You'll know they're ready when the cheese is fully melted and has some golden-brown spots on top. If you want a crispier cheese crust, you can turn on the broiler for the last 1-2 minutes, but watch closely to prevent burning.

Once done, remove the dish from the oven using oven mitts. Let the enchiladas cool for 5 minutes before serving. This cooling time allows the cheese to set slightly, making it easier to serve and eat your mummy-licious creation.

Advertisement

Step 4. Garnish With Fresh Cilantro

garnish with fresh cilantro

A sprinkle of fresh cilantro adds the perfect finishing touch to your Mummy's Curse Enchiladas. Once you've removed the dish from the oven and the cheese has melted to gooey perfection, it's time to add that final burst of flavor and color.

You'll want to use fresh cilantro for this step, as dried herbs won't give you the same vibrant taste or appearance.

Start by rinsing a small bunch of cilantro under cool water to remove any dirt. Gently pat it dry with a clean kitchen towel or paper towels.

Next, hold the stems in one hand and use your other hand to pluck off the leaves. You can also use kitchen shears to snip off the leaves if you prefer.

Roughly chop the cilantro leaves, but don't go too fine – you want to maintain some of that leafy texture.

Once you've prepared your cilantro, sprinkle it generously over the top of your enchiladas. The bright green leaves will create a striking contrast against the golden cheese and add a fresh, zesty flavor that complements the rich, spicy filling.

Advertisement

Step 5. Serve With Cold Beverages

serve with cold drinks

Complementing the fiery flavors of your Mummy's Curse Enchiladas, cold beverages are essential to round out the meal.

You'll want to choose drinks that can cool your taste buds and provide refreshment between bites of spicy goodness. A classic choice is iced water with lemon slices, which cleanses the palate and keeps you hydrated.

For a more festive option, try making a batch of homemade horchata. This creamy rice drink, flavored with cinnamon and vanilla, pairs perfectly with Mexican cuisine.

If you're in the mood for something fruity, blend up a pitcher of fresh strawberry agua fresca or tangy lime margaritas (virgin versions for the younger crowd, of course).

Don't forget about Mexican sodas! Look for flavors like tamarind, mango, or lime at your local grocery store. These fizzy treats add a fun twist to your meal.

For the adults, a chilled Mexican beer with a lime wedge is always a hit.

Advertisement

Whatever you choose, make sure to serve your drinks in tall glasses filled with ice to keep them extra cold. Your taste buds will thank you!

Final Thoughts

concluding reflections and insights

With a twist on traditional Mexican cuisine, Mummy's Curse Enchiladas offer a fun and spooky way to celebrate Halloween or add some excitement to your dinner table.

These creepy-looking enchiladas are sure to be a hit with family and friends, combining tasty ingredients with a ghoulish presentation.

You'll love how easy they're to make, and your guests will be impressed by their unique appearance.

Frequently Asked Questions

Are Mummy's Curse Enchiladas Safe to Eat for People With Food Allergies?

If you have food allergies, you'll need to be cautious with any dish. It's essential that you check the ingredients carefully and consult with the chef or server about potential allergens before consuming any unfamiliar food.

Can the Recipe Be Adapted for Vegetarian or Vegan Diets?

You can easily adapt the recipe for vegetarian or vegan diets. Replace meat with beans, lentils, or plant-based alternatives. Swap dairy cheese for vegan cheese or nutritional yeast. Use vegetable broth instead of chicken broth for the sauce.

Advertisement

What's the Origin of the Name "Mummy's Curse Enchiladas"?

You're curious about the name's origin? It's likely a playful Halloween-inspired creation. The "mummy's curse" part evokes ancient Egyptian mythology, while "enchiladas" refers to the Mexican dish. It's a fun, spooky twist on a classic meal.

How Spicy Are These Enchiladas on a Scale of 1 to 10?

You'll find these enchiladas pack a serious punch! On a scale of 1 to 10, they're easily an 8 or 9. They'll make your taste buds tingle and might even have you breaking a sweat.

Are There Any Superstitions or Rituals Associated With Making This Dish?

You'll find no specific superstitions or rituals for this dish. However, some cooks believe in whispering ancient Egyptian incantations while preparing it. Others might place a small pyramid charm nearby for good luck and authenticity.

Continue Reading
Advertisement

Cooking

Haunted Haystack Cookies

Delightfully spooky and deliciously crunchy, these Haunted Haystack Cookies will have your guests begging for the recipe – and you’ll find it right here.

Published

on

By

spooky halloween cookie recipe

Haunted Haystack Cookies are a spooktacular Halloween treat that'll fill your home with delightful aromas. These crunchy cookies blend shredded coconut and crispy chow mein noodles for a unique, subtly sweet taste. Originating in 19th century New England, they've evolved over decades to capture the essence of autumn. You'll love the crisp exterior and soft, chewy center – perfect for entertaining guests at your Halloween festivities. With easy-to-follow instructions and creative variations, you can make these festive cookies that are sure to become a new family tradition. If you're craving more Halloween baking inspiration, just keep reading!

Key Takeaways

  • Haunted Haystack Cookies are a traditional Halloween treat featuring a combination of shredded coconut and crispy chow mein noodles for a unique texture.
  • The cookies have a crisp exterior and a soft, chewy center, appealing to a wide range of taste preferences.
  • The recipe includes essential ingredients like butter, brown sugar, egg, and vanilla, along with flour, baking soda, and salt for structure.
  • Baking tips include preheating the oven, chilling the dough, and avoiding overmixing to maintain the cookies' shape and texture.
  • Haunted Haystack Cookies can be served at Halloween parties, given to trick-or-treaters, and customized with various candy toppings or drizzled chocolate for added flavor and presentation.

History

The origin of Haunted Haystack Cookies can be traced back to the late 19th century, when resourceful New England bakers sought to incorporate the abundant autumn harvest into their seasonal confections.

As the crisp fall air arrived, these innovative cooks turned to the readily available corn, nuts, and dried fruits to create a delightful treat resembling a whimsical haystack. The result was a delightfully crunchy and subtly sweet cookie that captured the essence of the harvest season.

Over the decades, the Haunted Haystack Cookie evolved, with bakers experimenting with different ingredient combinations and decorative techniques.

Some added a touch of spice, while others nestled hidden surprises within the cookie's golden depths.

Today, these beloved confections remain a beloved autumn tradition, filling homes with the comforting aromas of fall and invoking nostalgia for simpler times.

Advertisement

Whether enjoyed as a cozy afternoon snack or a festive dessert, the Haunted Haystack Cookie continues to delight and inspire bakers of all ages.

Recipe

Haunted Haystack Cookies are a spooky and delightful treat perfect for Halloween festivities. These cookies are made to resemble a haunted haystack, with a crisp exterior and a soft, chewy center. The addition of chocolate chips and shredded coconut creates a delightfully haunting yet delicious combination.

Preparing these cookies is a fun activity the whole family can enjoy. The process is simple, and the end result is a batch of cookies that are sure to impress your guests and satisfy your sweet tooth.

Ingredients:

  • 1 cup unsalted butter, softened
  • 1 cup brown sugar
  • 1 egg
  • 1 teaspoon vanilla extract
  • 1 1/2 cups all-purpose flour
  • 1 teaspoon baking soda
  • 1/2 teaspoon salt
  • 1 cup semisweet chocolate chips
  • 1 cup shredded coconut

Directions:

Preheat your oven to 375°F (190°C). In a large mixing bowl, cream together the softened butter and brown sugar until light and fluffy. Beat in the egg and vanilla extract until well combined.

Advertisement

In a separate bowl, whisk together the all-purpose flour, baking soda, and salt. Gradually add the dry ingredients to the wet ingredients, mixing until just combined. Fold in the chocolate chips and shredded coconut.

Scoop heaping tablespoons of the dough onto a parchment-lined baking sheet, spacing them about 2 inches apart. Bake for 10-12 minutes, or until the edges are golden brown and the centers are still slightly soft. Allow the cookies to cool on the baking sheet for 5 minutes before transferring them to a wire rack to cool completely.

For an extra haunting touch, you can sprinkle a pinch of black food coloring or cocoa powder onto the cookies before baking to create a spookier appearance. Enjoy your Haunted Haystack Cookies with a glass of milk or a hot cup of coffee for a truly delightful Halloween treat.

Cooking Steps

First, you'll need to preheat your oven to 350°F.

Next, mix the dry ingredients together, then stir in the chocolate chips.

Advertisement

Step 1. Preheat Oven to 350°F

preheat oven to 350 f

Preheat your oven to 350°F, the perfect temperature for baking these delightful Haunted Haystack Cookies. This essential first step ensures your oven is nice and toasty, ready to transform the simple ingredients into a spooky Halloween treat.

Proper preheating is key – you'll want to give your oven plenty of time to reach the ideal baking temperature. Set a timer for at least 15 minutes to allow the oven to fully heat up. This will help your cookies bake evenly, with a crisp exterior and a soft, chewy interior.

Don't be tempted to skip this preparatory stage – rushing the preheat can lead to uneven baking or even a total cookie catastrophe! Take the extra few minutes to get your oven up to temperature, and you'll be rewarded with freshly baked haunted haystacks that are sure to delight.

Once your oven is ready, you can move on to mixing up the dough and shaping those spooky cookies.

Step 2. Mix Dry Ingredients

combine dry ingredients thoroughly

In a medium-sized bowl, whisk together the all-purpose flour, baking soda, and a pinch of salt. This dry mixture forms the base of your ghostly haystack cookies. Make sure to stir them well, so the ingredients are evenly distributed.

Did you know that adding a bit of essential oils for flavor can elevate your baking experience?

Next, grab some brown sugar and granulated sugar, then add them to the bowl. Whisk everything together until the sugars are fully incorporated. The combination of brown and white sugar will give your cookies a delightful chewiness and crisp edges.

Advertisement

Don't forget to add a dash of ground cinnamon for a warm, haunting flavor. Blend it all together until the dry ingredients are thoroughly mixed.

With the foundations set, you're one step closer to baking up a batch of spooky, yet delicious haystack cookies. Just wait until you see how these simple dry ingredients transform into a hauntingly good treat.

Step 3. Add Chocolate Chips

incorporate chocolate chips

After whisking the dry ingredients, it's time to fold in the chocolate chips. Adding chocolate chips to your cookies can elevate your dessert, similar to how Crab Cakes are served with sauces to enhance their flavors.

Using a large spoon or spatula, gently incorporate the chocolate chips into the cookie dough. Avoid overmixing, as this can cause the chips to melt and create an uneven distribution.

Take your time and make sure the chips are evenly dispersed throughout the dough. The chocolate chips will add pockets of rich, melty goodness to your Haunted Haystack Cookies. Be careful not to break the chips as you mix them in.

Gentle, folding motions work best to maintain the integrity of the chocolate. Once the chips are incorporated, your cookie dough is ready for the next step.

Advertisement

The combination of the buttery, crunchy haystack base and the gooey chocolate chips will create a truly delightful treat. Get ready to enjoy the haunting deliciousness of these spooky cookies!

Step 4. Roll Dough Into Balls

roll dough into balls

With the chocolate chips now folded into the dough, it's time to start shaping your Haunted Haystack Cookies. Scoop out a heaping tablespoon of the dough and roll it between your palms to create a smooth, round ball.

Be gentle, as you don't want to overwork the dough and make the cookies tough. Place each ball onto the prepared baking sheets, spacing them about 2 inches apart. This'll give the cookies room to spread as they bake.

Once you've rolled all the dough into balls, it's a good idea to give them a quick chill in the fridge for 30 minutes. This firms up the dough, which helps the cookies hold their shape better during baking.

When you're ready, preheat your oven and pop those trays right in. In no time, you'll have a batch of delightfully haunted-looking cookies, ready to be devoured.

Step 5. Bake for 8-10 Minutes

bake for 8 10 minutes

Preheat your oven to 375°F (190°C).

Once your dough is rolled into delightful little balls, it's time to bake them to perfection. Gently place the dough balls on a parchment-lined baking sheet, spacing them about 2 inches apart. This allows the cookies to spread and develop their signature haystack shape without crowding each other.

Advertisement

Now, pop the baking sheet into the preheated oven and set a timer for 8-10 minutes. Keep a close eye on them, as these cookies can go from perfectly golden to overly crisp in a matter of moments. The cookies are ready when the edges have turned a lovely light brown and the centers are still slightly soft.

Once the timer goes off, carefully remove the baking sheet from the oven. Allow the cookies to cool on the sheet for a few minutes before transferring them to a wire rack.

This cooling period helps solidify the haystacks' whimsical shape. With a little patience, your haunted haystack cookies are now ready to delight and spook your friends and family!

Final Thoughts

Haunted Haystack Cookies are a delightful Halloween treat that'll have your guests clamoring for more. These spooky, crunchy cookies are sure to delight and impress, making them the perfect addition to your holiday festivities.

The unique combination of shredded coconut and crispy chow mein noodles creates a texture that's both satisfying and fun.

Advertisement

Once you've baked and assembled these haunted haystacks, don't forget to let your creativity shine. Experiment with different candy toppings or add a drizzle of melted chocolate for an extra touch of decadence. The possibilities are endless when it comes to customizing these festive cookies.

Ultimately, Haunted Haystack Cookies are a delightful way to celebrate the spooky season. They're easy to make, visually stunning, and sure to be a hit with all your trick-or-treaters.

Frequently Asked Questions

Are the Cookies Actually Haunted?

No, the cookies aren't actually haunted. That's just a fun name to get you excited about baking them!

While the cookies may look a bit spooky, they're completely normal and safe to eat. The "haunted" part is just part of the festive theme, meant to make baking them more fun and engaging.

How Long Do the Cookies Last?

The shelf life of your homemade cookies can vary, but they'll usually last 3-5 days when stored properly.

Advertisement

Keep them in an airtight container at room temperature, and they'll stay fresh and delicious.

If you notice any changes in texture, smell, or appearance, it's best to toss them out.

With a little care, you can enjoy your cookies for several days after baking.

Just be sure to savor them before they disappear!

Can the Recipe Be Made Vegan?

You can absolutely make the Haunted Haystack Cookies recipe vegan!

Advertisement

Just substitute the butter for a plant-based alternative like coconut oil or vegan margarine. Instead of eggs, you can use a flax or chia seed "egg" (1 tablespoon ground flax or chia mixed with 3 tablespoons water).

With a few simple swaps, you can enjoy these festive treats without any animal products.

Have fun experimenting and let your creativity shine!

Why Are They Called "Haunted Haystack Cookies"?

Haunted haystack cookies get their spooky name from their resemblance to little ghostly haystacks. The crunchy, peak-y cookies are meant to look like piles of hay, giving them a rustic, haunted vibe that's perfect for Halloween.

As you bake them, the cookies puff up into tall, ghostly shapes that'll send a shiver down your spine – in the best way possible! The haunting look is all part of the fun.

Advertisement

Do the Cookies Contain Any Supernatural Ingredients?

No, these cookies don't contain any supernatural ingredients.

The name "haunted haystack cookies" simply refers to their appearance – they're meant to look like spooky piles of hay, perfect for Halloween parties or fall celebrations.

While they may look a bit spooky, they're made with regular baking essentials like flour, butter, and sugar.

Continue Reading

Cooking

Midnight Black Bean Dip

Dive into the depths of a rich, Latin-inspired midnight black bean dip that offers a tantalizing fusion of flavors and textures. Explore the possibilities.

Published

on

By

creamy midnight black bean dip

Originating from Latin American culinary traditions, the rich and flavorful midnight black bean dip showcases the versatility of this humble legume with its deeply pigmented hue and robust, earthy taste. You'll love how the slow-simmered black beans combine with zesty spices and creamy avocado for a mouthwatering snack or appetizer. Prepare it in a snap with minimal effort, then serve with tortilla chips or fresh veggies. The midnight black bean dip's symbolic unity and global popularity hint at the cultural significance and endless creative possibilities waiting to be explored.

Key Takeaways

  • Midnight Black Bean Dip is a Latin American-inspired recipe featuring a rich, flavorful blend of black beans, avocado, and aromatic spices.
  • The dip's distinctive midnight hue and robust taste stem from the use of nutrient-dense black beans, a staple ingredient in Latin American cuisine.
  • This versatile appetizer can be served warm or at room temperature, with lime wedges for added zest, and pairs well with tortilla chips, pita, or fresh vegetables.
  • Preparation is quick and straightforward, making it an ideal option for entertaining or as a simple, healthy snack.
  • The combination of fiber-rich black beans, creamy avocado, and zesty seasonings offers a satisfying flavor profile with potential health benefits.

History

The origins of midnight black bean dip can be traced back to the vibrant culinary traditions of Latin America. For centuries, the humble black bean has been a staple ingredient in the region's diverse and flavorful dishes.

As people from different cultures and backgrounds mingled, they began sharing their cherished recipes, leading to the development of this beloved dip.

Over time, the recipe evolved, with each community adding their own unique twist. The midnight hue of the dip comes from the richly pigmented black beans, which lend a striking visual appeal and a robust, earthy flavor.

This dip has become a symbol of the unity and creativity that have long defined Latin American cuisine.

Today, midnight black bean dip is a beloved snack and appetizer, enjoyed around the world. Its versatility allows it to be paired with an array of accompaniments, from crisp tortilla chips to fresh vegetables.

Advertisement

Whether served at lively gatherings or savored in quiet moments, this dip continues to bring people together through the power of shared culinary traditions.

Recipe

Midnight Black Bean Dip is a rich and flavorful appetizer that's perfect for any occasion. The combination of black beans, spices, and creamy avocado creates a dip that's both indulgent and healthy. This recipe is easy to prepare and can be made ahead of time, making it a great option for entertaining or a quick snack. Butter, particularly when used in compound forms, can enhance the richness of dips and spreads, adding an extra layer of flavor butter enhances flavor.

The key to this dip is the slow-simmered black beans, which develop a deep, earthy flavor. The addition of cumin, chili powder, and garlic powder enhances the natural sweetness of the beans, while the creamy avocado adds a luxurious texture.

Ingredients:

  • 2 cans (15 oz each) black beans, rinsed and drained
  • 1 ripe avocado, pitted and mashed
  • 2 cloves garlic, minced
  • 1 teaspoon cumin
  • 1 teaspoon chili powder
  • 1/2 teaspoon salt
  • 1/4 cup chopped cilantro (optional)
  • Lime wedges for serving

Cooking Instructions:

In a medium saucepan, combine the black beans, avocado, garlic, cumin, chili powder, and salt. Cook over medium heat, stirring occasionally, until the flavors are well-combined and the dip is heated through, about 10 minutes.

Advertisement

Remove from heat and stir in the chopped cilantro, if using.

Serve the Midnight Black Bean Dip warm or at room temperature, with lime wedges on the side. This dip can be made a day in advance and refrigerated until ready to serve. When ready to serve, simply reheat gently on the stove or in the microwave. Enjoy!

Cooking Steps

First, drain and rinse the black beans to remove any excess liquid.

Next, sauté the aromatics like onions and garlic until they're fragrant and tender.

Then, blend the beans in a food processor or blender until they reach a smooth, creamy texture.

Advertisement

Step 1. Drain and Rinse Black Beans

drain and rinse beans

Start by draining and rinsing the black beans. Place a colander in the sink and pour the canned black beans into it. Give the beans a good rinse under cool running water.

This step helps remove any excess salt or impurities from the canning process. Once the beans are fully rinsed, give the colander a gentle shake to remove any excess water. You don't want too much liquid in your dip, so be sure to drain the beans thoroughly.

With the beans now clean and ready to use, you can move on to the next step in creating your delicious Midnight Black Bean Dip. This simple preparation ensures your dip will have the best possible flavor and consistency.

Take your time with this step, as properly draining and rinsing the beans sets the foundation for the rest of the recipe.

Step 2. Sauté Aromatics Until Fragrant

saut aromatics until fragrant

Next, sauté the aromatics until fragrant. In a large skillet or saucepan, heat a tablespoon of olive oil over medium heat.

Once the oil is shimmering, add the diced onion, minced garlic, and a pinch of salt. Stir the mixture frequently, allowing the flavors to meld and the vegetables to soften, about 5 minutes.

You'll know the aromatics are ready when they release their aroma and turn slightly translucent. Be careful not to let the garlic burn, as that can create a bitter taste. Adjust the heat as needed to prevent scorching.

Advertisement

Once the onions and garlic are fragrant and tender, you're ready to move on to the next step. This sautéing process lays the foundation for the delicious black bean dip, so take your time and enjoy the enticing scents wafting through your kitchen.

Step 3. Blend Beans Until Smooth Texture

blend beans until smooth

With the aromatic base ready, you can now blend the beans until they reach a smooth, creamy texture.

Transfer the sautéed onions, garlic, and spices to a food processor along with the drained and rinsed black beans. Pulse the mixture a few times to break down the solids, then let the machine run continuously for 1-2 minutes, scraping down the sides as needed.

Blend until the dip reaches a silky, uniform consistency, with no visible whole beans remaining.

Taste the dip and adjust the seasoning as necessary, adding more salt, cumin, or chili powder to suit your preferences. The goal is a well-balanced flavor that highlights the earthy black beans.

For an even creamier texture, you can drizzle in a bit of olive oil while the processor is running.

Advertisement

Once you've achieved the desired consistency, transfer the dip to a serving bowl and prepare to enjoy your homemade Midnight Black Bean Dip.

Step 4. Stir in Seasonings and Spices

add spices and seasonings

With the beans now blended to a smooth, creamy texture, you'll want to stir in a few key seasonings and spices to round out the flavor profile.

Start by adding a teaspoon of ground cumin, which will lend an earthy, aromatic note. Turmeric, known for its potent relief for osteoarthritis pain, can also add a vibrant color and health benefits to your dip.

Next, sprinkle in a half-teaspoon of chili powder for a subtle kick of heat. Don't forget to include a quarter-teaspoon of garlic powder, as it'll provide a savory, umami-rich background.

For a touch of acidity and brightness, stir in a tablespoon of freshly squeezed lime juice. Finally, season the dip with a pinch of salt and black pepper to taste, balancing the flavors and bringing everything together.

Give the mixture a good stir until all the seasonings are evenly incorporated. Now your midnight black bean dip is ready to be served with your favorite tortilla chips, crackers, or fresh vegetables.

Advertisement

Get ready for taste buds to be delighted!

Step 5. Transfer to Serving Bowl

transfer to serving bowl

Once the seasonings have been thoroughly incorporated, go ahead and transfer the midnight black bean dip into a serving bowl. This is the final step before it's time to dig in!

Gently scoop the rich, creamy dip from the saucepan and place it in your desired serving dish. You'll want something with a bit of depth to hold all that delicious bean goodness.

Arrange the dip in the bowl, smoothing the top with the back of a spoon. If you're feeling fancy, you can even create a little well in the center to hold any extra toppings you'd like to add, like diced tomatoes, chopped cilantro, or a drizzle of tangy lime crema.

Once plated, your midnight black bean dip is ready to serve. Surround the bowl with an assortment of crisp tortilla chips, pita wedges, or veggie sticks, and let your guests scoop and dip to their heart's content.

This dip is sure to disappear fast, so you might want to make a double batch!

Advertisement

Final Thoughts

The Midnight Black Bean Dip's final thoughts are simple – this recipe offers a delightfully rich and savory dip that's sure to impress your guests. The deep, earthy flavors of the black beans perfectly complement the zesty seasonings, creating a mouthwatering treat that's both satisfying and unique.

For those looking to enhance their culinary experience, consider pairing this dip with a fermented vegetable plate for added flavor and health benefits. Whether you're hosting a party or simply looking for a tasty snack, this dip is sure to be a hit.

Don't be afraid to get creative with your serving suggestions, too – the possibilities are endless! Pair it with crispy tortilla chips, fresh veggies, or even spread it on toast for a heartier meal.

And the best part? This recipe is incredibly easy to whip up, so you can enjoy the delicious results without spending hours in the kitchen.

Frequently Asked Questions

Can I Substitute Different Types of Beans?

Absolutely! You can substitute different types of beans in this recipe. Pinto, kidney, or even garbanzo beans would work well.

Advertisement

Just keep in mind that the flavor and texture may vary slightly. The key is to choose beans that you enjoy and that complement the other ingredients.

Don't be afraid to experiment – the great thing about dips is that they're highly customizable to your tastes. Have fun with it!

How Long Does the Dip Keep in the Fridge?

The dip will keep in the fridge for 3-5 days.

Just make sure to store it in an airtight container.

This way, the flavors will stay fresh and you can enjoy the dip throughout the week.

Advertisement

Be sure to give it a good stir before serving, as the ingredients may separate a bit over time.

With proper storage, you can savor every last bite of your homemade dip.

Can I Make This Dip Ahead of Time?

Yes, you can absolutely make this dip ahead of time!

In fact, it's a great recipe to prep in advance. The flavors will actually improve as the dip sits in the fridge, allowing the spices to meld together.

You can make it up to 3 days ahead and store it in an airtight container. This makes it a super convenient appetizer or snack to have on hand whenever you need it.

Advertisement

Just give it a good stir before serving for the best texture and taste.

Is This Dip Suitable for Vegetarian or Vegan Diets?

Absolutely, this dip is perfect for vegetarian and vegan diets! Since it's made with plant-based ingredients like black beans, it's a delicious and satisfying option for folks avoiding meat and dairy.

The blend of spices and seasonings gives it plenty of flavor, and you can serve it with crunchy veggies or tortilla chips for a tasty, protein-packed snack or appetizer.

Go ahead and whip up a batch – your veggie-loving friends will thank you!

Can I Adjust the Spice Level to My Preference?

You can absolutely adjust the spice level of this dip to suit your personal taste!

Advertisement

Start with the recommended amounts of spices, then add more if you want a bolder flavor. Go slowly and taste as you go, so you don't accidentally make it too spicy.

That way, you can get the perfect balance of heat that you enjoy. Have fun experimenting and finding your perfect spice level!

Continue Reading

Cooking

Cobweb Cotton Candy

Navigating the ethereal strands of cobweb cotton candy, a century-old confectionary delight that captivates with its unique visual appeal and customizable flavors.

Published

on

By

sweet fluffy delicate treat

Cobweb cotton candy's delicate, ethereal strands have captivated dessert lovers for over a century. Tracing its origins to innovative 19th-century confectioners, the iconic sugary treat was patented in 1897 and grew popular at carnivals and state fairs. To make it, you'll heat sugar, corn syrup, and water until it reaches 300°F, then spin the liquefied mixture into fine, feathery strands. Wrap these around decorations like sprinkles for the signature cobweb effect, and serve immediately to enjoy the cloud-like texture. With its unique visual appeal and customizable flavors, it's no wonder cobweb cotton candy continues to enchant both children and adults – and there's more to discover about this delightful confection.

Key Takeaways

  • Cobweb cotton candy is a delicate, ethereal dessert with a visually striking, web-like appearance, distinguishing it from traditional cotton candy.
  • The recipe involves heating sugar, corn syrup, and water to a precise temperature, then spinning the mixture into fine, intricate strands.
  • Careful handling and timing are essential to maintain the fluffy texture and prevent the sugar from hardening, ensuring an optimal eating experience.
  • Cobweb cotton candy can be customized with vibrant colors and unexpected flavors, appealing to both children and adults for various events.
  • Mastering the techniques and exploring different variations of cotton candy, such as incorporating seasonal flavors or experimenting with shapes, can lead to unique and captivating creations.

History

The origins of cobweb cotton candy can be traced back to the late 19th century, when enterprising confectioners began experimenting with new and innovative ways to create delicate, airy treats.

This period marked a significant transformation in the culinary arts, as artisans sought to blend creativity with technical skill, reminiscent of the way modern artists emphasize the importance of imagination in creativity creative expression in art.

One such pioneering individual was William Morrison, an American candy maker who, in 1897, patented a machine that could spin sugar into fine, gossamer-like strands. This invention laid the groundwork for the delightful confection we now know as cobweb cotton candy.

Over the next few decades, the popularity of this fluffy sugar delight continued to grow, with carnival vendors and state fair concessionaires showcasing their creative spinning techniques.

The delicate, web-like appearance of the candy soon earned it the nickname "cobweb cotton candy," a moniker that has endured to this day.

Advertisement

As the 20th century progressed, the art of crafting cobweb cotton candy evolved, with improvements in machinery and techniques allowing for increasingly intricate and mesmerizing displays of spun sugar.

Recipe

Cotton candy is a delightful and airy confection that has been captivating the hearts and taste buds of people for generations.

This whimsical treat, often associated with carnivals and fairs, can now be enjoyed in the comfort of your own home with the enchanting Cobweb Cotton Candy recipe.

Capturing the essence of the classic cotton candy, this recipe adds a touch of elegance and sophistication with the incorporation of an intricate cobweb design. By carefully shaping the spun sugar, you can create a visually stunning dessert that's sure to impress your guests and delight your senses.

Ingredients:

Advertisement
  • 1 cup granulated sugar
  • 1/4 cup light corn syrup
  • 1/4 cup water
  • Food coloring (optional)

Cooking Instructions:

In a medium saucepan, combine the sugar, corn syrup, and water. Bring the mixture to a boil over medium-high heat, stirring constantly until the sugar has dissolved.

Continue cooking, without stirring, until the temperature reaches 300°F on a candy thermometer. Carefully pour the hot sugar mixture into the center of a cotton candy machine and turn it on.

Allow the sugar to spin, creating delicate strands of cotton candy. Using your fingers, gently shape the cotton candy into a cobweb design, creating intricate patterns and shapes.

Tips:

For best results, work quickly as the cotton candy will start to harden and become difficult to manipulate.

Advertisement

If you desire a specific color, add a few drops of food coloring to the sugar mixture before heating. Serve the Cobweb Cotton Candy immediately for maximum enjoyment and be prepared to be enchanted by the ethereal and whimsical presentation.

Cooking Steps

First, you'll need to heat the sugar until it's completely liquefied.

Once it's ready, you'll spin the sugar into fine, wispy strands.

Then, gather your desired edible decorations and wrap the spun sugar around them.

Serve your creation immediately for the best texture and flavor.

Advertisement

Step 1. Heat Sugar Until Liquefied

heat sugar until liquefied

With your sugar ready, begin heating it in a heavy-bottomed saucepan over medium heat.

Keep a close eye on the sugar, stirring occasionally, as it will quickly liquefy and start to caramelize. You'll know it's ready when the sugar turns a light golden color and reaches 300-320°F on a candy thermometer.

Once the sugar is fully melted, remove the saucepan from the heat to prevent burning.

The molten sugar will be incredibly hot, so take care not to let it splash or drip on your skin.

Carefully pour the liquid sugar into the center of your cotton candy machine, allowing it to spin and transform into delicate, wispy strands.

Work quickly, as the sugar will harden and become difficult to work with as it cools.

Advertisement

With patience and practice, you'll soon be creating fluffy, ethereal cobweb cotton candy right in your own kitchen.

Step 2. Spin Sugar Into Fine Strands

spin sugar into strands

Now that you have your molten sugar ready, it's time to transform it into the delicate, wispy strands of cotton candy. You'll need a special tool called a cotton candy maker. This device has a spinning head that heats the sugar and forces it through tiny holes, creating those delicate, hair-like fibers.

First, fill the center of the cotton candy maker with your liquefied sugar. Turn on the machine, and watch as the sugar is rapidly heated and spun. The centrifugal force pushes the sugar through the perforated walls, forming incredibly thin, airy strands.

Gently guide these strands with your hands, gathering them around a paper cone or paper floss stick. Be careful, as the sugar is still very hot! Continue spinning and collecting the cotton candy until you've reached your desired amount.

The key is to work quickly, as the sugar will harden and become difficult to spin if it cools too much. With a little practice, you'll be spinning up fluffy, cloud-like cotton candy in no time!

Step 3. Gather Desired Edible Decorations

collect edible decorations needed

To create the perfect cobweb cotton candy, you'll want to gather a few edible decorations. Look for delicate, wispy strands of sugar that will complement the fluffy, ethereal texture of your cotton candy.

Crunchy crystallized sugar pieces or delicate sprinkles in coordinating colors can add visual interest and a satisfying crunch.

Advertisement

Consider using edible glitter or lustre dust to give your cotton candy a magical, shimmering effect. These decorative elements can be scattered over the top of your creation or carefully placed to form intricate patterns.

You might also try incorporating small, edible flowers or fresh herbs for a touch of natural beauty.

Be mindful of the flavors and textures you choose, as they should enhance the sweetness and airy quality of the cotton candy.

With a little creativity and attention to detail, you can transform your cobweb cotton candy into a true work of art, delighting both the eyes and the palate.

Step 4. Wrap Spun Sugar Around Decorations

wrap sugar around decorations

Once you've gathered your desired edible decorations, it's time to start spinning the cotton candy.

You'll want to work quickly, as the spun sugar cools rapidly. Dip your fingertips into the hot, liquefied sugar, then gently pull the strands upward and outward, allowing them to fall and twist around your decorations.

Advertisement

Be careful – the sugar is extremely hot, so work cautiously. As the strands cool, they'll become delicate and airy, forming a delicate "cobweb" effect around your chosen items.

Experiment with different techniques, like swirling the sugar or making quick, darting motions, to create unique patterns.

Don't be afraid to layer the cotton candy, wrapping it around the decorations multiple times for a fuller, fluffier look.

With a bit of practice, you'll be spinning professional-looking cotton candy creations in no time.

Just remember to work quickly and safely to achieve the best results.

Advertisement

Step 5. Serve Immediately for Best Texture

serve fresh for texture

With the cotton candy created, it's crucial to serve it immediately for the best possible texture. Cotton candy is delicate and prone to absorbing moisture, so you'll want to enjoy it right away for that perfect fluffy, melt-in-your-mouth consistency.

Don't wait – the sugar strands will start to stiffen and lose their airy appeal the longer they sit.

When you're ready, carefully lift the spun sugar from the decorations and transfer it to a serving plate or bowl. Handle it gently, as the threads can easily break apart.

If you've wrapped it around anything, simply peel it off the decoration, trying to maintain the cobweb-like shape as much as possible.

Serve the cotton candy immediately, encouraging your guests to dig in and savor the delicate, cloud-like texture. The longer it sits, the more the sugar will begin to harden, so make sure everyone gets a chance to enjoy it at its prime.

With a little speed and care, you can ensure your homemade cotton candy is as light and delightful as possible.

Advertisement

Final Thoughts

As you've discovered the captivating world of cobweb cotton candy, you can't help but feel a sense of wonder and excitement. This delicate, ethereal treat has captured the hearts and imaginations of dessert enthusiasts everywhere.

While the process may seem daunting at first, the end result is truly worth the effort. With a little practice, you'll be whipping up these airy, delicate confections like a pro, impressing friends and family with your culinary skills.

As you continue to explore the world of cotton candy, don't be afraid to experiment and put your own unique spin on this classic delight. Whether you choose to incorporate vibrant food colorings or unexpected flavors, the possibilities are truly endless.

Frequently Asked Questions

Is Cobweb Cotton Candy Safe to Eat?

You might be wondering if cobweb cotton candy is safe to eat.

Well, the good news is that regular cotton candy is generally considered safe, as long as it's stored properly and consumed in moderation.

Advertisement

However, the "cobweb" version may have additional ingredients or preparation methods that could make it risky.

It's best to check with the vendor or manufacturer to ensure it meets food safety standards before indulging.

When in doubt, it's always better to err on the side of caution.

Can I Make Cobweb Cotton Candy at Home?

Yes, you can make cobweb cotton candy at home! It's a fun and creative way to dress up your classic cotton candy.

All you need is a cotton candy machine, some food coloring or flavoring, and a little bit of patience.

Advertisement

Start by making your regular cotton candy, then use a fork or skewers to carefully stretch and shape it into delicate, weblike strands.

With a bit of practice, you can create an impressive edible cobweb right in your own kitchen.

How Long Does Cobweb Cotton Candy Last?

Homemade cotton candy typically lasts 1-2 days when stored properly.

To maximize its freshness, keep it in an airtight container at room temperature. Avoid refrigerating, as this can cause the delicate spun sugar to absorb moisture and become sticky.

With a little care, you can enjoy your fluffy, handcrafted cotton candy for a couple of days before it starts to lose its light, airy texture.

Advertisement

Just be sure to savor it while it's at its best!

Where Can I Buy Cobweb Cotton Candy?

Finding cobweb cotton candy can be tricky, but there are a few options to consider.

Many local fairs, festivals, and carnivals may offer this unique treat. You can also check with specialty candy shops or online retailers that specialize in hard-to-find confections.

While not as widely available as regular cotton candy, cobweb cotton candy is out there if you're willing to do a bit of searching.

With a little persistence, you're sure to track down this delightful fluffy delight.

Advertisement

What Are the Potential Health Benefits of Cobweb Cotton Candy?

While cobweb cotton candy may seem like an indulgent treat, it actually offers some potential health benefits!

The airy, wispy texture of this candy can help satisfy your sweet tooth without overwhelming your system with heavy sugars.

Plus, the intricate webbing provides a fun, interactive experience that can engage your senses and make snacking more enjoyable.

Continue Reading
Advertisement

Affiliate disclaimer

As an affiliate, we may earn a commission from qualifying purchases. We get commissions for purchases made through links on this website from Amazon and other third parties.

Advertisement

Vetted

Vetted2 months ago

Book Review: “The Creative Spark: Unleashing Your Inner Artist”

Reviving Creativity in the Digital Age In an era where digital distractions often dim our creative instincts, “The Creative Spark:...

parenting discipline book list parenting discipline book list
Vetted2 months ago

15 Best Parenting Books for Discipline Every Parent Should Read

Peruse top parenting books for discipline, such as 'No-Drama Discipline' and 'The Whole-Brain Child,' for valuable insights and strategies to...

exploring emotions through books exploring emotions through books
Vetted2 months ago

15 Best Baby Emotions Books to Help Your Little One Understand Feelings

Peek into the world of emotions with the top 15 baby books that promise to unravel your little one's feelings...

stylish and comfortable strollers stylish and comfortable strollers
Vetted2 months ago

15 Best Nuna Strollers for Stylish and Comfortable Travel

Hunting for the perfect stylish and comfortable travel stroller? Discover the top Nuna options and their unique features in this...

top strollers for children top strollers for children
Vetted2 months ago

15 Best Strollers for Infants and Toddlers – Top Picks for Convenience and Comfort

Just when you thought choosing a stroller was overwhelming, discover the top picks for convenience and comfort!

free books for babies free books for babies
Vetted2 months ago

15 Best Free Books for Babies Every Parent Should Download

Open the door to a world of delightful stories and engaging adventures with the top free books for babies -...

active parents need sturdy active parents need sturdy
Vetted2 months ago

15 Best All Terrain Strollers for Active Parents on the Go

Master the art of navigating any terrain with the top 15 all-terrain strollers for active parents - find your perfect...

books for baby girl books for baby girl
Vetted2 months ago

15 Best Books for a One-Year-Old Baby Girl to Spark Imagination and Wonder

Kickstart your baby girl's love for books with these 15 captivating tales that promise to ignite her imagination and wonder.

top strollers for air travel top strollers for air travel
Vetted2 months ago

15 Best Strollers for Airplane Travel – Making Your Journey Hassle-Free

Yearning for stress-free air travel with your little one? Discover the top 15 strollers designed for seamless journeys, ensuring comfort...

the office baby books the office baby books
Vetted2 months ago

15 Best "The Office" Baby Books Every Fan Will Love

Uncover a treasure trove of 'The Office' inspired baby books that will enchant fans of the show with whimsical stories...

top strollers for parents top strollers for parents
Vetted2 months ago

15 Best Strollers of 2024 for Stylish and Functional Parenting

Kickstart your parenting journey with the top 15 strollers of 2024, offering style and functionality for modern parents - find...

building baby s first library building baby s first library
Vetted2 months ago

15 Best Books for Your Baby's First Library

Jumpstart your baby's love for reading with these top picks for their first library, each offering unique benefits for early...

Trending