
You'll have a blast making a Witch's Broom Cheese Ball for your Halloween party! This spooky appetizer combines cream cheese, cheddar, and blue cheese into a broom shape, complete with pretzel stick bristles. You'll mix the cheeses with herbs and spices, shape the mixture into a broom handle, and coat it with shredded cheese for texture. After chilling, you'll add pretzel sticks for bristles and a long breadstick for the handle. Garnish with fresh herbs for a magical touch. It's not just delicious; it's a fun centerpiece that'll cast a spell on your guests. Discover how to conjure up this bewitching treat with ease.
Key Takeaways
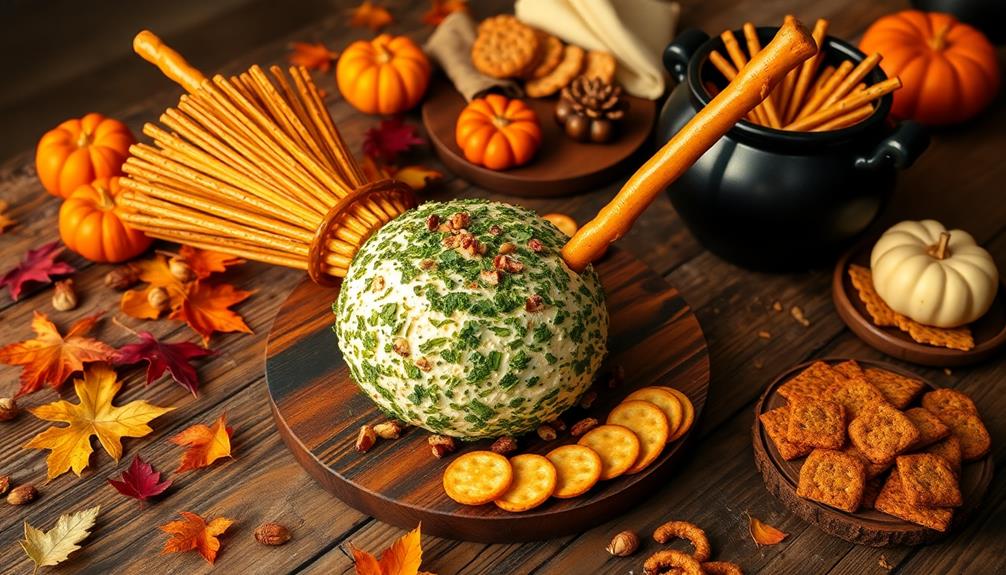
- A festive Halloween appetizer shaped like a witch's broom using cheese and pretzel sticks.
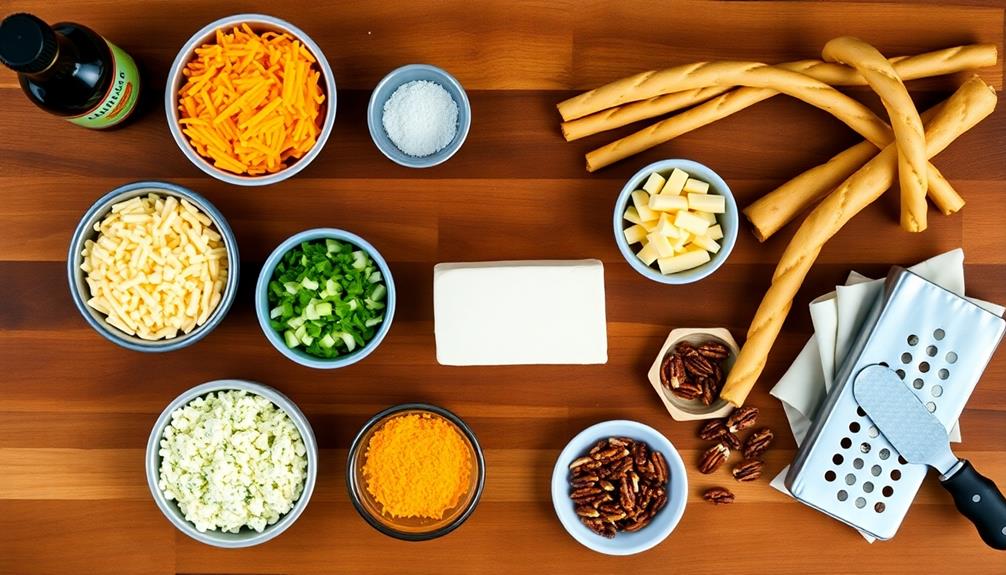
- Made with cream cheese, cheddar cheese, and blue cheese, mixed with herbs and spices.
- Shaped into a broom handle and bristles, then coated with shredded cheese for texture.
- Decorated with pretzel sticks as the broom bristles and a long breadstick for the handle.
- Garnished with fresh herbs for a spooky, forest-like appearance and served as a party centerpiece.

Standing Stone Farms Basic Beginner Cheese Making Kit – Mozzarella, Burrata, Burricota, Chevre, Ricotta, Mascarpone & Butter!
- Includes all ingredients (except dairy): Make 10-15 pounds of cheese
- Quick cheese making process: Preservative-free, non-GMO cheese in 20 minutes
- Comprehensive recipe guide: Includes recipes for Ricotta, Mascarpone, Cottage, Chevre, Cream, Mozzarella
As an affiliate, we earn on qualifying purchases.
As an affiliate, we earn on qualifying purchases.
History

Delving into the history of the Witch's Broom Cheese Ball reveals a relatively recent culinary creation. You'll find that this festive appetizer gained popularity in the late 20th century, particularly during Halloween celebrations.
It's a fun twist on the classic cheese ball, which has been a party staple since the 1940s. The Witch's Broom Cheese Ball combines the savory appeal of a traditional cheese spread with a whimsical presentation.
You might wonder where the idea came from. It's likely that creative home cooks and food bloggers developed this concept as a way to make their Halloween gatherings more memorable. The broom-like appearance, typically created using pretzel sticks, adds a playful touch that's perfect for spooky-themed parties.
While there's no single inventor credited with the Witch's Broom Cheese Ball, you'll notice it's become a popular DIY project. Over the years, you've probably seen various versions pop up in magazines, cookbooks, and online recipes.
Its enduring appeal lies in its simplicity and visual impact, making it a go-to choice for Halloween enthusiasts and cheese lovers alike.
Recipe

This whimsical Witch's Broom Cheese Ball is the perfect appetizer for your Halloween party or autumn gathering. Shaped like a witch's broom, this savory cheese ball combines creamy textures with a delightful blend of flavors that will enchant your guests.
The Witch's Broom Cheese Ball not only tastes delicious but also serves as a festive centerpiece for your Halloween spread. With its broom-like appearance created using pretzel sticks and a decorative handle, this appetizer is sure to cast a spell on both young and old alike.
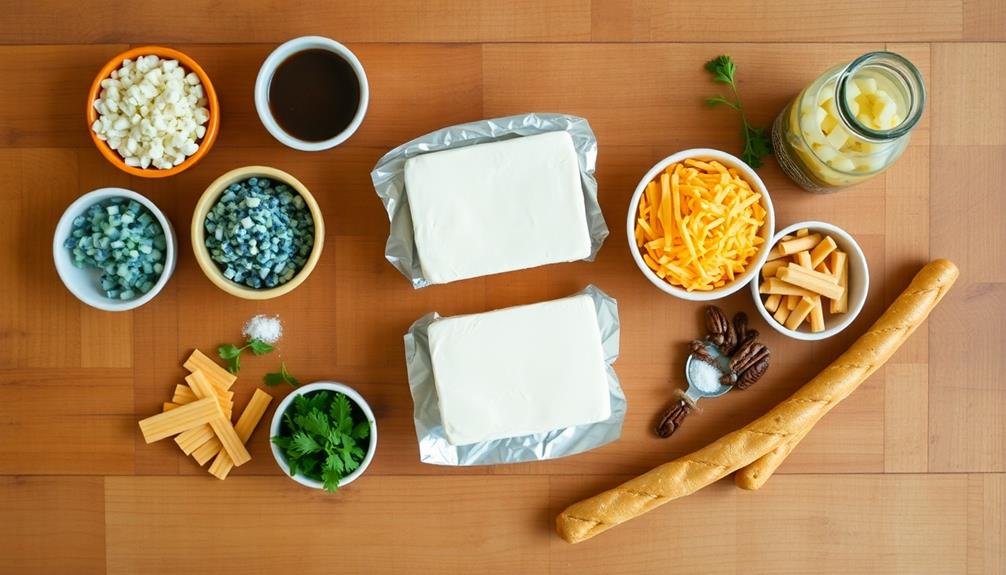
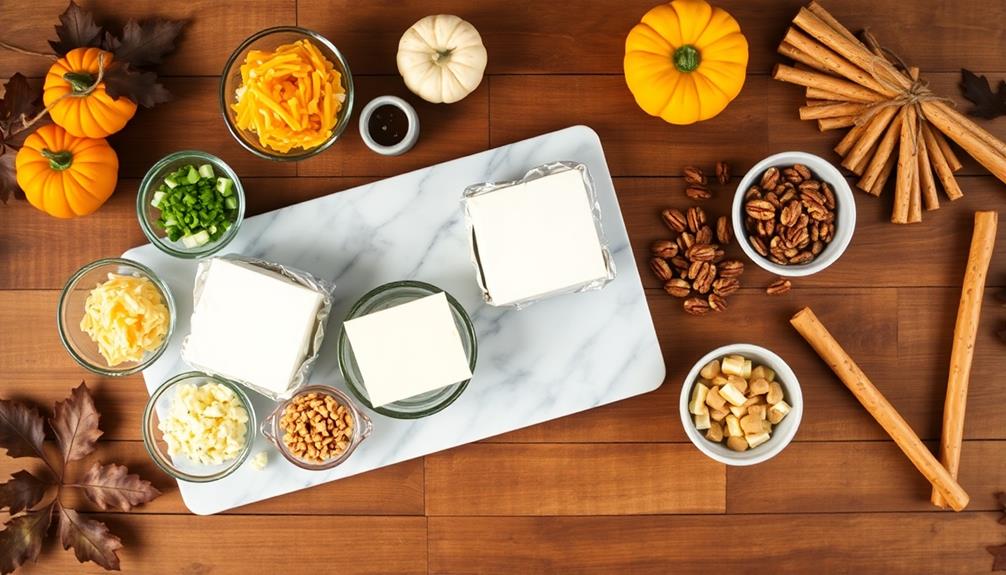
- 16 oz cream cheese, softened
- 2 cups shredded cheddar cheese
- 1/4 cup crumbled blue cheese
- 2 tablespoons minced onion
- 1 tablespoon Worcestershire sauce
- 1/2 teaspoon garlic powder
- 1/4 cup chopped fresh parsley
- 1/4 cup finely chopped pecans
- Pretzel sticks
- 1 long breadstick or twisted bread for the handle
In a large bowl, mix the cream cheese, cheddar cheese, blue cheese, minced onion, Worcestershire sauce, and garlic powder until well combined. Shape the mixture into a long, tapered cylinder to resemble a broom head.
Roll the cheese ball in a mixture of chopped parsley and pecans to coat. Refrigerate for at least 2 hours or overnight. Before serving, arrange pretzel sticks around one end of the cheese ball to create the broom bristles. Insert the breadstick or twisted bread into the other end to form the broom handle.
For best results, allow the cheese ball to soften at room temperature for about 30 minutes before serving. This will make it easier to spread on crackers or bread. You can prepare this cheese ball up to two days in advance, keeping it refrigerated until ready to serve.
For a spooky twist, consider adding a few drops of black food coloring to the cheese mixture or using black sesame seeds in place of the chopped pecans for the coating.
Cooking Steps
To create your witch's broom cheese ball, you'll start by mixing cream cheese with spices and shaping it into a broom handle.
Next, you'll coat the cheese mixture with shredded cheese, giving it a textured, broom-like appearance.
Step 1. Mix Cream Cheese and Spices
Begin by softening the cream cheese at room temperature for about 30 minutes. This'll make it easier to mix and blend with other ingredients.
Once it's soft, place the cream cheese in a large mixing bowl. Now, it's time to add your spices and flavorings. You'll want to include garlic powder, onion powder, and dried herbs like parsley or dill. Don't forget a pinch of salt and pepper to enhance the overall taste.
Using a hand mixer or a sturdy spatula, blend the cream cheese and spices until they're well combined. Make sure to scrape the sides of the bowl as you go, so everything gets mixed evenly.
If you're feeling adventurous, you can add some shredded cheddar cheese or crumbled bacon for extra flavor and texture. Keep mixing until the mixture is smooth and all the ingredients are evenly distributed. This step is crucial for creating a delicious and well-balanced cheese ball.
Once you're satisfied with the consistency and flavor, you're ready to move on to shaping your witch's broom cheese ball.
Step 2. Shape Into Broom Handle

Now that you've mixed your cheese and spices, it's time to shape the broom handle. Start by dividing your cheese mixture into two portions: one-third for the handle and two-thirds for the broom's bristles.
Take the smaller portion and roll it between your hands to form a long, thin cylinder. This will be your broom handle, so aim for a length of about 8-10 inches.
Once you've got the basic shape, place it on a piece of wax paper or a clean cutting board. Use your fingers to gently taper one end, making it slightly thinner to resemble a real broom handle.
If the cheese mixture starts to stick to your hands, you can lightly dust them with flour. Don't worry if it's not perfect – a little unevenness can add to the rustic, witchy charm!
When you're happy with the shape, carefully transfer the handle to a plate and refrigerate it for about 30 minutes. This will help it firm up, making it easier to assemble the complete broom later on.
Step 3. Add Shredded Cheese Coating

While your broom handle chills in the fridge, let's focus on creating that unmistakable bristly texture for your witch's broom.
You'll need about 2 cups of finely shredded cheddar cheese for this step. Spread the cheese on a large plate or shallow dish, creating an even layer.
Once your cheese ball handle is firm, it's time for the fun part!
Take the chilled cheese ball out of the fridge and carefully roll it in the shredded cheese. As you roll, press gently to help the cheese stick to the surface. You'll want to cover the entire "handle" portion, leaving the pointed end bare.
Don't worry if it's not perfect – a slightly messy look adds to the charm of your witch's broom!
If you notice any bare spots, simply sprinkle some extra cheese and pat it into place.
For an extra spooky touch, you can mix in a bit of finely chopped fresh parsley or chives with your shredded cheese. This will give your broom a slightly "moldy" appearance that's perfect for Halloween!
Step 4. Add Pretzel Stick Handle

The final step in creating your witch's broom cheese ball is adding the handle. You'll need a long pretzel stick for this part, so choose one that's sturdy and straight.
Carefully insert the pretzel stick into the narrow end of your cheese ball, pushing it in about halfway. This will serve as the broom's handle, giving your creation its distinctive witch's broom shape.
As you insert the pretzel, be gentle to avoid cracking the cheese ball. If you're worried about the pretzel breaking, you can use a skewer to create a small pilot hole first.
Once the pretzel is securely in place, you might need to reshape the cheese slightly around the stick to maintain the broom's form.
For an extra touch, you can add a small ribbon bow where the pretzel meets the cheese. This isn't just decorative; it'll help hide any imperfections where the stick enters the cheese.
Now your witch's broom cheese ball is complete and ready to cast a spell on your guests' taste buds!
Step 5. Add Herbs for Garnish
Herb garnishes add a final touch of witchy charm to your broom-shaped cheese ball. You'll want to choose herbs that not only look great but also complement the flavors of your cheese mixture. Fresh parsley, chives, and dill are excellent options that'll give your broom a magical, forest-like appearance.
To add the herbs, gently press them into the surface of your cheese ball. Start at the top of the broom's bristles and work your way down, creating a feathery texture. You can use whole herb leaves or chop them finely for a more delicate look.
Don't forget to sprinkle some herbs around the base of your cheese ball to create the illusion of fallen leaves or scattered twigs.
If you're feeling extra creative, you can use different herbs to create patterns or stripes on your broom. Just remember not to overdo it – you want the herbs to enhance the broom shape, not hide it.
Final Thoughts

Creating this Witch's Broom Cheese Ball isn't just about making a tasty appetizer; it's about crafting a memorable Halloween experience. You've now learned how to transform simple ingredients into a spooky, eye-catching centerpiece for your party table.
Remember, the key to success is in the details, from selecting the right cheese blend to carefully shaping and decorating your broom.
Don't be afraid to get creative with your design. You can experiment with different types of pretzels for the broom handle or try various nut coatings for unique textures. If you're serving a crowd, consider making mini versions for easy individual servings.
Keep in mind that you can prepare the cheese ball ahead of time and add the final touches just before your guests arrive.
As you present your Witch's Broom Cheese Ball, watch your friends and family light up with excitement. It's sure to be a conversation starter and might even inspire others to try their hand at Halloween-themed treats.
Most importantly, have fun with the process and enjoy the delicious results of your culinary creativity!
Frequently Asked Questions
Can I Make This Cheese Ball Ahead of Time?
Yes, you can make this cheese ball ahead of time. It's actually better to prepare it in advance, allowing flavors to meld. You'll want to refrigerate it for at least a few hours or overnight before serving.
What Can I Use Instead of Pretzels for the Broom Bristles?
You've got options for broom bristles beyond pretzels. Try using thin breadsticks, crispy bacon strips, or carrot sticks. You can even get creative with stringy vegetables like celery or green onions. Whatever you choose, ensure it's sturdy enough.
Is There a Vegetarian Version of This Halloween-Themed Cheese Ball?
You can make a vegetarian version easily. Simply swap out any meat-based ingredients for plant-based alternatives. Use vegan cream cheese, omit bacon, and add extra veggies or nuts for texture. Don't forget to use vegetarian-friendly crackers too!
How Long Can the Witch's Broom Cheese Ball Sit Out at Room Temperature?
You shouldn't leave your cheese ball out for more than 2 hours at room temperature. It's best to serve it chilled and refrigerate any leftovers promptly. If it's hot outside, reduce the time to 1 hour.
Can I Freeze Leftover Cheese Ball Mixture for Future Use?
You can freeze leftover cheese ball mixture for future use. It's a great way to save time and reduce waste. Simply wrap it tightly in plastic wrap and aluminum foil before freezing. It'll keep for up to 1 month.