Make mouth-watering yogurt melts easily by blending yogurt with fruits and freezing it into bite-sized drops. Enjoy these healthy snacks as a delicious treat. For more ideas and recipes, explore the full details.
Key Takeaways
- Customizable for baby's preferences and dietary needs.
- Provides essential nutrients for healthy growth and development.
- Made with natural ingredients for a safe and wholesome snack.
- Supports bone health, gut health, and overall well-being.
- Encourages healthy eating habits from an early age.

Amyandone Mini Round Silicone Molds, 148 Cavities Semi Sphere Chocolate Candy Mold for Baking and Freezing Chocolate Chip/Gumdrop/Cookie/Dog Treat/Cake Decor/Fruit Snack (with a Scraper)
- Food Grade Silicone: BPA-free, heat resistant from -4℉ to 446℉
- Easy to Use & Clean: Simple demolding and cleaning with included scraper
- Multi-Purpose Use: Suitable for chocolates, candies, treats, and crafts
As an affiliate, we earn on qualifying purchases.
As an affiliate, we earn on qualifying purchases.
Ingredients You Need
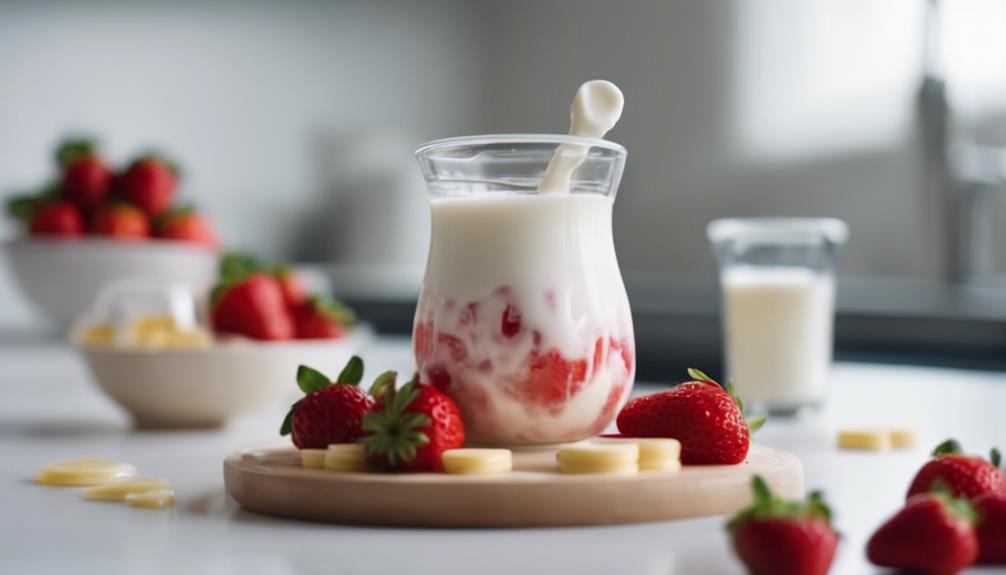
You'll need baby yogurt or plain whole milk Greek yogurt for making homemade yogurt melts. These melts are a perfect snack for babies and toddlers.
To add a fruity twist, consider using a banana yogurt puree to enhance the flavor of the melts. Stonyfield baby yogurt is a popular choice for this recipe, ensuring a creamy and nutritious base. Opting for a no-added-sugar yogurt makes these treats a healthier option for your little one.
Making homemade yogurt melts is easy. Simply spread the yogurt onto parchment paper in small, bite-sized drops. Once frozen, they become a convenient and mess-free snack that your baby will love.
The ingredients for these melts are simple and easily accessible, making it a stress-free recipe for busy parents. Enjoy the satisfaction of providing your child with a wholesome and delicious treat by whipping up a batch of these homemade yogurt melts today.
Step-by-Step Process

To create these homemade yogurt melts, start by mixing or blending roughly half a cup of plain whole milk Greek yogurt with about two tablespoons of fruit or a baby food puree.
Here's an easy step-by-step process to make these nutritious baby snacks:
- Prepare the Mixture: Combine the plain whole milk Greek yogurt with your chosen fruit(s) or baby food puree in a bowl. Mix or blend until smooth.
- Fill the Bag: Spoon the yogurt mixture into a plastic bag. Seal the bag and snip off a tiny corner to create a makeshift piping bag.
- Pipe the Drops: Squeeze small drops of the mixture onto a nonstick tray or a pan lined with parchment paper. Make sure to space them out evenly.
- Freeze and Store: Place the tray in the freezer for 1-2 hours until the drops are solid. Once frozen, transfer the yogurt melts to an airtight container and store them in the freezer. Thaw briefly before serving to soften.
Enjoy this homemade and nutritious snack for your little one!
Recipe Inspiration

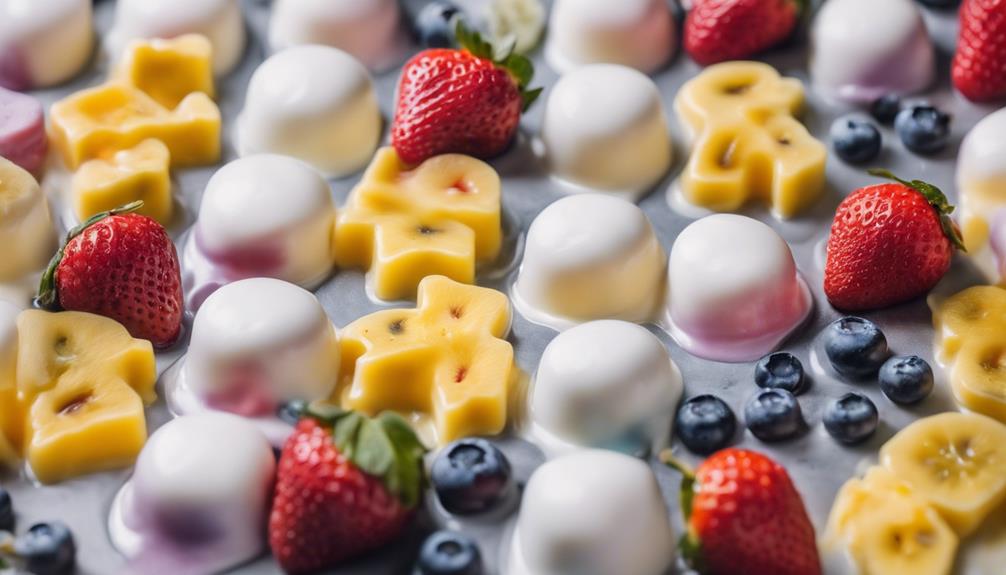
Looking for a burst of flavor in your homemade yogurt melts? Experiment with a variety of flavor options like raspberries, strawberries, pumpkin & cinnamon, mango, and more to tantalize your taste buds.
Use silicone molds to create fun shapes such as stars or gummy bears with your easy homemade yogurt snacks. Get creative and try different fruit combinations like mango and raspberry or strawberry and banana to customize the taste of your yogurt melts.
For a unique twist, consider incorporating flavors like pumpkin & pear puree or maqui berry puree into your homemade yogurt melts. These unexpected combinations can elevate the taste experience and provide a burst of freshness.
If you're feeling adventurous, explore savory options available for yogurt melts. Try out flavors like garlic and herb or tomato and basil for a savory snack that's both delicious and nutritious.
Let your creativity flow and experiment with various combinations to find your favorite homemade yogurt melt recipe.
Serving Homemade Yogurt Melts

Thaw the homemade yogurt melts briefly before serving to guarantee a softer texture.
When it comes to serving these delightful treats to your baby or toddler, consider the following tips:
- Serve small portions: Offering small portions at a time not only prevents quick melting but also helps minimize any potential mess.
- Best enjoyed at home: Due to their quick melting nature, homemade yogurt melts are best enjoyed in a controlled environment, making them a perfect snack option for babies.
- Suitable for babies around 10 months old: These yogurt melts are specifically designed for babies, ensuring they're both delicious and nutritious for your little one.
- Consider on-the-go snacking: For busy days, you might want to try Amara's organic toddler yogurt melts, which provide a convenient and tasty option for snacking while out and about.
Storage Tips

To maintain the freshness of your homemade yogurt melts, remember to store them in an airtight container after freezing.
Using glass containers in the freezer is ideal for preserving the texture and taste of your yogurt melts.
Consider these tips to guarantee your yogurt melts stay delicious for up to a week.
Freezing Instructions
For optimal freshness, freeze your homemade yogurt melts on a baking sheet until solid for about 1-2 hours. This initial step helps maintain the shape and integrity of your delectable baby snack.
Once frozen, follow these steps to make sure your yogurt melts remain tasty and nutritious:
- Remove the frozen yogurt bites from the baking sheet.
- Store them in an airtight container or freezer bag to prevent freezer burn and preserve their creamy texture.
- When ready to enjoy, thaw the yogurt melts at room temperature for 3-5 minutes. This brief period allows them to soften slightly for a delightful eating experience.
- Avoid stacking the yogurt melts when storing to prevent them from sticking together. This way, you can easily grab a single piece without any hassle.
Airtight Container Storage
Store your homemade yogurt melts in an airtight container to preserve their freshness and quality. Using a glass container is recommended for proper storage as it helps prevent freezer burn and maintains the quality of the melts. Storing the yogurt melts in an airtight container can also extend their shelf life, ensuring you have delicious snacks ready for your little one. Make sure the container is sealed tightly to preserve the texture and flavor of the yogurt melts effectively.
| Key Points | Details |
|---|---|
| Airtight Container | Use an airtight container to maintain freshness and quality. |
| Glass Container | Opt for a glass container for storing yogurt melts effectively. |
| Proper Storage | Proper storage prevents freezer burn and maintains melt quality. |
Sweetener Options

When selecting sweeteners for your homemade yogurt melts, think about using natural alternatives such as maple syrup or agave instead of honey for babies under 1 year old.
Accuracy in your measurements is crucial to preserve the correct balance of flavors in your treats.
Explore various sweeteners or fruit purees to introduce diversity and accommodate your child's taste preferences.
Sweetener Choices
Consider incorporating maple syrup or agave as sweetener options in your homemade yogurt melts for babies under 1 year old to prioritize safety. When choosing sweeteners for your baby's snacks, it's essential to avoid honey due to the risk of botulism. Instead, opt for natural alternatives like maple syrup or agave to guarantee the utmost safety for your little one.
Here are some key points to keep in mind when selecting sweeteners for your homemade yogurt melts:
- Substitute honey: Swap out honey for maple syrup or agave in your baby's snacks to prevent the risk of botulism.
- Proper measurements: Ensure you use the correct amount of sweetener, whether it's honey, maple syrup, or agave, to maintain the right balance of sweetness in the yogurt melts.
- Alternative sweeteners: Explore alternative sweeteners like maple syrup or agave to provide a safe and delicious treat for your baby.
- Natural options: Choose natural sweeteners such as maple syrup or agave to sweeten your homemade yogurt melts, keeping them healthy and nutritious for your little one.
Natural Coloring Options
Enhance the visual appeal of your homemade yogurt melts by incorporating natural coloring options like blue spirulina powder, turmeric, and beetroot powder. These alternatives provide vibrant colors without the use of artificial food coloring, making them safe for babies under 1 year old. Experimenting with these natural colorings not only adds visual appeal but also guarantees that your little one's snacks are healthy and free from harmful additives.
When sweetening yogurt melts for babies under 1 year old, opt for natural sweeteners like maple syrup or agave instead of honey. This choice helps reduce the risk of botulism, a rare but serious illness that can affect infants. By using these safer alternatives, you can still add a touch of sweetness to your homemade yogurt melts while prioritizing your baby's health and well-being.
Enjoy the benefits of natural coloring options in your snacks, knowing that you're providing a delicious and nutritious treat for your little one.
Frequently Asked Questions
Are Homemade Yogurt Melts Safe for Babies?
Yes, homemade yogurt melts are safe for babies when made correctly. Make sure they are frozen solid to prevent choking. Thaw slightly before serving. Supervise your baby while they enjoy to avoid mishaps. Introduce around 9-10 months.
Is Homemade Yogurt Good for Babies?
You might wonder if homemade yogurt is good for your baby. It sure is! Packed with nutrients like calcium and probiotics, homemade yogurt is a fantastic choice to support your baby's growth and digestion.
Why Are Gerber Yogurt Melts so Good?
Gerber Yogurt Melts are so good because they are made with real yogurt and fruit purees, offering a tasty and nutritious snack for babies. They promote independence, support bone growth, aid digestion, and are convenient for busy parents.
What to Mix With Yogurt for Babies?
To create a tasty treat for your little one, mix plain whole milk Greek yogurt with fruit or baby food puree. Experiment with different flavors and freeze the drops for a nutritious snack.
Conclusion
In the kitchen, as you scoop up a handful of homemade yogurt melts, you're holding a little piece of nourishment and love for your baby. These delicious treats symbolize the care and effort you put into providing healthy snacks for your little one.
Enjoy the satisfaction of knowing you're giving your child a nutritious and tasty snack made with your own hands. Here's to happy snacking!