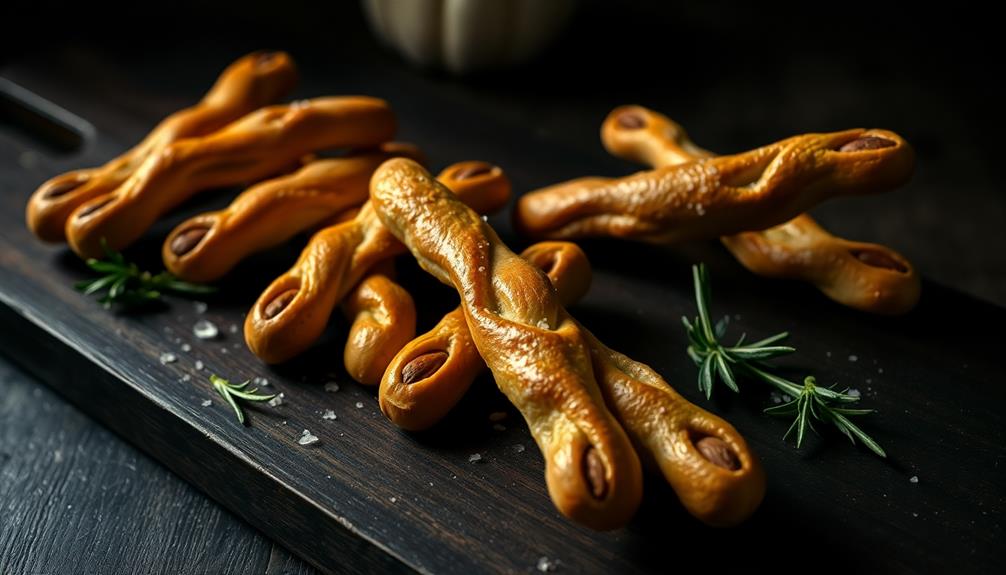
Bone-chilling chicken fingers are a spooky twist on a classic favorite, perfect for Halloween parties or themed dinners. You'll start with regular chicken strips, but the magic happens in the coating. Using activated charcoal powder mixed into the breading, you'll create pitch-black chicken fingers that look eerily delicious. The process is similar to making traditional chicken fingers: dip in flour, egg wash, and then the charcoal-infused breadcrumbs before frying. Serve them with creatively named dipping sauces like "blood-red marinara" or "ghoulish green avocado dip" for extra fun. With a crispy exterior and juicy interior, these chicken fingers are sure to be a hit. Curious about the full recipe and history?
Key Takeaways
- Bone-Chilling Chicken Fingers are Halloween-themed chicken strips with a dark, crunchy breading for an eerie appearance.
- Activated charcoal powder is used to achieve a deep black color in the coating.
- The recipe follows traditional chicken finger preparation with a spooky twist in appearance and presentation.
- Flavorful seasonings enhance taste while maintaining the visually scary appeal of the dish.
- Creative dipping sauces like "blood-red marinara" complement the Halloween theme and enhance the overall experience.

Viva Doria Activated Charcoal Powder, Hardwood Derived, Food Grade, 4 Oz
In the natural products industry, activated charcoal is used for general body detox, digestive cleansing, face masks, food…
As an affiliate, we earn on qualifying purchases.
As an affiliate, we earn on qualifying purchases.
History
Chicken fingers, a staple of American comfort food, have a surprisingly recent history. You might think they've been around forever, but they actually emerged in the 1970s. Fast food restaurants were looking for new ways to serve chicken, and the finger-shaped cuts became an instant hit.
You'll find that the popularity of chicken fingers skyrocketed in the 1980s. They quickly became a favorite on kids' menus across the country. Parents loved them because they were easy for children to eat, and kids enjoyed the fun shape and crispy texture.
Soon, you'd see chicken fingers popping up in school cafeterias, diners, and even upscale restaurants.
As you explore the history of this dish, you'll discover that it's evolved over time. Chefs have experimented with different coatings, from traditional breadcrumbs to crushed cornflakes.
They've also created various dipping sauces to complement the flavors. Today, you can find chicken fingers in countless variations, from spicy buffalo-style to honey-mustard glazed.
It's a simple dish that's stood the test of time and continues to be a crowd-pleaser.

Chefmaster Coal Black Liqua-Gel® Food Coloring | Vibrant Color | Professional-Grade Dye for Icing, Frosting, Fondant | Baking & Decorating | Fade-Resistant | Easy-to-Use | Made in USA | 2.3 oz
Eye-Catching Color Premium blends add vivid, rich, fade-resistant, true-to-shade colors that are made specially for your baking and…
As an affiliate, we earn on qualifying purchases.
As an affiliate, we earn on qualifying purchases.
Recipe
Bone-Chilling Chicken Fingers are a spooky twist on the classic comfort food, perfect for Halloween parties or any eerie-themed gathering. These crispy, tender chicken strips are coated in a dark, crunchy breading that gives them an otherworldly appearance, while still maintaining their delicious flavor.
The secret to achieving the bone-chilling look lies in the use of activated charcoal powder, which turns the breading a deep black color. Combined with a mix of seasonings, these chicken fingers not only look eerily captivating but also pack a flavorful punch that will have your guests coming back for more.
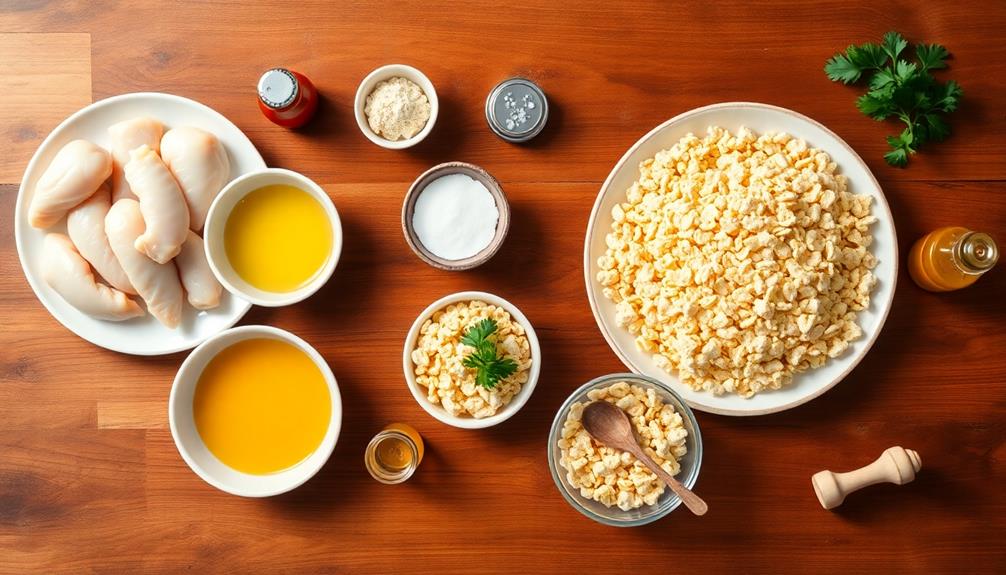
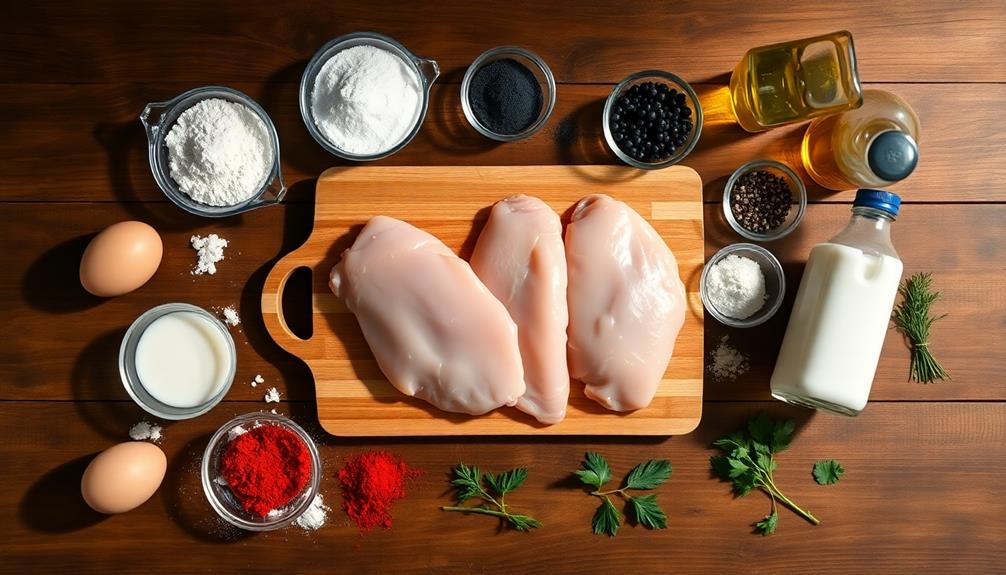
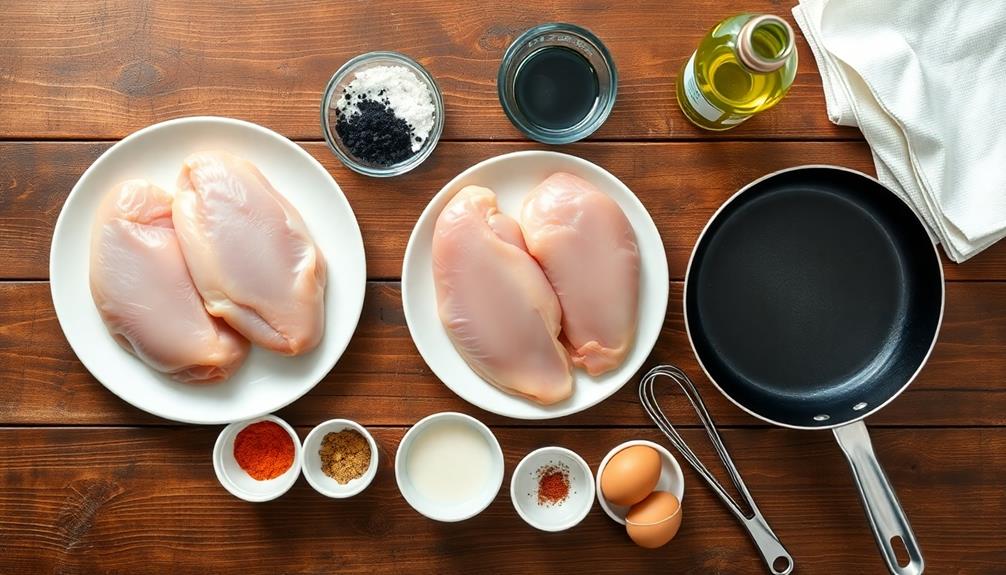
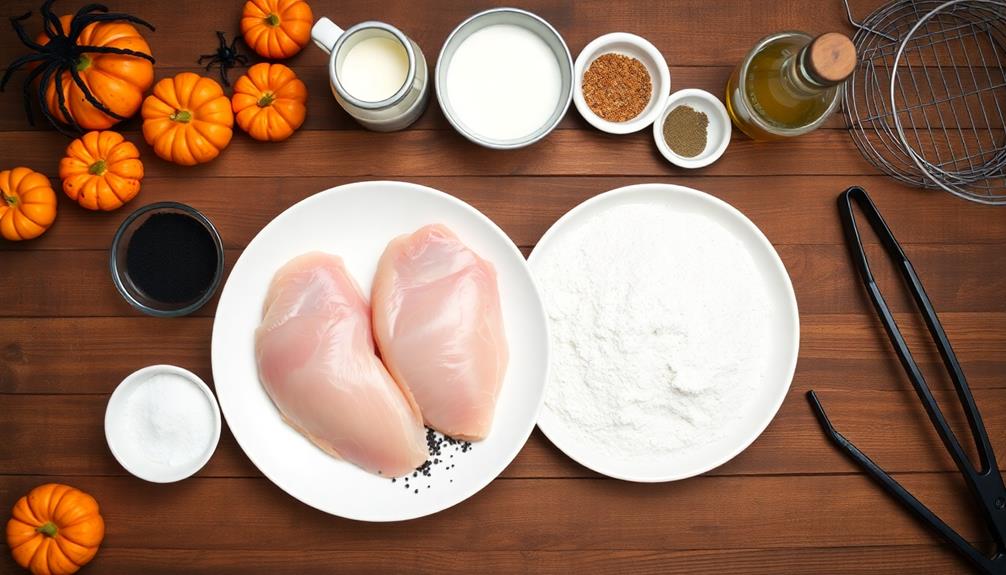
- 2 lbs boneless, skinless chicken breasts
- 2 cups all-purpose flour
- 2 tablespoons activated charcoal powder
- 1 tablespoon garlic powder
- 1 tablespoon onion powder
- 1 teaspoon paprika
- 1 teaspoon salt
- 1/2 teaspoon black pepper
- 2 large eggs
- 1/4 cup milk
- Vegetable oil for frying
To prepare the Bone-Chilling Chicken Fingers, start by cutting the chicken breasts into strips. In a shallow dish, mix the flour, activated charcoal powder, and seasonings. In another dish, whisk together the eggs and milk.
Dip each chicken strip into the egg mixture, then coat it thoroughly in the charcoal-flour mixture. Heat oil in a large skillet over medium-high heat and fry the coated chicken strips for 3-4 minutes on each side, or until golden brown and cooked through. Drain on paper towels before serving.
For best results, make sure the oil is hot enough before frying to ensure a crispy exterior. If you're concerned about the use of activated charcoal, you can substitute it with black food coloring, though the effect may not be as dramatic.
Serve these spooky chicken fingers with a variety of dipping sauces, such as ranch dressing tinted green for a "toxic slime" effect, or a blood-red marinara sauce for added Halloween flair.
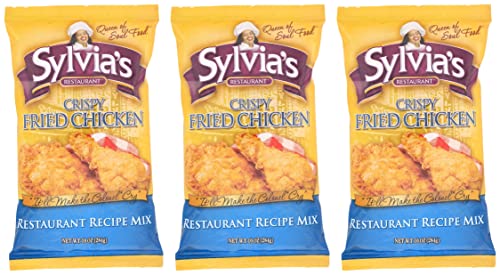
Sylvia’s Crispy Fried Chicken Mix, Chicken Fry Seasoning Mix for Perfect Fried Chicken, Make Crispy Fried Chicken at Home, 10oz bag (Pack of 3)
PERFECT FRIED CHICKEN, EVERY TIME: With Sylvia’s tried and tested chicken seasoning mix, you can make restaurant-style crispy…
As an affiliate, we earn on qualifying purchases.
As an affiliate, we earn on qualifying purchases.
Cooking Steps

You'll begin the cooking process by dipping your chicken pieces in seasoned flour, then into an egg wash, and finally coating them in a breadcrumb mixture.
Next, you'll carefully fry the coated chicken in hot oil until it's golden brown and crispy.
Once they're done, you'll want to drain your chicken fingers on paper towels to remove any excess oil, making them perfectly crispy on the outside and juicy on the inside.
Step 1. Dip Chicken in Seasoned Flour

Once you've prepared your seasoned flour mixture, it's time to coat the chicken. Take each chicken strip and dip it into the flour, making sure it's evenly covered on all sides.
You'll want to gently shake off any excess flour to prevent clumping. This step is crucial for achieving that perfect crispy exterior we all love.
As you're coating the chicken, you might notice the flour mixture sticking to your fingers. Don't worry, that's normal! Just keep a clean, dry towel nearby to wipe your hands occasionally.
Remember, the key is to create a thin, even layer of flour on each piece of chicken. If you find some spots aren't fully covered, give them another quick dip.
Once all your chicken strips are coated, place them on a clean plate or baking sheet. You'll notice they've a dusty, pale appearance – that's exactly what you want at this stage.
The flour coating will transform into a golden, crispy shell during cooking. Now you're ready for the next exciting step in creating your bone-chilling chicken fingers!
Step 2. Dip Chicken in Egg Wash
After coating your chicken strips in seasoned flour, it's time for the egg wash. This step is crucial for creating that perfect, crispy exterior on your chicken fingers. You'll need a couple of eggs and a splash of milk or water.
Crack the eggs into a shallow bowl and add about a tablespoon of liquid. Whisk the mixture until it's well combined and slightly frothy.
Now, take each floured chicken strip and dip it into the egg wash. Make sure it's completely coated, allowing any excess to drip off. The egg wash acts like glue, helping the next layer of coating stick to the chicken. It also adds moisture, which will keep your chicken fingers juicy on the inside.
As you dip each piece, try to use one hand for the dry ingredients and one for the wet. This will help prevent your fingers from getting too messy and clumpy.
Once all your chicken strips are coated in egg wash, you're ready for the final step in creating your bone-chilling chicken fingers!
Step 3. Coat in Breadcrumb Mixture

The final coating is where your chicken fingers truly come to life. After dipping each piece in the egg wash, it's time to give them their crispy exterior.
Pour your breadcrumb mixture onto a large plate or shallow dish. You'll want to use seasoned breadcrumbs for extra flavor, but plain ones work too if you've added your own spices.
Take each egg-coated chicken strip and gently press it into the breadcrumbs. Make sure you're covering every bit of the chicken, including the sides. You can even use your fingers to pat the crumbs onto any bare spots.
Don't be afraid to really pack on those breadcrumbs – they're what'll give your chicken fingers that satisfying crunch.
Once you've coated a piece, give it a little shake to remove any excess crumbs, then place it on a clean plate. Repeat this process with all your chicken strips.
If you run low on breadcrumbs, just add more to your dish. When you're done, you'll have a plate full of uncooked chicken fingers ready for the next step: frying or baking.
Step 4. Fry in Hot Oil
Sizzling oil awaits your breaded chicken fingers. It's time to fry these spooky treats to crispy perfection. First, make sure your oil is hot enough by testing it with a small piece of bread. If it bubbles and browns quickly, you're good to go.
Carefully lower your chicken fingers into the oil using tongs, making sure not to overcrowd the pan. You'll hear that satisfying sizzle as they hit the oil.
Keep an eye on your chicken as it cooks, turning it occasionally to ensure even browning. The outside should turn a golden-brown color, while the inside cooks through. This usually takes about 3-4 minutes per side, but cooking times may vary. If you're unsure, you can use a meat thermometer to check that the internal temperature reaches 165°F (74°C).
Once your chicken fingers are done, remove them from the oil and place them on a paper towel-lined plate to drain excess oil. Let them cool for a minute or two before serving.
Your bone-chilling chicken fingers are now ready to give your taste buds a frighteningly good experience!
Step 5. Drain on Paper Towels

Now that your chicken fingers are golden-brown and crispy, it's time to give them a quick pat down. Using a slotted spoon or tongs, carefully remove the chicken fingers from the hot oil and transfer them to a plate lined with paper towels. This step is crucial for achieving the perfect texture and taste.
The paper towels will absorb any excess oil from the chicken fingers, ensuring they're not greasy when you bite into them. Let them rest for about a minute, allowing the oil to drain off. You'll notice the paper towels becoming slightly oily – that's a good sign! It means you're getting rid of unnecessary grease.
While the chicken fingers are draining, you can prepare your serving plate or basket. Line it with a fresh paper towel to catch any remaining oil.
Once the minute is up, gently transfer the chicken fingers to your prepared serving dish. They should now feel less oily to the touch and have a satisfying crunch when you pick them up. Your bone-chilling chicken fingers are almost ready to serve – just a few more steps to go!
Rasta Imposta Chick-n-Dip Sauce Packet Halloween Costume Chicken Dipping Condiment Funny Dress Up Mens Womens Costume, Adult One Size
WE'VE GOT YOU COVERED: Get your sacue on at your next event, party or festival! This Chick-n-Dip Sauce…
As an affiliate, we earn on qualifying purchases.
As an affiliate, we earn on qualifying purchases.
Final Thoughts

Don't be afraid to experiment with different seasonings or dipping sauces to complement your bone-chilling creation.
You could try a blood-red marinara or a ghoulish green avocado dip for added Halloween flair.
If you're serving these at a party, consider presenting them in a mock skeleton hand or arranging them to look like they're crawling out of a grave-shaped platter.
Lastly, always prioritize food safety.
Make sure your chicken is cooked thoroughly, and don't leave the fingers out at room temperature for too long.
With these tips in mind, you're ready to serve up a spine-tingling treat that'll have your guests coming back for seconds.
Happy haunting in the kitchen!
Frequently Asked Questions
Are Bone-Chilling Chicken Fingers Safe for Children to Eat?
You shouldn't worry about chicken fingers being unsafe for kids. They're typically made from boneless chicken breast, which is safe when properly cooked. Just ensure they're heated thoroughly and served at an appropriate temperature for children.
Can I Use Frozen Chicken Tenders for This Recipe?
You can definitely use frozen chicken tenders for this recipe. They'll work just fine, but make sure you thaw them completely before cooking. You'll also want to adjust your cooking time accordingly to ensure they're thoroughly cooked through.
What Dipping Sauces Pair Well With Bone-Chilling Chicken Fingers?
You'll love pairing these chicken fingers with classic options like honey mustard, BBQ sauce, or ranch dressing. For a spooky twist, try a blood-red marinara or a green avocado dip. Don't forget sweet chili sauce for extra kick!
How Long Do Leftovers Last in the Refrigerator?
You'll want to eat your leftovers within 3-4 days for best quality and safety. Don't forget to refrigerate them promptly after cooling. If you're unsure, use your senses and when in doubt, throw it out.
Can I Make These Chicken Fingers Gluten-Free?
Yes, you can make gluten-free chicken fingers. Simply substitute regular flour with gluten-free alternatives like almond flour, coconut flour, or a gluten-free all-purpose blend. You'll also need to use gluten-free breadcrumbs or crushed gluten-free crackers for coating.