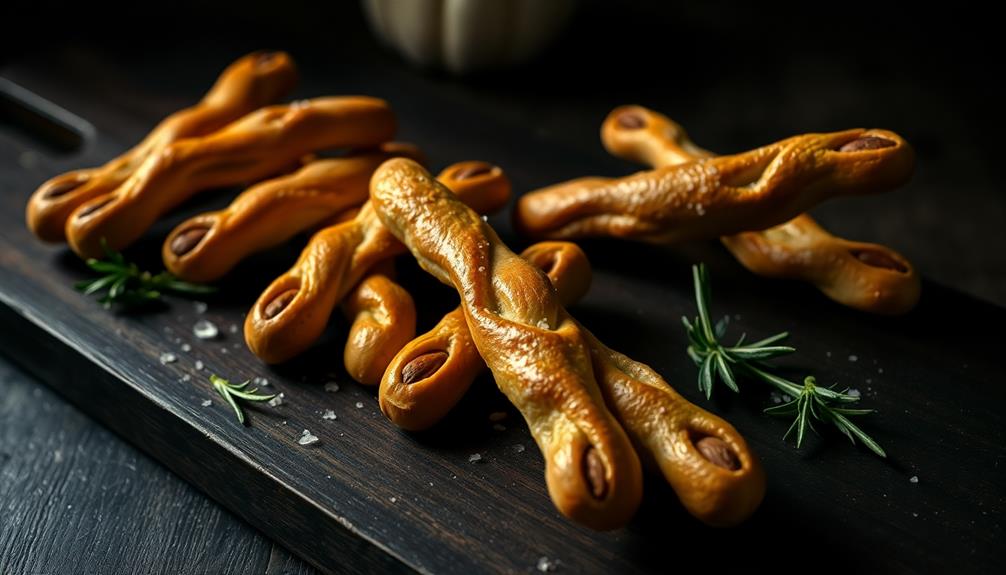
Graveyard Dirt Cake is a spooky, no-bake dessert perfect for Halloween parties. You'll layer crushed chocolate cookies, creamy pudding, and whipped topping to create a miniature graveyard scene. It's easy to make and fun to decorate with gummy worms, candy pumpkins, and cookie tombstones. The recipe originated in the 1980s and has since become a Halloween favorite. You can customize it with different toppings and even make individual servings in clear cups. Kids love helping with the decorations, and adults enjoy the nostalgic treat. The flavors meld beautifully after chilling, making it even tastier. Prepare to unearth more ghoulish details about this creepy confection!
Key Takeaways
- Graveyard Dirt Cake is a no-bake Halloween dessert layering crushed chocolate cookies, pudding, and cream cheese mixture.
- Key ingredients include chocolate sandwich cookies, cream cheese, instant pudding mix, and Halloween-themed candies for decoration.
- The dessert resembles a miniature graveyard, often featuring gummy worms and cookie "tombstones" for a spooky effect.
- Preparation involves crushing cookies, mixing pudding, layering ingredients, and refrigerating for at least 2 hours before serving.
- Creativity in presentation is encouraged, with options for individual servings in clear cups or a larger, decorative graveyard scene.

JarThenaAMCS 100 Pcs Halloween Snack Cups Pumpkin Skull Spider Web Dots Disposable Bowls 9oz Ice Cream Dessert Treat Paper Bowls for Hot Iced Food Birthday Trick or Treat Party Supplies
- Package Includes: 100 Halloween-themed snack bowls
- Designs: Pumpkins, skulls, spiders, and more
- Material: Sturdy, oil-proof paper with coating
As an affiliate, we earn on qualifying purchases.
As an affiliate, we earn on qualifying purchases.
History

Despite its ghoulish name, graveyard dirt cake has no actual connection to cemeteries. This fun and spooky dessert actually originated in the 1980s as a Halloween-themed treat. You'll find that it's become a popular choice for parties and gatherings, especially during the fall season.
The cake's history is rooted in the creativity of home cooks who wanted to make something special for Halloween. They took inspiration from the classic dirt cake, which usually features crushed cookies to resemble soil. To give it a spooky twist, they added gummy worms and candy decorations to mimic a graveyard scene.
Over time, you've probably noticed that the recipe has evolved. People have added their own touches, like using different types of cookies or adding unique toppings. Some versions even include small tombstone-shaped cookies or candy pumpkins.
While it's not an ancient tradition, graveyard dirt cake has quickly become a beloved part of modern Halloween celebrations. You'll often see it at school parties, family gatherings, and Halloween-themed events, delighting both kids and adults with its playful appearance and tasty ingredients.
Recipe

Graveyard Dirt Cake is a delightfully spooky dessert that's perfect for Halloween parties or any occasion where you want to add a touch of playful macabre to your menu. This no-bake treat combines layers of crushed chocolate cookies, creamy pudding, and whipped topping to create a dessert that resembles a miniature graveyard.
The beauty of this recipe lies in its simplicity and versatility. You can customize the "graveyard" with various toppings and decorations to make it as eerie or as cute as you'd like. From gummy worms and candy pumpkins to chocolate tombstones and cookie crumb "dirt," the possibilities are endless for creating your own edible spooky scene.
Ingredients:
- 1 package chocolate sandwich cookies
- 1 (8 oz) package cream cheese, softened
- 1/4 cup butter, softened
- 1 cup powdered sugar
- 3 1/2 cups milk
- 2 (3.9 oz) packages instant chocolate pudding mix
- 1 (12 oz) container frozen whipped topping, thawed
- Gummy worms, candy pumpkins, and other Halloween-themed candies for decoration
To prepare the Graveyard Dirt Cake, start by crushing the chocolate sandwich cookies into fine crumbs. In a large bowl, beat cream cheese, butter, and powdered sugar until smooth. In another bowl, whisk milk and pudding mix until thickened.
Fold the whipped topping into the pudding mixture. Layer the ingredients in a clear serving dish or individual cups, starting with cookie crumbs, followed by the cream cheese mixture, and then the pudding mixture. Repeat layers, ending with cookie crumbs on top.
Refrigerate for at least 2 hours before serving. Just before serving, decorate the top with gummy worms, candy pumpkins, and other spooky treats to create your graveyard scene.
For best results, make this dessert at least a few hours in advance to allow the flavors to meld and the cookie crumbs to soften slightly. If you're making individual servings, clear plastic cups work well and allow guests to see the layers.
To create tombstones, use milano cookies decorated with icing, or make your own from fondant or chocolate. Remember, the key to a great Graveyard Dirt Cake is in the presentation, so have fun with the decorations and let your creativity shine!
Cooking Steps

You're ready to bring your spooky dessert to life!
First, you'll crush the chocolate sandwich cookies and mix the pudding with milk.
Then, you'll add the cream cheese mixture, layer the pudding and cookie crumbs, and finally, top it off with some creepy candy decorations.
Step 1. Crush Chocolate Sandwich Cookies

To begin, place the chocolate sandwich cookies in a large resealable plastic bag. Make sure the bag is sealed tightly, pushing out any excess air.
Now, it's time to crush those cookies! You can use a rolling pin or the bottom of a heavy pan to gently press and roll over the bag. As you do this, you'll hear the satisfying crunch of cookies breaking into smaller pieces.
Keep crushing until you've got a mix of fine crumbs and some slightly larger chunks. This variety will give your "dirt" a more realistic texture.
If you're having trouble breaking down some stubborn cookies, you can always open the bag and crush them directly with your hands. Just be sure to wash up first!
Once you're happy with the consistency, pour the crushed cookies into a bowl. Take a moment to check for any large pieces that might've escaped your crushing efforts.
If you find any, simply break them up with your fingers. Your cookie "dirt" is now ready to be used in your spooky graveyard cake!
Step 2. Mix Pudding and Milk

Now it's time to create the creamy base for your graveyard dirt cake. In a large mixing bowl, pour in the instant chocolate pudding mix. Make sure you're using the right amount as specified on the package.
Next, grab your milk and measure out the required quantity. It's important to use cold milk for the best results.
Once you've got your ingredients ready, it's time to mix. Using a whisk or an electric mixer, combine the pudding mix and milk. Start slowly to avoid splashing, then gradually increase your speed.
You'll want to mix for about two minutes, or until the pudding starts to thicken. Don't worry if it seems a bit runny at first; it'll continue to set as it chills.
As you're mixing, keep an eye out for any lumps. If you spot any, give them a good whisk to break them up. Your goal is a smooth, creamy texture that'll blend perfectly with the other ingredients.
Once you're satisfied with the consistency, set the bowl aside. You'll be using this pudding mixture soon to assemble your spooky graveyard dirt cake!
Step 3. Add Cream Cheese Mixture

With the pudding base prepared, it's time to whip up the cream cheese mixture. In a large bowl, combine softened cream cheese, powdered sugar, and a splash of vanilla extract. Use an electric mixer to blend these ingredients until they're smooth and creamy. This step is crucial for achieving that perfect, velvety texture in your dirt cake.
Next, fold in the whipped topping. You'll want to do this gently to maintain the light, airy consistency. As you combine the ingredients, you'll notice the mixture becoming fluffier and more voluminous. This cream cheese blend will add a rich, tangy flavor that complements the chocolate pudding beautifully.
Once your cream cheese mixture is ready, it's time to incorporate it into the pudding. Carefully pour the cream cheese blend over the pudding layer in your serving dish. Use a spatula to spread it evenly, creating a smooth surface.
This layer adds a delightful contrast in both taste and appearance to your graveyard dirt cake. Remember, the key to a great dirt cake is in the layers, so take your time to ensure each one is just right.
Step 4. Layer Pudding and Cookie Crumbs

After preparing the cream cheese mixture, it's time to create the signature layers of your graveyard dirt cake.
Start by grabbing a large, clear glass bowl or a 9×13-inch baking dish. This will be the "graveyard" for your spooky dessert.
Begin with a layer of crushed chocolate cookies, which represent the dirt. Spread about 1/3 of your cookie crumbs evenly across the bottom of the container.
Next, you'll add a layer of the chocolate pudding mixture. Carefully spoon it over the cookie crumbs, making sure to cover them completely. Don't worry if it's not perfect; the imperfections will add to the "dirt" effect.
Now, add a layer of the cream cheese mixture on top of the pudding.
Repeat this layering process: cookies, pudding, cream cheese mixture. Continue until you've used all your ingredients, finishing with a layer of cookie crumbs on top. This final layer will be your graveyard "soil."
Remember to reserve some cookie crumbs for decorating later.
Once you've finished layering, cover the dish with plastic wrap and refrigerate for at least 4 hours, or overnight if possible, to let the flavors meld together.
Step 5. Add Spooky Candy Decorations

The chilled graveyard dirt cake is ready for its spooky transformation. Now it's time to add the eerie decorations that'll make your dessert truly shine.
Start by placing gummy worms around the edges of the cake, letting them peek out from the "dirt" for a creepy-crawly effect. Next, grab some Milano cookies and use icing to write "RIP" on them, creating miniature tombstones. Stick these cookies upright into the cake at various angles for an authentic graveyard look.
Don't forget the ghosts! Use white chocolate-covered almonds or marshmallows to craft tiny specters, and position them around your graveyard.
For a final touch, sprinkle some candy pumpkins or autumn-colored M&Ms across the surface to represent fallen leaves. If you're feeling extra creative, you can make a small path using crushed graham crackers to mimic a walkway through your spooky cemetery.
Final Thoughts

As you wrap up your Graveyard Dirt Cake creation, you'll find it's more than just a dessert—it's a conversation starter and a crowd-pleaser. This spooky treat combines delicious flavors with a fun, creepy appearance that's perfect for Halloween parties or any monster-themed event.
Remember, the key to a great Graveyard Dirt Cake is in the details, so don't be afraid to get creative with your decorations. You can make this dessert ahead of time, which is super helpful when you're planning a party.
It'll taste even better after sitting in the fridge for a few hours, allowing the flavors to meld together. If you have leftovers (which is unlikely!), they'll keep well in the refrigerator for up to three days.
Don't forget to snap a picture of your finished creation before serving—it's sure to be a hit on social media! And most importantly, have fun with the process. Baking should be enjoyable, and this Graveyard Dirt Cake is the perfect way to showcase your culinary creativity while delighting your friends and family.
Frequently Asked Questions
Can I Use Real Dirt Instead of Crushed Cookies for Authenticity?
You shouldn't use real dirt in your dessert. It's not safe to eat and could contain harmful bacteria or parasites. Stick with crushed cookies; they're edible and will give you the desired "dirt" appearance without risking illness.
Is Graveyard Dirt Cake Suitable for Vegetarians or Vegans?
You'll find traditional graveyard dirt cake isn't suitable for vegetarians or vegans. It often contains dairy products and gelatin. However, you can easily adapt the recipe using plant-based alternatives to create a vegan-friendly version you'll love.
How Long Can I Store Leftover Graveyard Dirt Cake?
You can store leftover cake in an airtight container in the fridge for up to 3-4 days. It's best to consume it quickly for optimal taste and texture. Don't leave it at room temperature for long.
Are There Any Alternatives to Gummy Worms for Decoration?
You can use various alternatives to gummy worms for decoration. Try candy rocks, chocolate sprinkles, or crushed cookies for a dirt-like effect. You'll also find that small plastic toys, like spiders or bones, work well for a spooky touch.
Can I Make a Gluten-Free Version of Graveyard Dirt Cake?
Yes, you can make a gluten-free version. You'll need to swap out regular cookies for gluten-free alternatives. Use gluten-free chocolate sandwich cookies for the "dirt" and ensure all other ingredients are gluten-free. It's an easy adaptation!