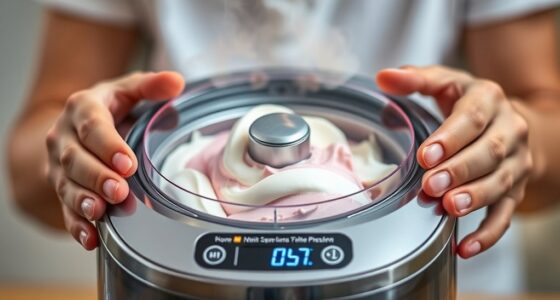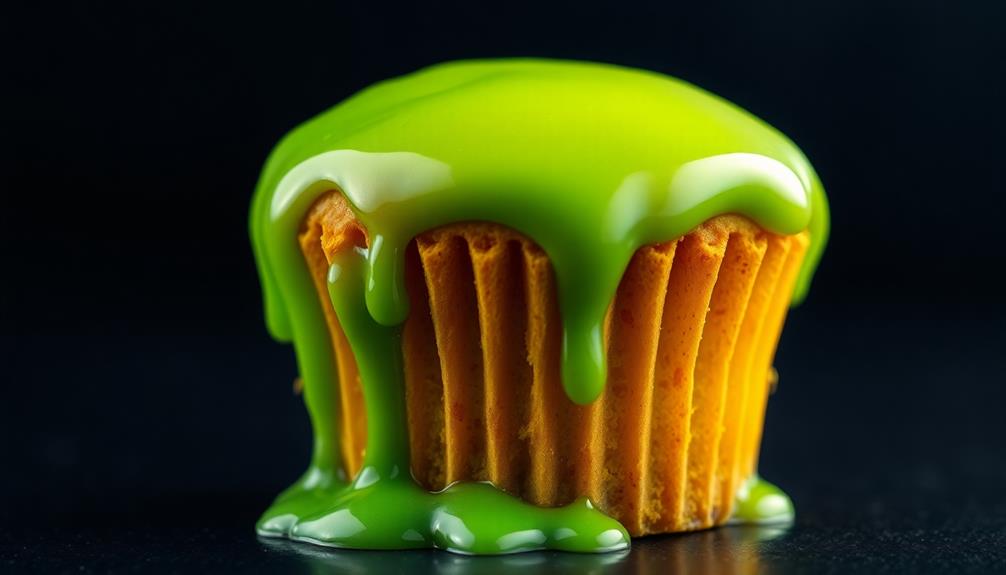
Slime-filled cupcakes are a delightfully spooky and fun treat that have captivated both kids and adults since the 1980s. These vibrant, neon-colored cupcakes feature a hidden pocket of oozing slime inside the golden cake. The key is creating the perfect slime consistency using cornstarch and green food coloring. Bake the cupcakes until they're golden brown, then let them cool to maintain the slime's stretchy texture. Wow your guests by cutting into these otherworldly treats – the bright green filling is sure to delight. Want to learn more about mastering this irresistible dessert?
Key Takeaways
- Slime-Filled Cupcakes originated in the 1980s as a creative baking trend, featuring vibrant, neon-colored gelatin or corn syrup fillings.
- The recipe is easy to make, with the key to success lying in creating a hidden pocket of slime within the cupcake batter.
- Slime-Filled Cupcakes are a fun and spooky treat that appeals to both kids and adults, perfect for Halloween parties or whimsical culinary occasions.
- Achieving the desired slime texture and consistency is crucial for the success of the recipe, requiring thorough mixing and kneading of the slime ingredients.
- Baking Slime-Filled Cupcakes requires attention to detail, such as ensuring accurate oven temperature and avoiding overflow during baking, to maintain the integrity of the slime filling.

Food Coloring Liquid Set – 12 Vibrant Color Food Grade, Food Coloring Gel Concentrated Neon Icing Colors for Cake Decorating, Baking, Easter Egg, Icing, Fondant, Cooking, Slime Making DIY Supplies Kit – 0.35 Fl. oz (10 ml)/Bottles
- Certified Safe and Vegan: FDA and MSDS approved, allergen-free ingredients
- Vibrant, Long-Lasting Colors: 12 highly concentrated, vivid shades
- Easy to Mix and Blend: Water-based formula for seamless shading
As an affiliate, we earn on qualifying purchases.
As an affiliate, we earn on qualifying purchases.
History
The origins of slime-filled cupcakes can be traced back to the 1980s, when creative bakers began experimenting with fun and unconventional fillings. They were inspired by the growing popularity of "gooey" and "oozy" treats, which captured the imagination of young dessert enthusiasts.
At first, these slime-filled cupcakes were a niche offering, found mostly at specialty bakeries and county fairs. The vibrant, neon-colored fillings, often made with gelatin or corn syrup, delighted children and adventurous adults alike.
As the trend gained momentum, home bakers started replicating the recipes, sharing their creations on early food blogs and in community cookbooks.
Today, slime-filled cupcakes have become a beloved classic, with endless variations in flavor and presentation. From spooky Halloween versions to unicorn-inspired pastel swirls, these playful treats continue to evolve, appealing to a wide range of tastes and age groups.
The sticky, messy delight of biting into a cupcake and having the colorful filling ooze out remains a cherished experience for cupcake connoisseurs.
Recipe
Slime-Filled Cupcakes are a fun and spooky treat that are sure to delight both kids and adults. Bright green oozing slime oozes out of the center of these cupcakes, creating a mesmerizing and otherworldly effect.
These cupcakes are easy to make and require just a few simple ingredients. The key is to create a hidden pocket of slime within the cupcake batter that will emerge when the cupcakes are baked. The result is a delightfully gooey and visually striking dessert that's perfect for Halloween parties or any occasion when you want to add a touch of whimsy to your culinary creations.
Ingredients:
- 1 box of yellow cake mix
- Eggs and oil as called for on the cake mix box
- 1 cup of water
- Green food coloring
- 1 cup of cornstarch
- 1 cup of water
Directions:
Preheat your oven to the temperature recommended on the cake mix box. Prepare the cake batter according to the instructions on the box.
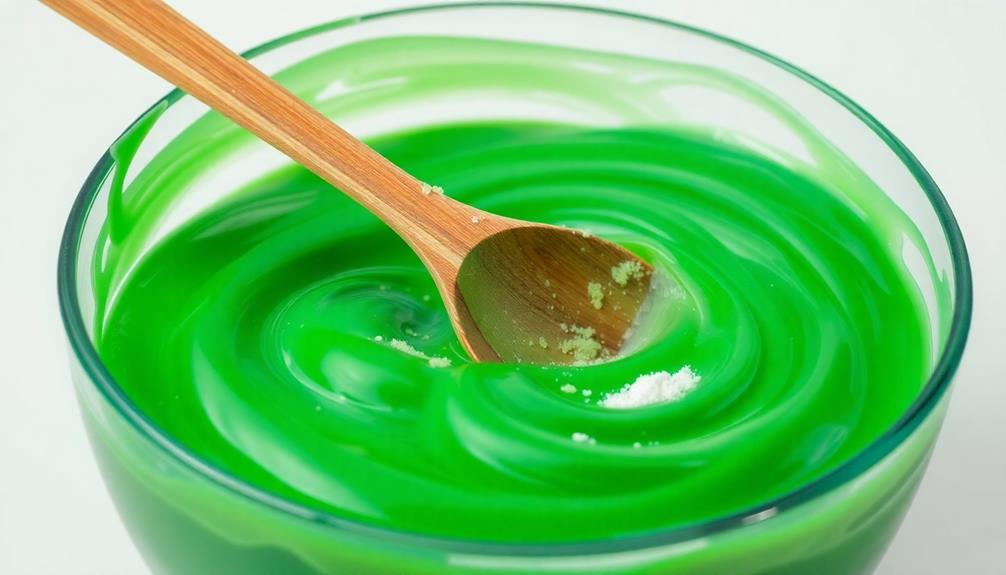
In a separate bowl, mix together the 1 cup of water and the cornstarch to create a thick, gooey slime. Add a few drops of green food coloring to the slime and stir to combine.
Spoon a small amount of the slime into the center of each cupcake liner, then top with the cake batter, covering the slime completely. Bake the cupcakes as directed on the box, until a toothpick inserted into the center comes out clean.
Tips:
Be sure to not overfill the cupcake liners with the slime, as it can cause the cupcakes to overflow while baking. Start with a small amount of slime and add more as needed.
Additionally, the slime can be made in advance and stored in the refrigerator until ready to assemble the cupcakes. This will help the slime maintain its thick, gooey texture.
Cooking Steps
First, preheat your oven to 350°F.
Next, mix the slime ingredients according to the recipe.
Then, carefully fill the cupcake liners with the slime mixture and bake the cupcakes until they're golden brown.
Step 1. Preheat Oven to 350°F
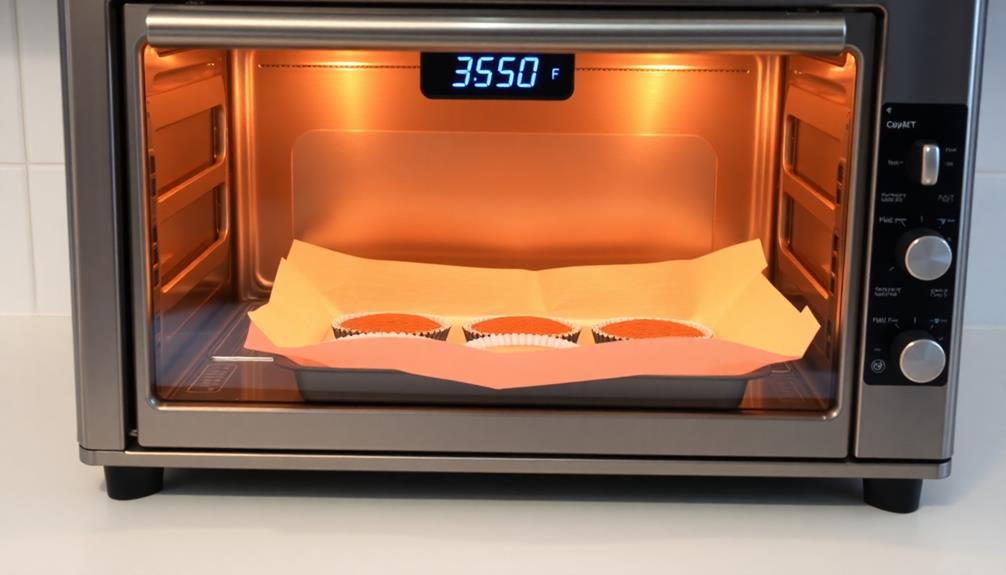
Preheat your oven to 350°F to get started on these delightfully spooky Slime-Filled Cupcakes. This crucial first step ensures your oven is the perfect temperature for baking.
Once it's preheated, your cupcakes will rise and bake evenly, resulting in a fluffy, moist texture. Be sure to use an oven thermometer to double-check the temperature – you want it to be spot-on for the best results.
While your oven is heating up, you can start preparing the other ingredients. Gather your mixing bowls, measuring cups, and cupcake tin so you're ready to go.
Preheating the oven gets the baking process off to a great start, so don't skip this important step. In just a few minutes, you'll have the perfect foundation for your creepy, slime-filled treats.
Step 2. Mix Slime Ingredients
With the oven preheated, it's time to tackle the slime-filled interior of these spooky cupcakes.
In a medium bowl, combine 1/2 cup of clear glue, 1/2 cup of liquid starch, and a few drops of green food coloring. Mix these ingredients together until a thick, gooey slime starts to form.
Be sure to knead the slime with your hands for a couple of minutes, working out any lumps or inconsistencies. The final slime should have a smooth, stretchy texture.
Once you're satisfied with the consistency, divide the slime into equal portions, placing each one in the center of an unbaked cupcake. Gently press the slime down, leaving a bit of room around the edges for the cake batter.
With the slime centers ready, you can now move on to pouring the cupcake batter over top, ensuring the slime is fully encased.
Get ready for a ghoulishly good surprise when these cupcakes are served!
Step 3. Fill Cupcake Liners With Slime
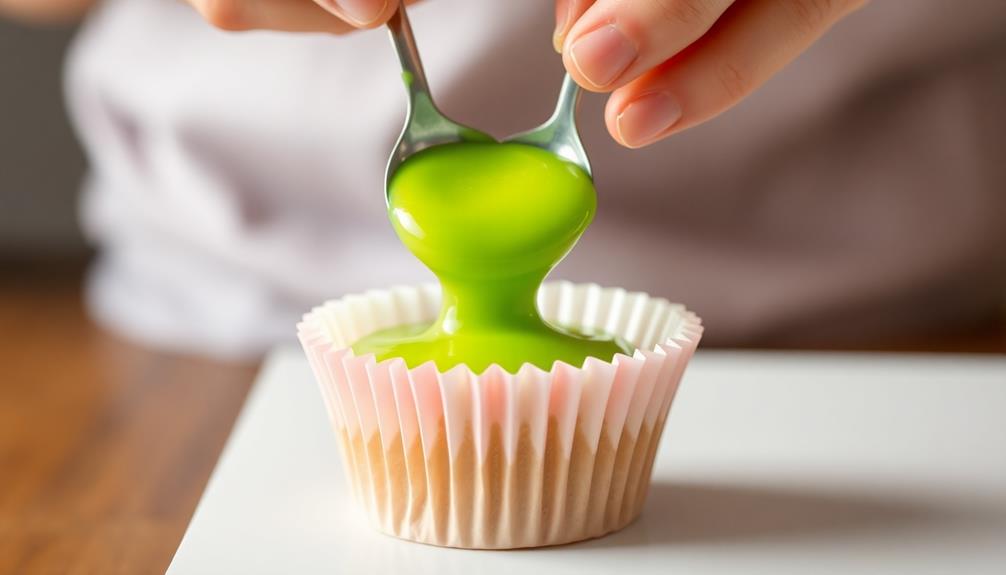
Grab your cupcake liners and get ready to fill them with the vibrant slime mixture. Carefully spoon or pipe the slime into each liner, filling them about three-quarters full. You'll want to avoid overfilling, as the slime will expand slightly as it sets.
Once all the liners are filled, gently tap the tray on the counter to help the slime settle and release any air bubbles.
Now, it's time to add the finishing touch – the "cupcake" topping! Prepare your favorite cupcake batter or use a store-bought mix. Spoon the batter over the slime, filling the liners to the top. Be sure to leave a little room at the top for the batter to rise.
Bake the cupcakes according to the recipe or mix instructions, keeping a close eye to prevent the slime from seeping out.
When the cupcakes are done, let them cool completely before serving. Enjoy the delightful surprise of slime-filled treats!
Step 4. Bake Cupcakes Until Golden Brown
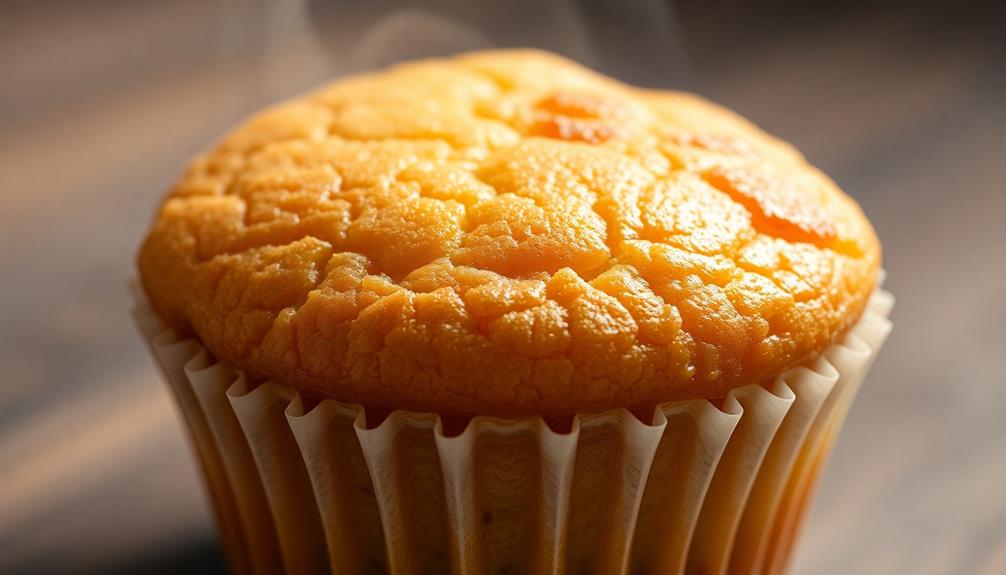
Carefully slide the filled cupcake tins into the preheated oven and bake for the recommended duration, typically 18 to 22 minutes.
Keep a close eye on them, as the baking time may vary depending on your oven. You'll know the cupcakes are ready when the tops are lightly golden brown and a toothpick inserted comes out clean.
Once the timer goes off, use oven mitts to carefully remove the cupcake tins from the oven.
Allow them to cool on a wire rack for about 10 minutes before trying to remove the cupcakes from the liners. This will help prevent the delicate slime center from seeping out.
Gently peel back the paper liners, revealing the perfectly baked cupcakes with their oozy, slime-filled centers.
Serve immediately and enjoy the delightful contrast of the soft, sweet cake and the gooey, colorful slime inside.
Step 5. Allow Slime to Cool

After allowing the cupcakes to cool for 10 minutes, you'll want to turn your attention to the slime-filled centers.
First, scoop out the centers of each cupcake, creating a small well in the middle. Be careful not to go all the way through the bottom – you want to leave a thin layer of cake intact.
Next, take your prepared slime and spoon it into the wells, filling them to the top. Don't be afraid to get a little messy!
Once all the cupcakes have been filled, you'll need to let the slime cool and set. This should take around 15-20 minutes. As the slime cools, it will thicken up and become nice and gooey.
Once it's ready, your slime-filled cupcakes will be the perfect spooky treat! Just be sure to let your friends and family know about the surprise filling before they take a bite.
Final Thoughts
As you put the final touches on your slime-filled cupcakes, it's time to reflect on the journey.
You've come a long way, from whipping up the perfect slime consistency to carefully piping it into the fluffy cupcakes. Take a moment to admire your handiwork – those vibrant, gooey cupcakes are sure to delight your friends and family.
Looking back, you may have encountered a few challenges along the way, but that's all part of the fun of DIY baking. The key is to approach each step with patience and a willingness to learn.
Don't be afraid to experiment and find what works best for you. After all, the joy of making these cupcakes comes from the process, not just the final result.
As you package up your creations, remember that the real magic happens when you share them. Watching someone's face light up as they take that first delightful bite will make all your hard work worthwhile.
Enjoy the sweet satisfaction of a job well done!
Frequently Asked Questions
Are Slime-Filled Cupcakes Safe to Eat?
Slime-filled cupcakes? That doesn't sound very appetizing!
While creative desserts can be fun, you'll want to be careful about eating anything containing unfamiliar substances. Homemade treats are generally safest, as you know exactly what's in them.
But store-bought cupcakes stuffed with slime? That's a hard pass. It's just not worth the risk.
Stick to classic cupcake fillings like frosting, fruit, or chocolate – that way, you can enjoy a delicious and worry-free treat!
What Is the Shelf Life of These Cupcakes?
The shelf life of slime-filled cupcakes can vary depending on the ingredients and storage conditions, but you'll generally want to enjoy them within 3-5 days.
Be sure to keep them refrigerated, as the slime filling is perishable. While the slime might look fun, it's important to remember it's not meant for long-term storage.
Can I Use Store-Bought Slime for the Filling?
You could try using store-bought slime for the cupcake filling, but it mightn't work as well as homemade.
Store-bought slimes can have a different texture and consistency that may not hold up inside the cupcakes. They could also potentially interact with the other ingredients in unpredictable ways.
For the best results, it's generally better to make your own slime specifically for this recipe. That way, you can control the properties and ensure it holds its shape nicely in the cupcakes.
How Do I Prevent the Slime From Oozing Out?
To prevent the slime from oozing out, you'll want to create a protective barrier around it.
Start by chilling the slime in the fridge before assembling your cupcakes. This will help it firm up.
Then, when adding the slime to the center of your cupcakes, be sure to completely encase it in the cake batter.
The baked cupcake will form a seal around the slime, keeping it contained.
With a little preparation, you can enjoy gooey, slime-filled treats without the mess!
Can I Make These Cupcakes Gluten-Free or Vegan?
Absolutely! Making these cupcakes gluten-free or vegan is totally doable.
Just swap out the regular flour for a gluten-free all-purpose blend, and use plant-based milk and egg replacer instead of dairy. You might need to adjust the baking time a bit, but the slime-filled center will still be a hit!
As long as you've got the right substitutions, you can easily make these treats allergy-friendly.
Give it a try – your friends will love the gooey surprise inside.