You'll love making Spider Infested Chocolate Bark for Halloween! This spooky treat combines rich chocolate with candy spiders for a fun, eye-catching dessert. Start by melting your favorite chocolate, then spread it on a parchment-lined tray. While it's still soft, add spider-shaped candies and create web patterns with a toothpick. Refrigerate until hard, then break into pieces for serving. Kids can help decorate, making it a great family activity. You can customize the bark with different chocolates or add-ins like nuts or crushed cookies. There's more to discover about this creepy-crawly confection!
Key Takeaways
- Spider Infested Chocolate Bark is a Halloween-themed treat combining chocolate with candy spiders for a spooky effect.
- The recipe requires melting chocolate, spreading it on parchment, and adding spider-shaped candies before refrigerating.
- No baking is needed; proper tempering of chocolate ensures the desired texture and snap.
- Customization options include using different chocolate types and adding toppings like crushed cookies or nuts.
- This treat is ideal for themed events, encourages family participation, and can be broken into pieces for serving or gifting.

Hairy Gummy Spiders Candy – Sugar Dusted Spider Gummies – Edible Halloween Spiders, by Queen City Candy Cave (1 Pound)
Gummy Spiders Candy: Assorted Fruity Flavored Sugar Sanded Gummy Candy Spiders bring the Fun, Unique, and Tasty to…
As an affiliate, we earn on qualifying purchases.
As an affiliate, we earn on qualifying purchases.
History

Several accounts of spider-infested chocolate bark have surfaced over the years, dating back to the early 20th century.
You might be surprised to learn that this unusual confection wasn't always considered a prank or accident. In some cultures, it was actually a delicacy!
The practice of adding insects to chocolate began in ancient Mesoamerica, where the Aztecs and Mayans would grind up cocoa beans with various ingredients, including small bugs.
As chocolate production spread globally, this tradition evolved. In the early 1900s, you'd find reports of spiders accidentally getting caught in chocolate-making machinery, leading to some unexpected additions to chocolate bars.

Merckens Chocolate Melting Wafers Bulk Bag Perfect For Dipping, Deserts, Baking And More (1 Pound, Dark 2026)
This product has been repackaged by KIDU. It is not sold in its original packaging. Merckens is a…
As an affiliate, we earn on qualifying purchases.
As an affiliate, we earn on qualifying purchases.
Recipe
Spider Infested Chocolate Bark is a delightfully spooky treat perfect for Halloween parties or any occasion that calls for a bit of creepy-crawly fun. This easy-to-make dessert combines the rich, smooth taste of chocolate with the playful addition of edible candy spiders, creating a visually striking and delicious confection.
While the name might sound intimidating, this recipe is actually quite simple to prepare and requires no baking. The key to achieving the best results lies in properly tempering the chocolate, which ensures a glossy finish and a satisfying snap when broken. The "spider infestation" is created using store-bought candy spiders or homemade royal icing decorations, allowing for customization in both color and size.
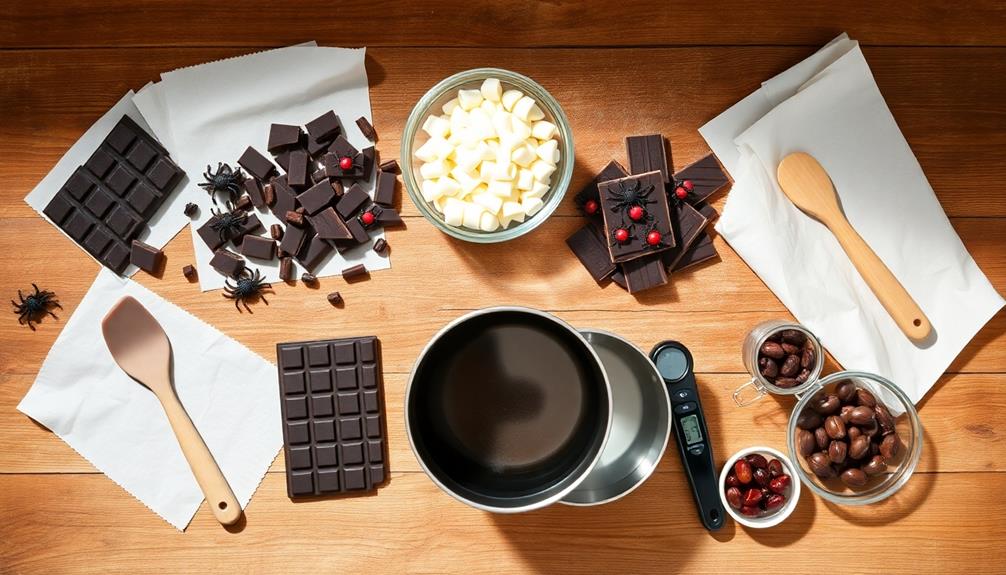
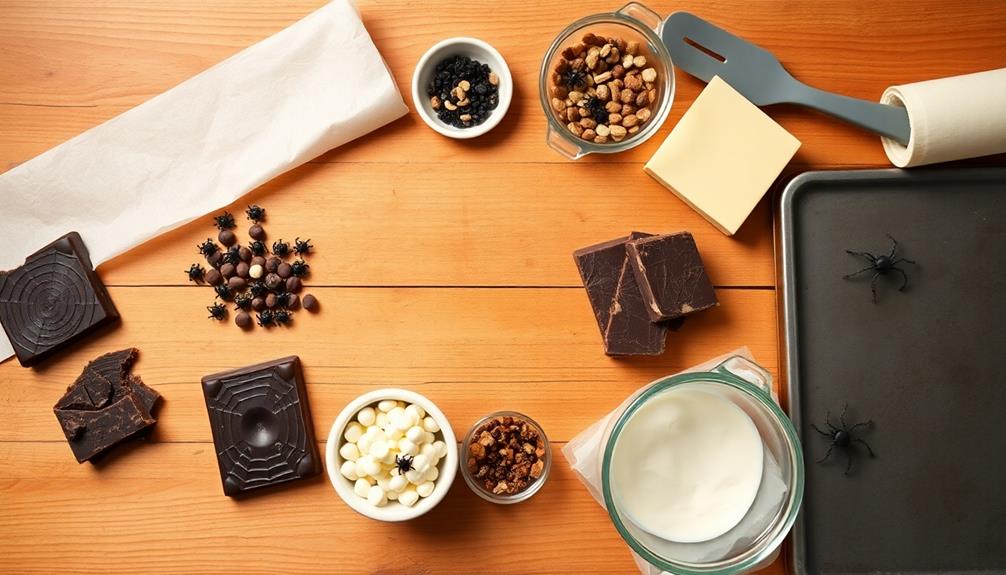
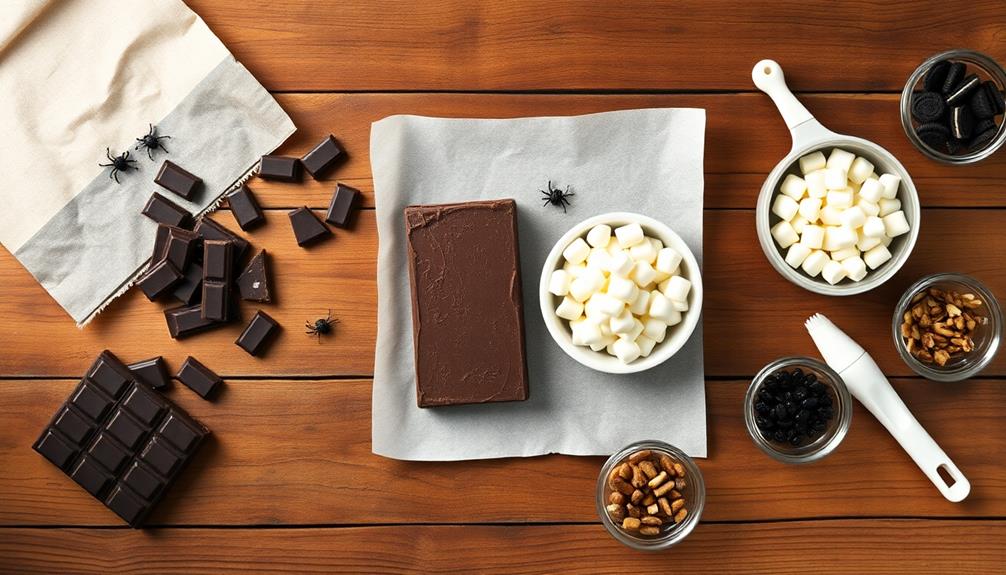
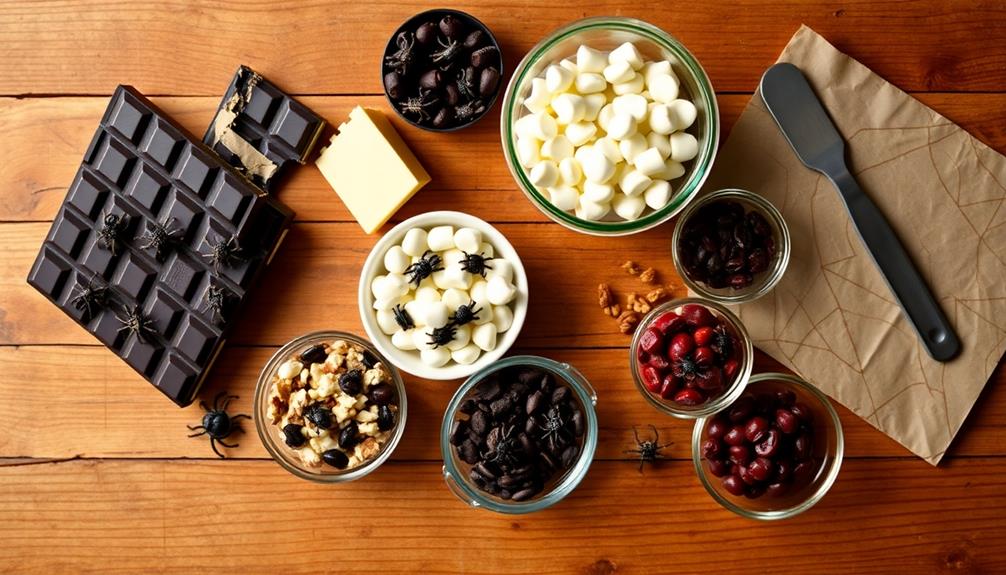
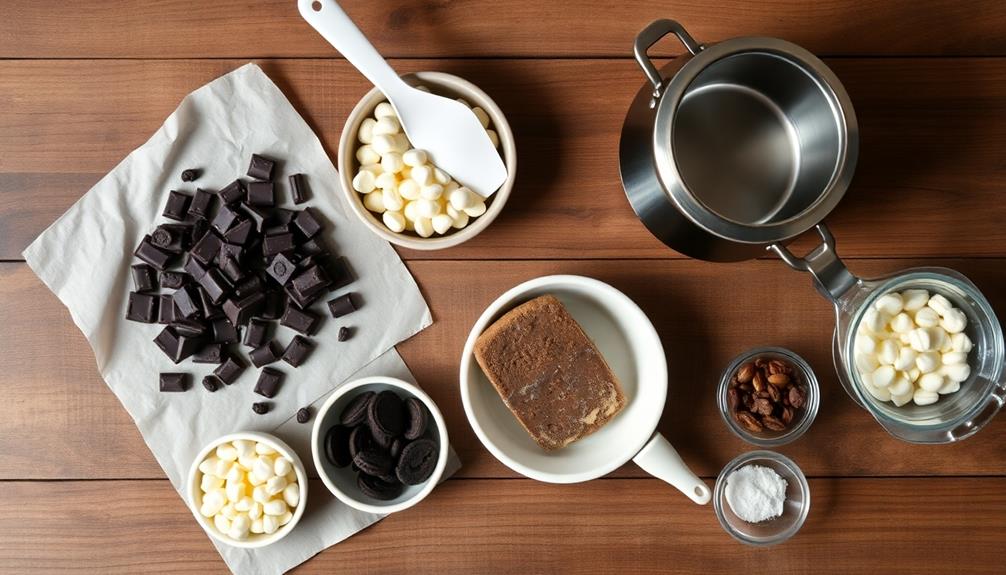
Ingredients:
- 12 oz dark chocolate, chopped
- 12 oz milk chocolate, chopped
- 1/4 cup white chocolate chips
- Edible candy spiders or royal icing spiders
- Optional: crushed cookies, nuts, or dried fruit for additional texture
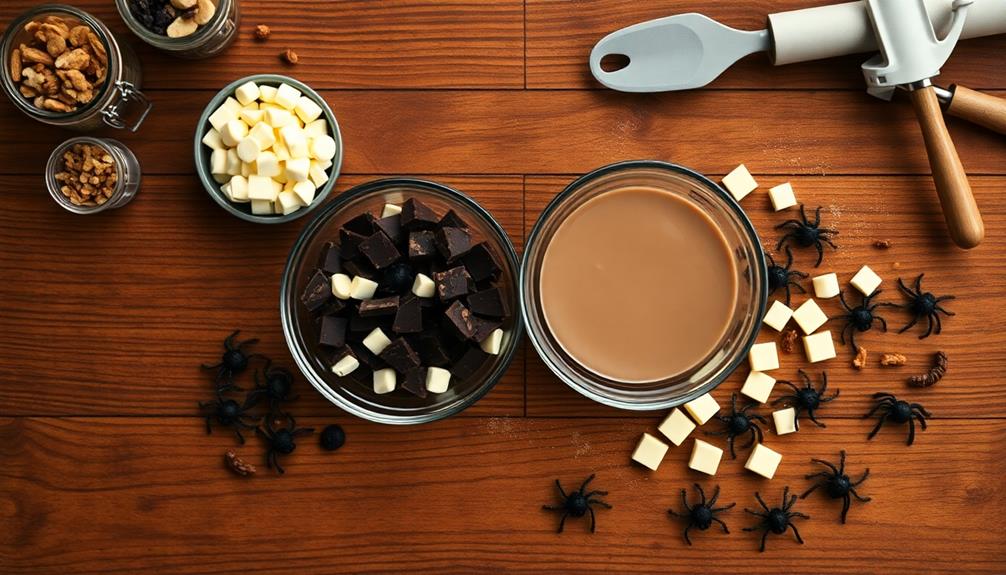
To make Spider Infested Chocolate Bark, start by melting the dark and milk chocolate separately in double boilers or microwave-safe bowls. Once melted, pour the chocolates onto a parchment-lined baking sheet, swirling them together with a spatula to create a marbled effect.
Quickly sprinkle the candy spiders over the chocolate, gently pressing them into the surface. Melt the white chocolate and drizzle it over the bark to create "spider webs." Refrigerate the bark for about 30 minutes until set, then break into pieces.
For best results, ensure all utensils and bowls are completely dry before working with the chocolate, as even a small amount of water can cause it to seize. If you're making your own royal icing spiders, prepare them in advance and allow them to dry completely before adding to the bark.
Experiment with different chocolate combinations and additional toppings to create your own unique variation of this creepy-crawly treat.

Cyoufine Professional Culinary Precision Drawing Decorating Spoon Set, 2Pcs Stainless Steel Chef Drizzle Spoons,Chocolate Filter Spoons,Plating Spoon for Decorative Plates, Cake, Coffee
【Premium Stainless Steel】made of high quality stainless steel material, non toxic, anti-rust, corrosion-resistant, solid and durable to use.Designed…
As an affiliate, we earn on qualifying purchases.
As an affiliate, we earn on qualifying purchases.
Cooking Steps

You'll start by melting your chocolate in the microwave, stirring frequently to ensure it's smooth.
Once melted, pour the chocolate onto a parchment-lined baking sheet and spread it evenly.
Now comes the fun part: sprinkle your spider-shaped candy pieces over the chocolate, pressing them in gently so they stick but don't sink completely.
Step 1. Melt Chocolate in Microwave

To begin the chocolate melting process, you'll need to break up your chosen chocolate into small, uniform pieces. This ensures that it'll melt evenly and quickly.
Place these pieces in a microwave-safe bowl, making sure it's completely dry to prevent the chocolate from seizing.
Next, set your microwave to 50% power. This lower setting helps prevent the chocolate from burning or becoming grainy. Start by microwaving the chocolate for 30 seconds, then remove the bowl and give it a good stir. Even if the chocolate doesn't look melted, stirring helps distribute the heat.
Continue microwaving in 15-second intervals, stirring between each burst. You'll notice the chocolate becoming smoother and more liquid with each round. Be patient and resist the urge to increase the power or time. It's better to go slow and steady to achieve perfectly melted chocolate.
Once most of the chocolate has melted, you might see a few small lumps remaining. Don't worry! The residual heat will usually melt these as you continue stirring.
Your chocolate is ready when it's smooth, glossy, and lump-free.
Step 2. Pour Chocolate Onto Parchment
Once you've achieved perfectly melted chocolate, it's time to move on to the next crucial step.
You'll need to prepare a flat surface for your chocolate bark. Grab a baking sheet and line it with a piece of parchment paper, making sure it's smooth and wrinkle-free.
Now, carefully pour your melted chocolate onto the parchment paper. Start from the center and let it spread outward naturally. If needed, use a spatula to gently guide the chocolate into an even layer. Aim for a thickness of about 1/4 inch for the perfect bark consistency.
To create that spooky spider-infested look, you'll want to work quickly before the chocolate sets. Use a toothpick or the tip of a butter knife to draw spider web patterns in the chocolate.
Start from the center and drag lines outward, then connect them with curved lines between. Don't worry if it's not perfect – the imperfections add to the creepy effect!
Step 3. Add Spider-Shaped Candy Pieces
After creating the spider web pattern, it's time to add the star attraction – the spiders themselves. You'll need spider-shaped candy pieces, which you can find at most grocery stores during Halloween season or online year-round.
If you can't find pre-made spider candies, don't worry! You can easily make your own using black licorice or fondant.
Carefully place the spider candies onto the still-wet chocolate. You'll want to distribute them evenly across the bark, so it looks like a proper infestation. Use tweezers if you're having trouble with sticky fingers.
For a more realistic look, try positioning some spiders near the edges of the web and others in the center.
If you're feeling extra creative, you can add some variety to your spider population. Mix in different sizes or colors of spiders, or even create baby spiders using small candy pieces.
Step 4. Refrigerate Until Chocolate Hardens
The next step in creating your spider-infested chocolate bark is to let it set up properly. After you've added all your spider-shaped candies and other creepy decorations, it's time to refrigerate your creation.
Carefully transfer your baking sheet or tray to the refrigerator, making sure it's level so the chocolate doesn't shift. You'll want to leave it in there for at least an hour, but two hours is even better if you can wait that long.
While the chocolate is cooling, it'll harden and become that perfect, snappable consistency we're looking for. This step is crucial because it ensures that all your spooky decorations stay firmly in place when you break the bark into pieces later.
If you're in a hurry, you can pop it in the freezer instead, but be careful not to leave it in there too long, or you might end up with frosty chocolate! Once the bark is completely firm to the touch, it's ready to be broken into fun, irregular shapes.
Step 5. Break Bark Into Pieces
Now comes the fun part – breaking your spider-infested chocolate bark into pieces! Take the chilled bark out of the refrigerator and place it on a clean cutting board. You'll notice that the chocolate has hardened, creating a solid sheet.
To break it, you've got a few options. For a rustic look, simply use your hands to snap the bark into irregular pieces. If you prefer more uniform shapes, grab a sharp knife and carefully score lines where you want to break the bark. Then, apply gentle pressure along these lines to create clean breaks.
As you're breaking the bark, be careful not to crush the spider decorations you've worked so hard to create. If you've used plastic spiders, they might pop off easily, so handle the bark gently. For chocolate spiders, they'll break along with the bark.
Once you've broken all the bark, arrange the pieces on a serving platter or in gift boxes. Remember, the jagged edges are part of the charm, so don't worry if they're not perfect. Your spooky spider-infested chocolate bark is now ready to enjoy or share with friends!

Halloween Silicone Mould Pack of 2 Chocolates Molds 3D Halloween Chocolate Candy Gummy Mold Skull Pumpkin Bat Ghost Witch Hat Spider tombstone Shapes Mold
PERFECT DESIGN Our silicone chocolate molds are made from one piece. With clear details and beautiful designs, you…
As an affiliate, we earn on qualifying purchases.
As an affiliate, we earn on qualifying purchases.
Final Thoughts
Wrapping up, this Spider Infested Chocolate Bark recipe offers a delightfully spooky treat for Halloween parties or horror-themed events. You'll find it's not only easy to make but also a real crowd-pleaser.
The combination of rich chocolate and creepy spider decorations creates a visual impact that's sure to impress your guests.
Remember, you can always customize this recipe to suit your preferences. Try using different types of chocolate, like white or dark, for varied flavors and colors. You might even experiment with adding crushed cookies or nuts to the melted chocolate for extra texture.
Don't forget, presentation is key! Arrange your chocolate bark pieces on a dark-colored platter to make the spider designs stand out.
This recipe is perfect for getting kids involved in Halloween preparations. They'll love helping to pipe the spider webs and place the candy spiders. Just be sure to supervise them around the melted chocolate.
With its mix of sweet treats and spooky decorations, your Spider Infested Chocolate Bark is bound to become a Halloween tradition in your home.
Frequently Asked Questions
Is Spider Infested Chocolate Bark Safe to Eat?
You shouldn't eat spider-infested chocolate bark. It's not safe and could contain harmful bacteria or parasites. Even if the spiders are edible, they might've contaminated the chocolate. It's best to avoid consuming any food with visible infestations.
Where Can I Buy Pre-Made Spider Infested Chocolate Bark?
You can't buy pre-made spider-infested chocolate bark anywhere. It's not a real product and would be unsafe to consume. Instead, try making regular chocolate bark at home or purchasing it from bakeries and candy shops.
Can I Use Real Spiders Instead of Candy Spiders?
You shouldn't use real spiders in edible treats. It's unsafe and potentially illegal. Stick to candy or edible decorations instead. If you're set on a creepy-crawly theme, there are many food-safe alternatives that'll achieve the desired effect.
How Long Does Spider Infested Chocolate Bark Stay Fresh?
You'll want to consume your chocolate bark within 1-2 weeks for optimal freshness. If you've stored it properly in an airtight container at room temperature, it can last up to a month. Don't forget to check for any signs of spoilage.
Are There Variations of Spider Infested Chocolate Bark for Different Holidays?
You'll find holiday variations for many treats. You can customize your bark with seasonal colors, festive shapes, and themed toppings. Try red and green for Christmas, pastels for Easter, or orange and black for Halloween. Get creative!