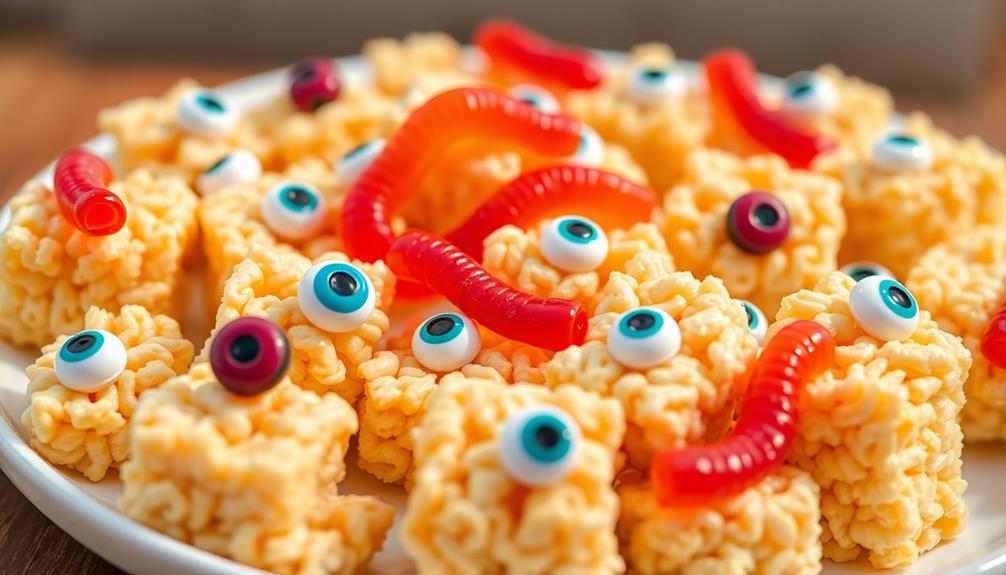

Creepy Crawler Rice Krispie Treats bring a spooky twist to the classic no-bake dessert. First, you'll melt butter and marshmallows, then stir in the iconic Rice Krispies cereal for that signature snap, crackle, and pop. Press the gooey mixture into a pan, then get creative with candy eyeballs, gummy worms, and other edible decorations to transform your treats into creepy crawlers. It's a simple yet imaginative recipe that's sure to delight guests at any Halloween party. Once you master the basics, you can explore even more ways to bring these delightfully spooky sweets to life.
Key Takeaways
- A festive Halloween-themed variation of the classic Rice Krispie Treats recipe, featuring creepy crawler decorations like gummy worms and candy eyeballs.
- Simple and accessible recipe using basic ingredients like butter, marshmallows, and Rice Krispies cereal, suitable for both kids and adults.
- Encourages creativity in dessert making, allowing for imaginative designs and presentation of the treats.
- Offers a hands-on baking activity that can engage guests and spark conversations around culinary arts.
- Serves as a unique and visually appealing centerpiece or party favor for Halloween-themed events.
History
When did Rice Krispie treats come into existence? These classic snacks have been around for quite some time!
Back in the 1930s, Kellogg's Rice Krispies cereal was a beloved breakfast food. Then, in 1939, the Kellogg Company's consumer affairs manager, Malitta Jensen, and a food technologist, Mildred Day, came up with the idea to bind the crunchy Rice Krispies cereal together with gooey melted marshmallows. Their creation was an instant hit!
The simple yet delightful Rice Krispie treat quickly became a staple in American households.
Whether you're making them for a school bake sale, a family gathering, or just a cozy afternoon snack, these nostalgic treats have stood the test of time.
With their satisfying snap, crackle, and pop, Rice Krispie treats offer a perfect balance of sweet and crunchy in every bite.
Recipe
Creepy Crawler Rice Krispie Treats are a fun and spooky twist on the classic treat. They're perfect for Halloween parties or any occasion where you want to add a touch of eerie charm to your desserts.
The key to these treats is the addition of candy eyeballs and gummy worms, which transform the ordinary Rice Krispies into a delightfully creepy confection. The recipe is simple and easy to follow, making it a great option for both experienced bakers and those new to the kitchen.
Ingredients:
- 3 tablespoons unsalted butter
- 4 cups miniature marshmallows
- 6 cups Rice Krispies cereal
- 1 cup candy eyeballs
- 1 cup gummy worms
Instructions:
Melt the butter in a large saucepan over medium heat. Add the marshmallows and stir constantly until they're completely melted and the mixture is smooth.
Remove the saucepan from the heat and stir in the Rice Krispies cereal until it's well coated. Gently fold in the candy eyeballs and gummy worms, being careful not to break them.
Spread the mixture into a 9×13 inch baking dish and press down firmly to compact it. Allow the treats to cool completely before cutting into squares and serving.
When making these Creepy Crawler Rice Krispie Treats, be sure to work quickly once the marshmallows are melted, as the mixture can become stiff and difficult to work with as it cools.
Additionally, consider using a variety of candy eyeballs and gummy worms in different colors and sizes to add even more visual interest to your creepy crawly creation.
Cooking Steps
Melt the butter and marshmallows in a large saucepan, then stir in the rice cereal until fully coated.
Firmly press the mixture into a prepared pan, creating an even layer.
Lastly, add your desired decorative critters on top and let the treats cool completely before slicing and serving.
Step 1. Melt Butter and Marshmallows

First, grab a large saucepan and add the butter. Melt the butter over medium heat, stirring occasionally until it's completely liquefied.
Next, pour in the marshmallows. Stirring constantly, let the marshmallows melt into the butter, creating a smooth, gooey mixture. Be careful not to let the mixture scorch or burn. It should take around 5-7 minutes for the marshmallows to fully melt.
Once the butter and marshmallows are perfectly blended, remove the saucepan from the heat. The mixture will continue to thicken as it cools slightly.
Work quickly, as the marshmallow mixture firms up fast. Grab a spatula and give it a few final stirs to ensure everything is evenly combined.
Now you're ready to stir in the crunchy Rice Krispies cereal and create your creepy crawler treats!
Step 2. Add Rice Cereal

With the butter and marshmallows melted into a smooth, gooey mixture, it's now time to stir in the Rice Krispies cereal.
Take the bowl of melted marshmallows and add the entire box of Rice Krispies. Use a large spoon to gently fold the cereal into the marshmallow mixture, making sure to evenly coat each piece.
Work quickly, as the marshmallows will start to stiffen as they cool. Keep folding and stirring until the cereal is fully incorporated and the mixture has a consistent, sticky texture.
Be careful not to crush the delicate Rice Krispies as you mix. Once the cereal is evenly distributed, the mixture is ready to be pressed into the prepared pan.
With the Rice Krispies now added, you're one step closer to creating those creepy crawler treats!
Step 3. Press Into Pan

Take the gooey Rice Krispies mixture and firmly press it into the prepared pan. Use your hands to evenly distribute the sticky treat, making sure to apply pressure throughout the entire surface. Gently smooth the top to create a flat, compact layer.
Be sure to reach all the corners and edges, packing the mixture in tightly. This will help the treats hold their shape once cooled and cut.
Once the pan is filled, use a spatula or the back of a spoon to further compress the Rice Krispies. Run the tool across the top, pressing down firmly to create a dense, even layer.
This step is crucial for achieving the classic Rice Krispies treat texture – chewy yet sturdy. Take your time and put some muscle into it!
After the mixture is evenly pressed, the pan is ready for the next step. Just wait until you see the delightfully creepy crawlers emerge from this delicious gooey base.
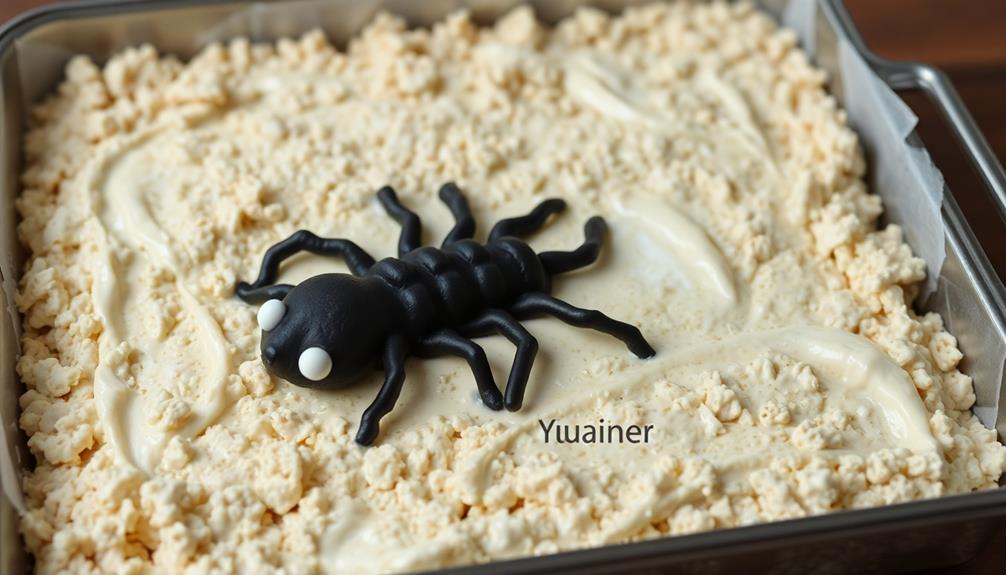
Step 4. Add Decorative Critters

After pressing the Rice Krispies mixture firmly into the pan, it's time to add the creepy crawly decorations.
You'll want to create a variety of fun, edible critters to top your treats. Start by gently pressing small round candies, like M&Ms or Sixlets, into the Rice Krispies to form the bugs' bodies. For legs, use thin pretzel sticks or slivered almonds, carefully pushing them into the sides of the bodies.
To make antennae, simply take a few pieces of melted chocolate and shape them into thin curvy lines, then lightly press them onto the tops of the bodies. You can also add googly eyes made from mini marshmallows or white chocolate chips for a whimsical touch.
Get creative and make all sorts of creepy crawlies – spiders, caterpillars, ladybugs, and more! Position the critters randomly across the top of your Rice Krispies pan for maximum visual impact.
Once you're satisfied with your edible insect display, let the treats chill until firm before cutting and serving.
Step 5. Let Cool Before Cutting
Once you've finished decorating your Rice Krispies treats with all the creepy crawlies, it's time to let them cool completely before cutting. This step is crucial to ensure your treats hold their shape and the decorations stay in place.
Allow the pan to sit at room temperature for at least 30 minutes, or until the treats have fully set. You'll know they're ready when the surface feels firm to the touch.
Resist the temptation to hurry things along by putting the pan in the fridge or freezer. Sudden temperature changes can cause the treats to crack or become misshapen. Be patient and let nature take its course.
Once cooled, use a sharp knife to carefully slice the treats into individual pieces. Take your time and cut slowly to avoid smashing the delicate decorations.
With a little care, you'll end up with perfectly cut, spooky-crawly Rice Krispies treats that are sure to delight. Just be sure to let them cool first!
Final Thoughts
Wrapping up this spooky treat, you can't help but marvel at the creative potential of Rice Krispies. These iconic cereal squares serve as the perfect canvas for all sorts of imaginative recipes. From the chewy, gooey center to the crunchy, golden edges, Rice Krispie Treats offer a satisfying textural experience.
As you bake and decorate your Creepy Crawler Rice Krispie Treats, you'll find that the process is both rewarding and fun. The simple ingredients and assembly make this a great project for bakers of all skill levels.
Whether you're a seasoned chef or a curious novice, you'll enjoy the hands-on experience of transforming ordinary Rice Krispies into spooky, whimsical treats.
Beyond the edible delight, these Creepy Crawler Rice Krispie Treats also serve as a delightful centerpiece or party favor. Guests will be delighted by the creative, ghoulish design, and you'll take pride in your culinary artistry.
Frequently Asked Questions
How Long Do the Treats Last Before Becoming Stale?
Rice Krispie treats can stay fresh for 5-7 days if you store them properly.
Keep them in an airtight container at room temperature – this'll prevent them from drying out and becoming stale.
Remember, the fresher the treats, the chewier and more delicious they'll be!
Can I Use Different Types of Cereal Besides Rice Krispies?
Absolutely! You can use a variety of cereals besides Rice Krispies to make tasty treats.
Cheerios, Corn Flakes, or even Fruity Pebbles would work great. Just keep in mind that the texture and flavor will be a bit different.
Be adventurous and experiment to find your favorite cereal combo! The key is to follow the basic recipe, substituting your chosen cereal for the Rice Krispies.
Have fun and get creative with your cereal selections.
Is It Possible to Make the Treats Without Food Coloring?
Absolutely, you can make Rice Krispie treats without food coloring!
The treats will have a more natural, neutral appearance, but they'll still have the same delicious marshmallow-y taste. Simply follow your regular recipe, skipping the food coloring.
You might even get creative with fun shapes or decorations to add a personal touch. The possibilities are endless when you let the classic flavors shine through.
Can I Substitute the Marshmallows With Another Type of Binding Agent?
You can definitely use other binding agents instead of marshmallows for your rice krispie treats.
Nut butters, melted chocolate, or even honey would work great. Just be sure to experiment and find the right ratio of ingredients to get the perfect texture.
The key is to create a cohesive mixture that holds the rice cereal together without being too sticky or dry.
Have fun experimenting!
How Do I Ensure the Spiders Are Distributed Evenly Throughout the Treats?
To ensure the spiders are evenly distributed, start by chopping them into smaller, uniform pieces. This'll help them blend seamlessly throughout the treat mixture.
As you press the mixture into the pan, take care to gently fold in the spider bits, making sure they're well-incorporated. Use a spatula to evenly distribute the mixture, pressing down lightly to lock everything in place.
With a little care, you can get those creepy crawlies spread out just right.