Ghostly meringue cookies are the perfect spooky treat for your Halloween party. You'll love how easy they are to make and how impressive they look. These crispy-on-the-outside, chewy-on-the-inside cookies have been around since the 1600s, but they've gotten a haunting makeover. To create them, you'll whip up egg whites and sugar, pipe them into ghost shapes, and bake them low and slow. Don't forget to add some eerie eyes with food coloring! They're not just tasty; they're also a great way to use up extra egg whites. There's more to uncover about these ethereal treats.
Key Takeaways
- Ghostly Meringue Cookies are Halloween-themed treats made from whipped egg whites and sugar.
- They feature a crisp exterior and slightly chewy center, with a ghostly white appearance.
- These cookies are piped into ghost shapes and baked at a low temperature for about an hour.
- Basic ingredients include egg whites, sugar, cream of tartar, vanilla extract, and optional black food coloring for eyes.
- Meringue cookies can be stored in an airtight container at room temperature for up to a week.

Piping Bags and Tips Set, 100Pcs 12 Inch Pastry Bags, Icing Bags Disposable for Cakes Decorating Kit Supplies with 1 Reusable Piping Bags, 1 Couplers, 12 Frosting Tips, 2 Bag Ties, 3 Cake Scraper
Affordable Piping Bags Combo: Package include 100 x disposable pastry bags, 1 x silicone pastry bags, 12 x…
As an affiliate, we earn on qualifying purchases.
As an affiliate, we earn on qualifying purchases.
History
Meringue cookies have been around for centuries, with their origins tracing back to the 1600s. You might be surprised to learn that these sweet, airy treats were first created in the Swiss village of Meiringen. That's right, the name "meringue" actually comes from this little town!
As you'd expect, meringue cookies quickly gained popularity throughout Europe. By the 18th century, they'd made their way to France, where they became a favorite at the royal court. You can imagine how fancy they must've looked on those elegant palace dessert tables!
Over time, people started getting creative with meringue. They'd shape it into different forms, like ghosts for Halloween. You'll find that meringue cookies are now enjoyed worldwide, with countless variations and flavors.
Interestingly, meringue isn't just for cookies. It's used in all sorts of desserts, from lemon meringue pie to baked Alaska. You've probably tasted it without even realizing it!
As you can see, this simple mixture of egg whites and sugar has quite a rich history.
black gel food coloring for baking
As an affiliate, we earn on qualifying purchases.
As an affiliate, we earn on qualifying purchases.
Recipe

Ghostly Meringue Cookies are a delightful and spooky treat perfect for Halloween parties or any autumn gathering. These light, airy cookies are shaped like adorable ghosts and have a crisp exterior with a slightly chewy center. Their pure white appearance makes them an ideal canvas for creative decorations, allowing you to give each ghost its own personality.
These meringue cookies are surprisingly simple to make, requiring only a few ingredients and some patience during the baking process. The key to achieving the perfect texture lies in properly whipping the egg whites and gradually incorporating the sugar. Once you've mastered the technique, you can experiment with different flavors and colors to create a variety of ghostly treats.
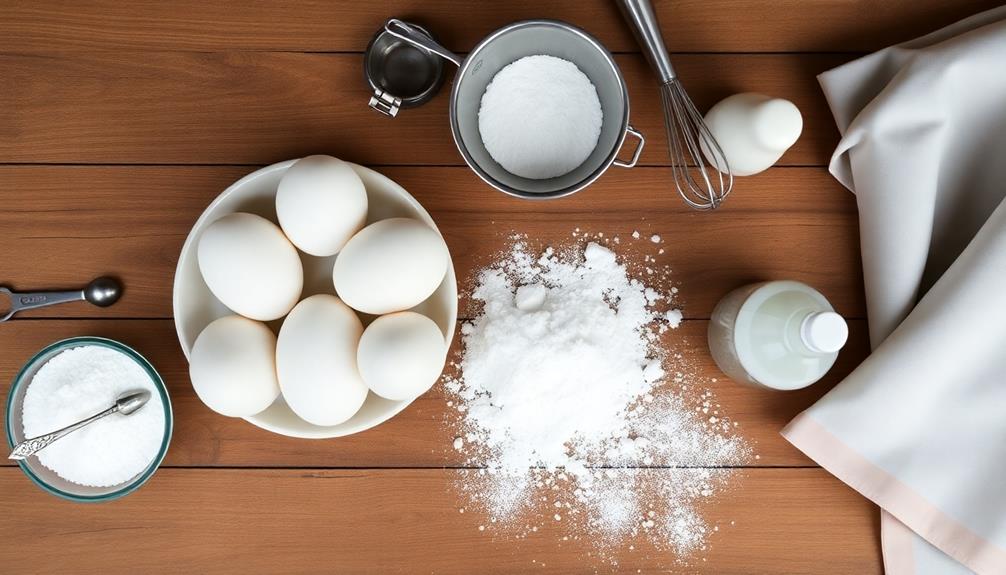
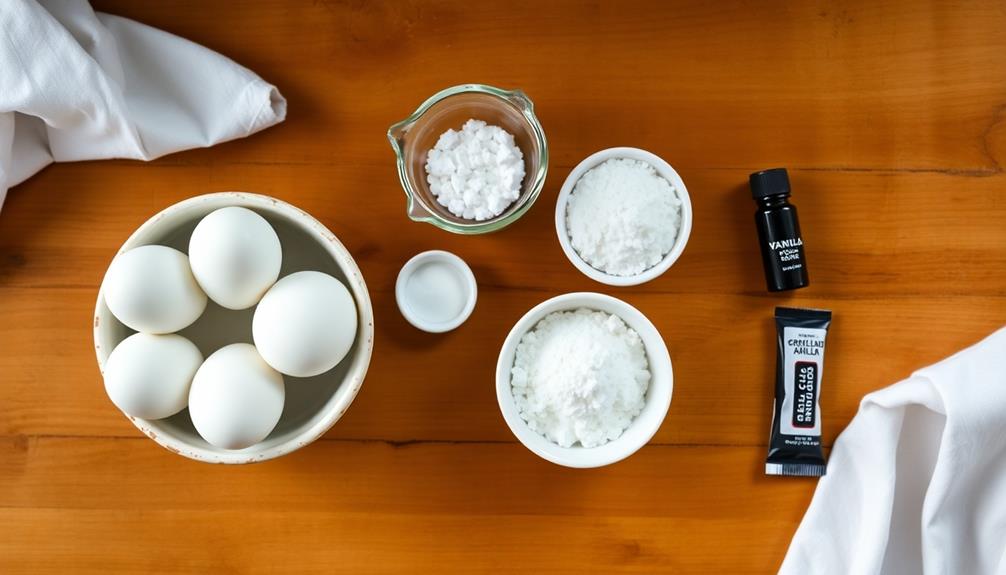
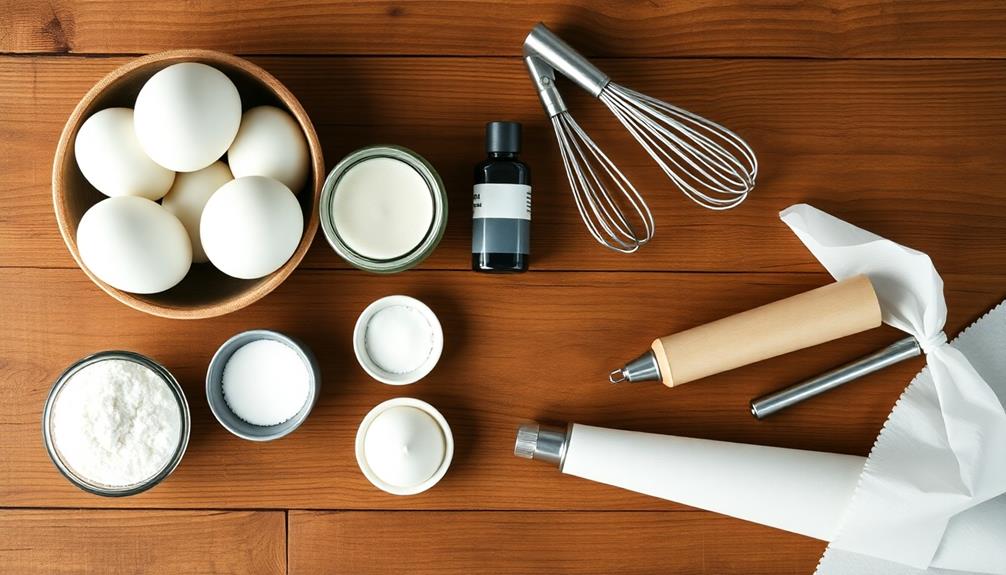
- 4 large egg whites, at room temperature
- 1 cup granulated sugar
- 1/4 teaspoon cream of tartar
- 1/2 teaspoon vanilla extract
- Black gel food coloring (for decorating)
Preheat the oven to 200°F (95°C) and line two baking sheets with parchment paper. In a clean, dry bowl, beat the egg whites on medium speed until foamy. Add the cream of tartar and continue beating until soft peaks form. Gradually add the sugar, one tablespoon at a time, while beating on high speed. Once all the sugar is incorporated, add the vanilla extract and continue beating until stiff, glossy peaks form.
Transfer the meringue to a piping bag fitted with a large round tip. Pipe ghost shapes onto the prepared baking sheets, making them about 2-3 inches tall. Use a small brush or toothpick dipped in black gel food coloring to add eyes and mouths. Bake for 2 hours, then turn off the oven and leave the cookies inside for an additional hour to dry out completely.
For best results, make these cookies on a dry day, as humidity can affect the texture of the meringue. If you want to add different flavors, replace the vanilla extract with almond, peppermint, or lemon extract. To create colorful ghosts, gently fold in a small amount of gel food coloring before piping.
Store the cookies in an airtight container at room temperature for up to a week, keeping them away from moisture to maintain their crisp texture.

GoodCook Everyday Nonstick Baking Sheet Set, 3 Pack Includes One Small, Medium & Large Pan Carbon Steel Construction Cookie Sheet Bakeware Set, Gray
SET OF 3 BAKING SHEETS: GoodCook’s Nonstick Cookie Sheet Set comes with a small 13” x 9”, medium…
As an affiliate, we earn on qualifying purchases.
As an affiliate, we earn on qualifying purchases.
Cooking Steps
To make these spooky treats, you'll start by preheating your oven to 225°F.
Next, you'll beat egg whites until they're foamy, then gradually add sugar and vanilla while continuing to mix.
Step 1. Preheat Oven to 225°F

Before you begin crafting your spooky treats, set your oven to 225°F (107°C). This low temperature is crucial for creating the perfect ghostly meringue cookies.
It's important to preheat your oven well in advance, as it'll take some time to reach the correct temperature. While you're waiting, you can gather your ingredients and prepare your baking sheets.
Make sure your oven rack is positioned in the center, as this will ensure even heating for your delicate meringues. If you have an oven thermometer, now's a great time to use it. These cookies are sensitive to temperature changes, so accuracy is key.
Don't forget to check that your oven is clean, as any lingering odors might affect the taste of your meringues.
If you're using a convection oven, you'll want to reduce the temperature by about 25°F. This adjustment will help prevent your ghostly treats from becoming too crispy or developing unwanted color.
Step 2. Beat Egg Whites Until Foamy

Now that your oven is preheating, it's time to focus on the star ingredient: egg whites.
You'll need to separate the whites from the yolks carefully, making sure no yolk sneaks into your whites. It's easier to do this when the eggs are cold, so take them straight from the fridge.
Once you've got your egg whites ready, grab a large, clean mixing bowl. Make sure it's completely dry and free from any grease or oil, as these can prevent your whites from foaming properly.
You'll also need an electric mixer or a whisk if you're feeling strong!
Start beating the egg whites on low speed. You'll see them begin to break up and become frothy. This is exactly what you want!
As you continue beating, the whites will start to look cloudy and bubbly. Keep going until you see soft, foamy peaks forming when you lift the beaters.
This usually takes about 1-2 minutes with an electric mixer, but might take a bit longer if you're whisking by hand.
Don't worry if it takes some time – your arm muscles will thank you later!
Step 3. Gradually Add Sugar and Vanilla

With your egg whites whipped to soft peaks, it's time to sweeten the deal. Gradually add the sugar, about a tablespoon at a time, while continuing to beat the mixture. This slow addition helps the sugar dissolve properly and prevents your meringue from becoming grainy.
Keep beating until the mixture is glossy and forms stiff peaks when you lift the beater.
Now, it's time to add a touch of flavor. Gently fold in a teaspoon of vanilla extract using a rubber spatula. Be careful not to overmix, as you don't want to deflate all the air you've worked so hard to incorporate. The vanilla will give your ghostly meringues a subtle, delicious taste that complements the sweetness.
As you're mixing, take a moment to admire how the meringue has transformed. It should now be smooth, shiny, and hold its shape well. This is the perfect consistency for piping your spooky ghost shapes.
If you're feeling adventurous, you could even experiment with other extracts like almond or peppermint for a unique twist on your ghostly treats.
Step 4. Pipe Meringue Onto Baking Sheet

Ready to bring your ghostly meringues to life? Now that you've prepared your meringue mixture, it's time to shape these spooky treats.
Grab a large piping bag and fit it with a round tip, about 1/2 inch in diameter. If you don't have a piping bag, don't worry! You can use a zip-top plastic bag with one corner snipped off.
Carefully spoon your meringue into the bag, trying not to deflate the mixture. Twist the top of the bag to close it, pushing the meringue toward the tip.
Line your baking sheet with parchment paper to prevent sticking. Hold the piping bag vertically, about an inch above the sheet. Squeeze gently to create the ghost's body, then lift slightly as you release pressure to form a pointy top. Aim for ghosts that are about 2-3 inches tall.
Space them about an inch apart, as they won't spread much during baking. Once you've piped all your ghosts, use a clean finger to smooth out any pointy tips if desired.
You're now ready for the next step in creating your ghostly treats!
Step 5. Bake for 60 Minutes
The moment of truth has arrived for your ghostly creations. It's time to bake your meringue cookies and watch them transform into spooky, delicious treats.
Preheat your oven to 200°F (93°C) and make sure the rack is in the center position.
Carefully slide your baking sheet with the piped meringue ghosts into the oven. Set your timer for 60 minutes and resist the urge to open the oven door during this time. The low, slow baking process allows the meringues to dry out gradually, creating that crisp exterior and marshmallowy interior you're aiming for.
After an hour, turn off the oven but don't remove the meringues just yet. Leave them inside with the door closed for another 30 minutes. This helps them cool slowly and prevents cracking.
Once the time's up, you can finally take them out and let them cool completely on the baking sheet. Your patience will be rewarded with perfectly set, ghostly white meringue cookies that are crisp on the outside and slightly chewy on the inside. They're now ready for the final touches!

Hamilton Beach 6-Speed Electric Hand Mixer with Whisk, Traditional Beaters, Snap-On Storage Case, 250 Watts, White
NO MORE LOST BEATERS: The snap-on storage case that comes with the Hamilton Beach hand mixer neatly holds…
As an affiliate, we earn on qualifying purchases.
As an affiliate, we earn on qualifying purchases.
Final Thoughts

These ghostly meringue cookies are sure to be a hit at your next Halloween party or spooky gathering. They're not only delicious but also a fun and creative way to celebrate the season.
You'll love how easy they're to make, and your guests will be impressed by their ethereal appearance. Remember, patience is key when working with meringue. Don't rush the process, and you'll be rewarded with perfectly light and crispy cookies.
If you're feeling adventurous, try adding a drop of food coloring to create pastel-hued ghosts, or experiment with different piping techniques for unique shapes.
Store your ghostly meringues in an airtight container to keep them fresh and crispy. They'll last for several days, making them perfect for preparing in advance.
If you have leftover egg yolks, consider using them in a custard or homemade mayonnaise to reduce waste. With these tips in mind, you're ready to create a batch of spooktacular meringue ghosts that'll haunt your taste buds in the best way possible!
Frequently Asked Questions
Can I Use Artificial Sweeteners Instead of Sugar for Ghostly Meringue Cookies?
You can use artificial sweeteners instead of sugar, but be cautious. They'll affect the texture and taste of your meringues. Stick to sugar substitutes designed for baking, like erythritol or stevia blends, for better results.
How Long Do Ghostly Meringue Cookies Stay Fresh?
You'll find that these cookies stay fresh for up to 2 weeks when stored properly. Keep them in an airtight container at room temperature. They'll maintain their crisp texture and ghostly appearance, ready for your enjoyment.
Are Ghostly Meringue Cookies Suitable for People With Gluten Intolerance?
You'll be glad to know that these cookies are typically gluten-free. They're made with egg whites and sugar, without any wheat flour. However, always check the specific recipe or packaging to be absolutely sure.
Can I Add Food Coloring to Make Colored Ghostly Meringue Cookies?
You can definitely add food coloring to make colored meringue cookies! It's easy to do and adds a fun twist. Just mix a few drops into your meringue before piping. You'll have colorful ghosts in no time!
What's the Best Way to Store Leftover Ghostly Meringue Cookies?
You'll want to store your leftover cookies in an airtight container at room temperature. Don't refrigerate them, as moisture can make them soggy. They'll stay crisp for up to a week if stored properly. Enjoy them soon!