
Graveyard Chocolate Mousse Cups are a spooky and delicious Halloween dessert you'll love making. You'll start by creating creamy chocolate mousse and filling edible chocolate cups. Then, you'll add fun decorations to make them look like mini graveyards. Crushed cookies become "dirt," while candy and cookies transform into tombstones and ghosts. This treat combines rich flavors with creative presentation, perfect for impressing your friends at Halloween parties. You can prepare them a day ahead and store them in the fridge. With simple ingredients and easy steps, you'll be a Halloween dessert pro in no time. Keep reading to uncover the secrets of making these eerie delights!
Key Takeaways
- Graveyard Chocolate Mousse Cups are spooky Halloween desserts featuring chocolate mousse in edible cups, decorated to resemble miniature graveyards.
- Key ingredients include dark chocolate, heavy cream, egg whites, sugar, cocoa powder, and decorative toppings like crushed cookies.
- Preparation involves making chocolate mousse, filling cups, and adding graveyard-themed decorations such as cookie crumb "soil" and candy tombstones.
- These desserts can be made a day in advance and stored in the refrigerator, with leftovers lasting up to three days.
- The recipe combines traditional chocolate mousse techniques with creative Halloween-inspired presentation for an impressive and tasty party treat.

Palksky Silicone Cups for Melting Chocolate, 4PCS Silicone Measuring Cups with 250 & 350ml Capacity, Reusable Baking Supplies for DIY Chocolate Molds
Versatile Chocolate Melting Cups: This silicone chocolate melting pot is ideal for melting and dipping chocolate. Made of…
As an affiliate, we earn on qualifying purchases.
As an affiliate, we earn on qualifying purchases.
History
The graveyard chocolate mousse cups' origin story is shrouded in mystery. You'll find that these spooky desserts have gained popularity in recent years, especially during Halloween celebrations. While their exact beginnings aren't clear, they likely evolved from traditional chocolate mousses and graveyard-themed cakes.
You might be interested to know that chocolate mousse itself has been around since the 1800s. It's believed to have originated in France, where chefs were experimenting with new ways to serve chocolate.
The idea of presenting desserts in cup form became more common in the mid-20th century, as people looked for convenient, individual portions.
The graveyard theme in desserts has roots in Day of the Dead celebrations and Halloween traditions. You'll notice that these cups combine the rich, creamy texture of mousse with playful decorations meant to resemble tombstones and spooky graveyard scenes.
Over time, bakers and home cooks have put their own spin on the concept, adding crushed cookies for "dirt" and using various candies to create eerie effects.
Today, you'll find countless variations of this fun and tasty dessert online and in cookbooks.

BinaryABC Halloween Cupcake Wrappers,Spider Web Cupcake Wrapper,Halloween Party Decorations Supplies 36Pcs
Spiderweb laser out wrappers decor for cupcake, baking, muffin etc.
As an affiliate, we earn on qualifying purchases.
As an affiliate, we earn on qualifying purchases.
Recipe
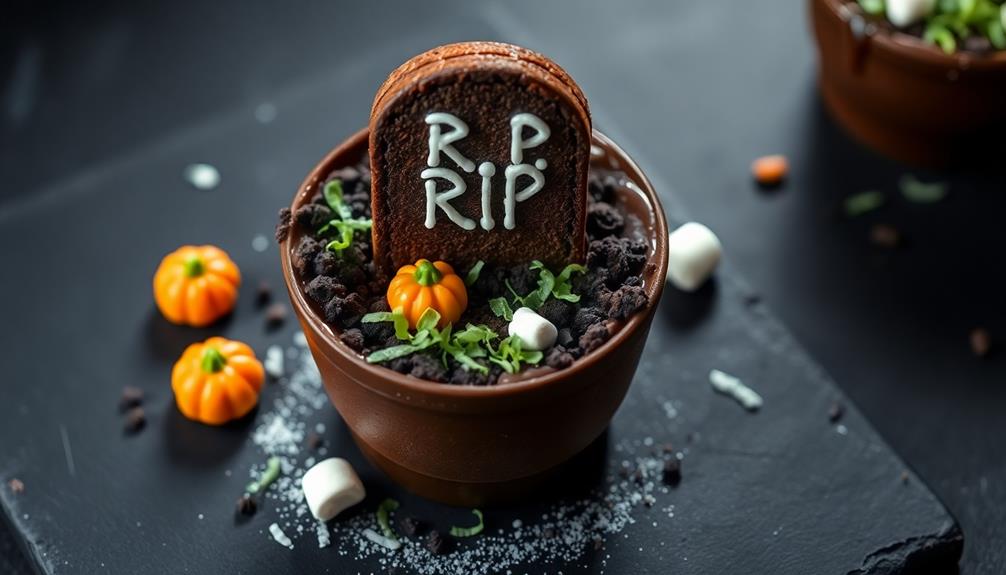
Graveyard Chocolate Mousse Cups are a delightfully spooky dessert that's perfect for Halloween parties or any ghoulish gathering. These creamy, chocolatey treats are served in edible chocolate cups, decorated to resemble miniature graveyards complete with cookie crumb "dirt" and candy decorations.
This recipe combines the rich, velvety texture of chocolate mousse with the fun, interactive element of creating your own graveyard scene. The chocolate cups can be made in advance, allowing you to focus on the mousse and decorations closer to serving time. While it may look complicated, this dessert is surprisingly simple to put together and is sure to impress your guests.
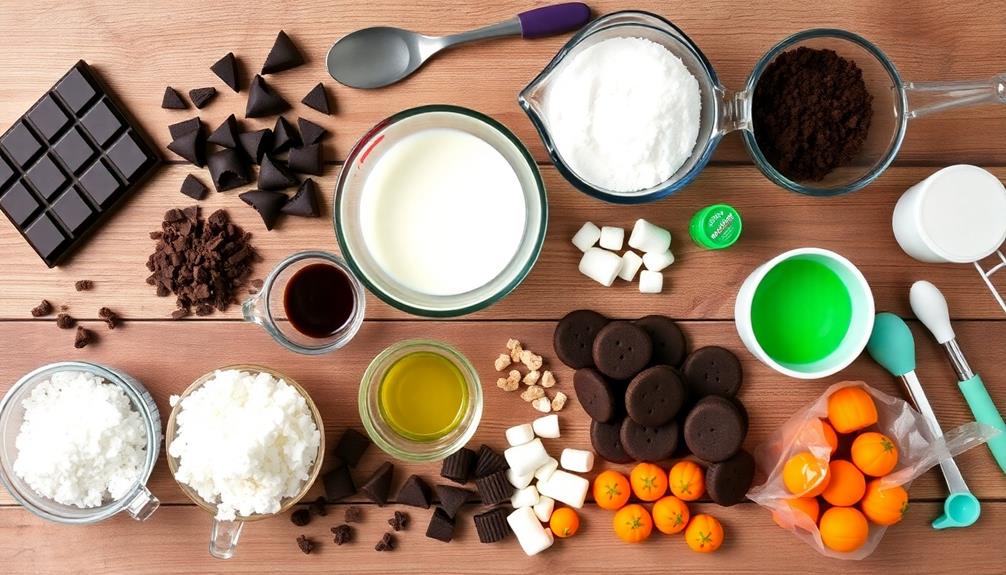
Ingredients:
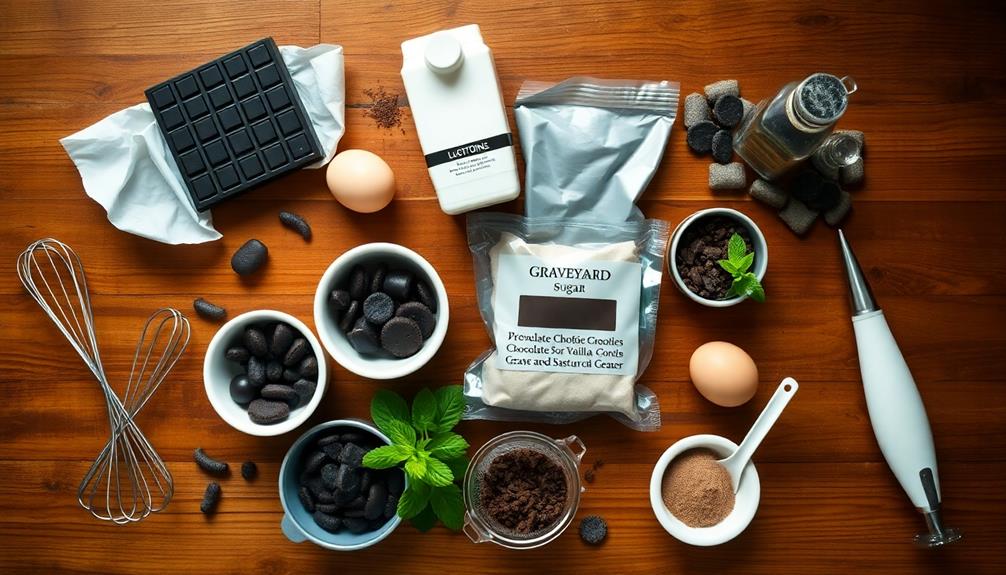
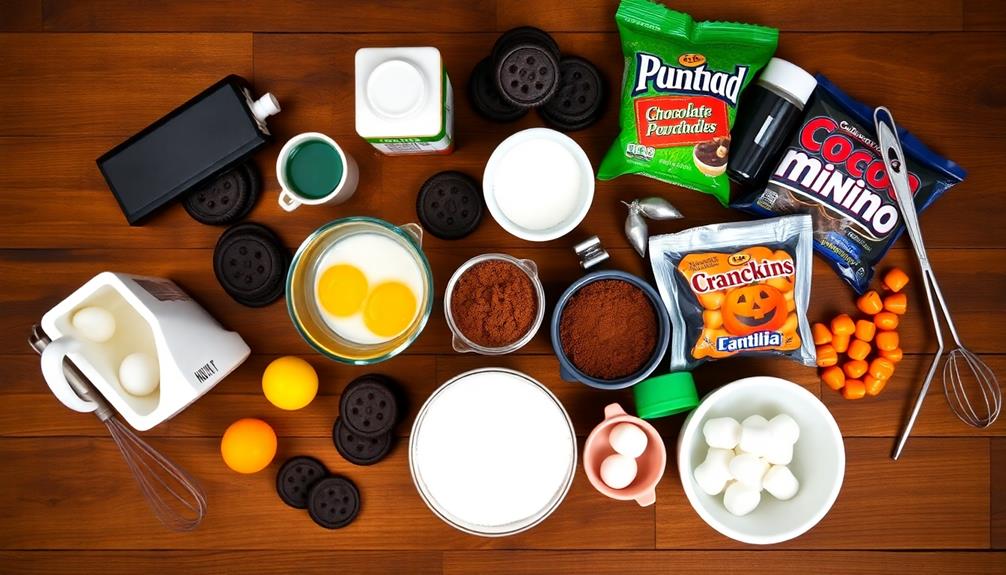
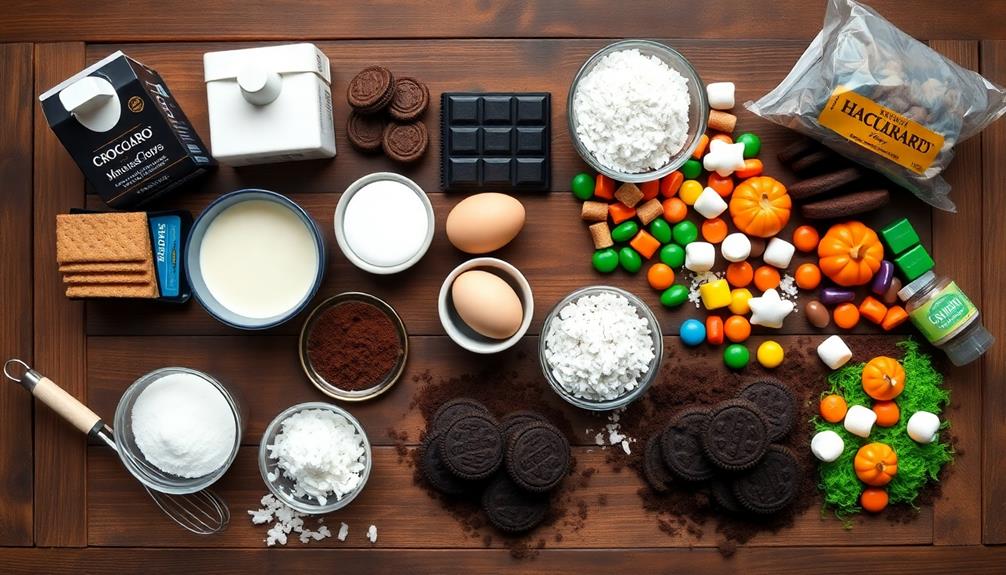
- 8 oz dark chocolate, chopped
- 1 cup heavy cream
- 2 egg whites
- 1/4 cup sugar
- 1/4 cup cocoa powder
- 1 tsp vanilla extract
- 1 cup chocolate cookie crumbs
- Milano cookies or graham crackers
- Candy pumpkins and ghosts
- Green food coloring
To prepare the Graveyard Chocolate Mousse Cups, start by melting half of the chocolate and using it to coat the inside of silicone molds or paper cups to create the edible chocolate cups. Chill until set.
For the mousse, whip the cream until stiff peaks form. In a separate bowl, beat egg whites until soft peaks form, then gradually add sugar and beat until glossy. Melt the remaining chocolate and fold it into the whipped cream along with cocoa powder and vanilla. Gently fold in the egg white mixture. Fill the chocolate cups with mousse and refrigerate for at least 2 hours.
When ready to serve, remove the chocolate cups from their molds. Sprinkle cookie crumbs over the mousse to create "dirt." Use Milano cookies or graham crackers as tombstones, writing "RIP" with edible marker or melted chocolate.
Add candy pumpkins and ghosts for decoration. For a finishing touch, mix a small amount of green food coloring with coconut flakes to create "moss" and sprinkle it around the tombstones. Serve chilled and enjoy your spooky creation!

Goalfly 6 Pcs Silicone Mixing Bowl (4.1 x 2.7 inches), Mixing Bowl Set for Facial Mask, Reusable Condiment Bowls, Esthetician Bowls, Silicone Bowls for Melting Chocolate
Set Includes: The set contains 3 colors of silicone bowls, grey, white and green; Mixing bowls mouth diameter…
As an affiliate, we earn on qualifying purchases.
As an affiliate, we earn on qualifying purchases.
Cooking Steps

You're about to embark on a spooky culinary adventure with these graveyard-themed chocolate mousse cups!
First, you'll crush cookies to create a crumbly base, then whip up a rich chocolate mousse mixture to fill your cups.
Once filled, you'll add eerie decorative toppings and chill the cups, transforming them into mini edible graveyards that are sure to impress your friends at your next Halloween party.
Step 1. Crush Cookies for Base
To create the spooky base for your graveyard-themed dessert, start by crushing chocolate sandwich cookies into fine crumbs. You'll need about 20 cookies for this recipe.
Place them in a resealable plastic bag and remove as much air as possible before sealing it. Using a rolling pin or the flat side of a meat mallet, gently crush the cookies by rolling or tapping the bag.
Don't go too hard, or you'll tear the bag! Once you've got a good start, you can use your hands to crush any remaining large pieces. Aim for a consistency similar to coarse sand.
If you don't have a plastic bag, you can use a food processor instead. Just pulse the cookies in short bursts until they're finely crushed. Be careful not to over-process, or you'll end up with cookie dust!
When you're done, you should have about 2 cups of cookie crumbs. These will form the perfect "dirt" base for your graveyard scene, adding both flavor and visual appeal to your spooky chocolate mousse cups.
Step 2. Prepare Chocolate Mousse Mixture

Now that you've prepared the cookie crumb base, it's time to whip up the star of the show: the chocolate mousse.
Start by melting dark chocolate in a double boiler or microwave, being careful not to overheat it. Once it's smooth, set it aside to cool slightly.
In a separate bowl, whip heavy cream until soft peaks form. This will give your mousse its light, airy texture.
Next, separate egg yolks from whites. Beat the yolks with sugar until they're pale and creamy. Gently fold the melted chocolate into the egg mixture, making sure it's well combined.
Now, carefully fold in the whipped cream, using a spatula to maintain as much air as possible.
In another bowl, beat the egg whites until stiff peaks form. Fold these into the chocolate mixture, again being gentle to keep the mousse fluffy.
Your mousse should now be rich, chocolatey, and delightfully smooth. If you want to add a spooky twist, consider mixing in a drop of black food coloring for a deeper, more mysterious hue.
Step 3. Fill Cups With Mousse

Spoons at the ready, it's time to fill your graveyard cups with the decadent chocolate mousse. Start by grabbing your prepared cups and the bowl of chilled mousse.
Using a spoon or a piping bag, carefully transfer the mousse into each cup. Fill them about three-quarters full, leaving some space at the top for decorations. As you're filling, gently tap the cups on the counter to remove any air bubbles and ensure an even surface.
If you're using a spoon, smooth out the top of the mousse with the back of it. For a piping bag, simply squeeze and swirl to create a level surface.
Don't worry if it's not perfectly smooth – your toppings will cover any small imperfections. Once all the cups are filled, place them in the refrigerator for at least an hour to set. This will help the mousse firm up and make it easier to add your graveyard decorations later.
Step 4. Add Spooky Decorative Toppings
Ready to transform your chocolate mousse cups into eerie graveyards? It's time to add some spine-chilling toppings that'll make your dessert truly Halloween-worthy.
Start by crushing chocolate cookies into fine crumbs, resembling dark soil. Sprinkle this "dirt" over the mousse, covering the surface completely.
Next, create tombstones using rectangle-shaped cookies or graham crackers. Use white icing to pipe "RIP" or spooky messages on them, then gently press them into the mousse.
For a creepy touch, add some gummy worms poking out of the "soil." You can also use green-tinted coconut flakes to create patches of moss around the tombstones.
To make ghost shapes, use small dollops of whipped cream or marshmallows. Add tiny chocolate chips for eyes.
For an extra eerie effect, place a few candy pumpkins or plastic skeletons around the graveyard. Finally, dust the entire scene with a light coating of cocoa powder to give it an aged, misty appearance.
Your graveyard chocolate mousse cups are now ready to haunt your Halloween party!
Step 5. Chill Before Serving

After all your creative decorating, it's crucial to chill your graveyard chocolate mousse cups before serving. This step isn't just about temperature; it's about perfecting the texture and presentation of your spooky dessert.
Place the cups in the refrigerator for at least 2 hours, or overnight if you've got the time. The cold air will help set the mousse, making it firmer and easier to eat.
While they're chilling, resist the temptation to peek! Every time you open the fridge door, you're letting warm air in, which can affect the setting process.
If you're in a hurry, you can pop them in the freezer for about 30 minutes, but be careful not to freeze them solid.
When it's time to serve, take the cups out just a few minutes before eating. This will allow the mousse to soften slightly, making it creamy and smooth.
The chilled cups will also help your decorations stay in place, keeping your graveyard scene intact until the last spoonful.

Oreo Small Cookie Crumbs
Perfect addition to ice cream, milkshakes, cheesecakes, dessert bars, and pies
As an affiliate, we earn on qualifying purchases.
As an affiliate, we earn on qualifying purchases.
Final Thoughts

These Graveyard Chocolate Mousse Cups are a delightful and spooky treat that's perfect for Halloween parties or any eerie-themed gathering.
You'll love how easy they're to make and how impressed your friends will be with your creepy culinary skills. Remember, the key to success is in the details, so take your time with the decorations.
Don't be afraid to get creative with your toppings. While we've suggested cookie crumbs for dirt and candy bones, you can experiment with other spooky elements like gummy worms or edible spiders.
If you're serving these to younger kids, you might want to tone down the scariness a bit.
Lastly, these mousse cups can be made a day in advance, which is great for party planning. Just keep them covered in the fridge until you're ready to serve.
And if you have leftovers (though that's unlikely!), they'll stay fresh for up to three days.
Frequently Asked Questions
Can I Use Different Types of Cookies for the "Dirt" Topping?
Absolutely! You can use various types of cookies for the "dirt" topping. Try Oreos, chocolate wafers, or graham crackers. Just crush them finely for the right texture. Experiment with different flavors to find your favorite combination.
How Long Can These Mousse Cups Be Stored in the Refrigerator?
You can store these mousse cups in the refrigerator for up to 3 days. They're best consumed within 24-48 hours for optimal texture and flavor. Make sure you cover them tightly with plastic wrap to prevent drying out.
Are There Any Non-Dairy Alternatives for Making the Chocolate Mousse?
Yes, you can make dairy-free chocolate mousse using alternatives like coconut cream, avocado, or silken tofu. You'll need to adjust the recipe slightly, but these options can create a creamy texture similar to traditional mousse.
What Other Halloween-Themed Decorations Can I Add to the Cups?
You can add edible tombstones, candy pumpkins, or spooky sprinkles. Try creating cobwebs with melted white chocolate, or use gummy worms as if they're crawling out. Don't forget plastic spiders or ghost-shaped marshmallows for extra fright!
Can I Prepare the Mousse Cups in Advance for a Party?
You can prepare mousse cups in advance for your party. Make them up to 24 hours ahead and store them covered in the fridge. Just add any final toppings or decorations right before serving to keep them fresh.