You'll transform ordinary brownies into a spooky Halloween treat with Haunted Graveyard Brownies. This festive dessert combines rich chocolate with eerie decorations. Start by baking fudgy brownies, then add cookie tombstones, gummy worms, and candy pumpkins. Use crushed chocolate cookies to create a "dirt" effect, and pipe green icing for grassy tufts. Black icing can spell out "RIP" on Milano cookie gravestones. Don't forget to add marshmallow ghosts and mini skeletons for extra creepiness. These brownies are perfect for Halloween parties and autumn gatherings, delighting both kids and adults. There's more to uncover about this ghoulishly good dessert.
Key Takeaways
- Haunted Graveyard Brownies are fudgy chocolate brownies decorated to resemble a spooky graveyard scene.
- Key decorations include cookie tombstones, crushed chocolate cookies for dirt, and candy pumpkins.
- The dessert combines a brownie base with creative toppings for a visually striking Halloween treat.
- Milano cookies with "RIP" written in icing serve as tombstones for the graveyard effect.
- Gummy worms, marshmallow ghosts, and skeleton figures enhance the eerie atmosphere of the dessert.
History

Throughout history, the concept of combining spooky themes with desserts has captivated bakers and confectioners alike. You'll find that this tradition dates back to ancient civilizations, where people often prepared special treats for festivals honoring the dead.
In medieval Europe, you might've encountered "soul cakes," small, round pastries given out on All Souls' Day.
As time passed, the idea of Halloween-themed sweets gained popularity. In the early 20th century, you'd see candy companies producing ghost and witch-shaped chocolates.
By the 1950s and '60s, home bakers started creating their own spooky desserts for Halloween parties. This is when you'd first encounter recipes for graveyard cakes and cookie tombstones.
The specific concept of "Haunted Graveyard Brownies" likely emerged in the late 20th century. You'd find it coinciding with the rise of elaborate Halloween celebrations and the growing trend of themed baking.
Today, you can easily find countless variations of this treat, each putting a unique spin on the classic brownie base with eerie decorations.
Recipe
Haunted Graveyard Brownies are a spooky and delicious treat perfect for Halloween parties or any festive autumn gathering. These decadent chocolate brownies are adorned with cookie "tombstones" and candy decorations to create a miniature edible graveyard scene that's sure to delight both kids and adults alike.
This recipe combines rich, fudgy brownies with creative decorations to bring the eerie atmosphere of a haunted graveyard to your dessert plate. The contrast between the dark chocolate brownie base and the pale cookie gravestones creates a visually striking effect, while the gummy worms and candy pumpkins add playful touches to complete the spooky scene.
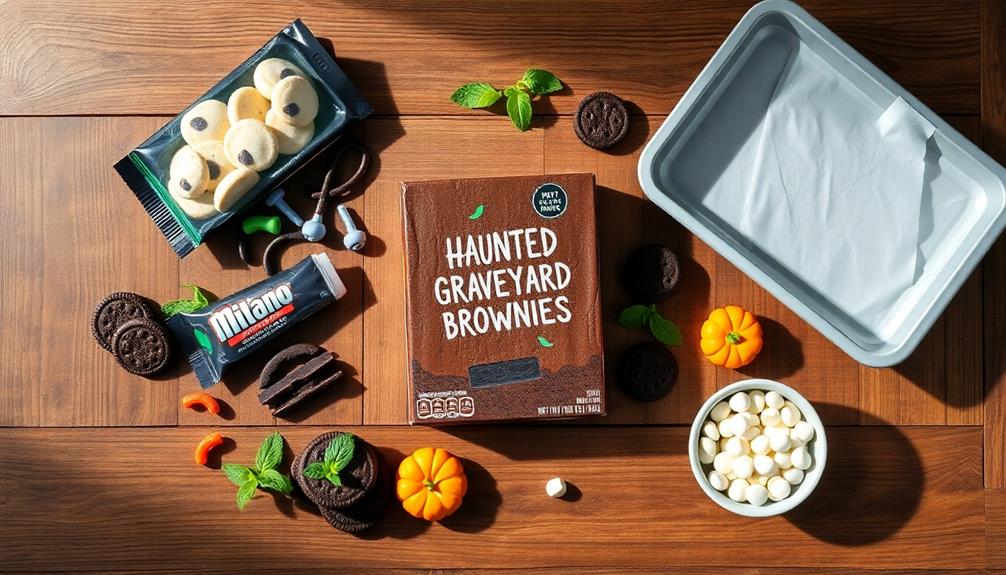
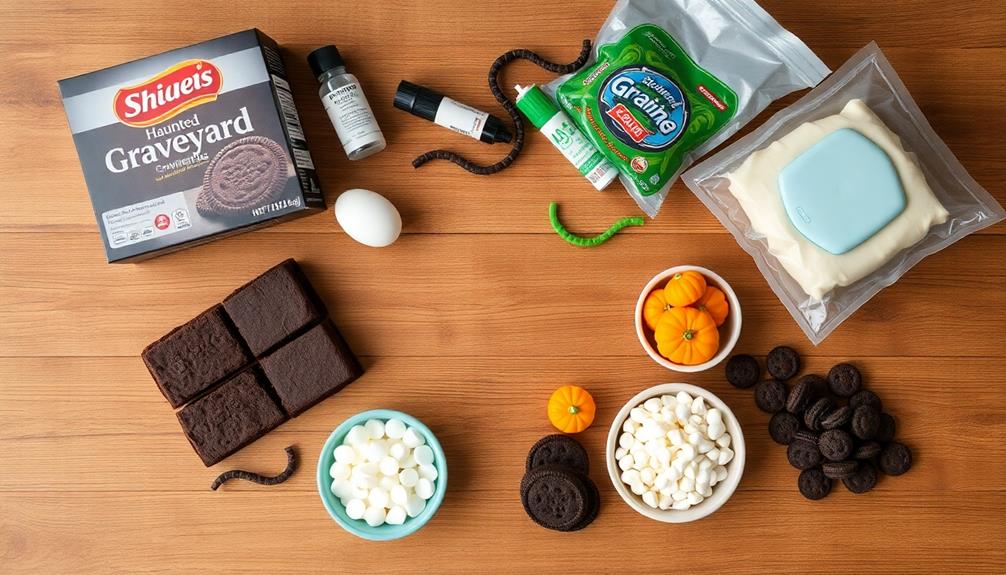
- 1 box brownie mix (plus ingredients listed on the box)
- 1 package of Milano cookies
- Black decorating icing
- Green decorating icing
- Gummy worms
- Candy pumpkins
- Chocolate sandwich cookies, crushed
- White chocolate chips
Prepare the brownie mix according to package instructions and bake in a 9×13 inch pan. While the brownies are cooling, use the black decorating icing to write "RIP" or other spooky messages on the Milano cookies to create tombstones.
Once the brownies are completely cool, sprinkle the crushed chocolate cookies over the top to create "dirt." Arrange the cookie tombstones, gummy worms, and candy pumpkins on the brownie surface. Use the green icing to pipe small tufts of "grass" around the tombstones and decorations. Finally, melt the white chocolate chips and drizzle over the brownies to create a ghostly effect.
For best results, allow the brownies to set in the refrigerator for at least an hour before serving. This will help the decorations stay in place and make cutting easier. If you're feeling extra creative, consider adding other Halloween-themed candies or decorations to enhance the graveyard scene.
To make cutting easier, use a plastic knife and wipe it clean between cuts to prevent the brownies from sticking and smearing the decorations.
Cooking Steps

You'll begin by preheating your oven to 350°F and mixing the dry ingredients in a bowl.
Next, you'll melt the butter and chocolate together, then add eggs and vanilla to create a rich, smooth batter.
Step 1. Preheat Oven to 350°F

The first step in creating these spooky treats is preheating your oven. Set the temperature to 350°F (175°C) and let it warm up while you prepare the other ingredients. This step is crucial because it ensures your brownies will bake evenly and have the perfect texture.
While you're waiting for the oven to reach the right temperature, you can gather your baking supplies and start measuring out ingredients. Don't forget to position the oven rack in the center, as this will help your brownies cook uniformly.
If your oven has a convection setting, it's best to stick with the regular bake mode for brownies. Keep in mind that every oven is slightly different, so you might need to adjust the temperature by a few degrees. If you have an oven thermometer, now's a good time to use it to double-check the accuracy of your oven's temperature display.
Step 2. Mix Dry Ingredients Together

Several dry ingredients form the foundation of these spooky brownies. You'll need to gather all-purpose flour, unsweetened cocoa powder, granulated sugar, and a pinch of salt. It's important to measure these ingredients accurately, so use level measuring cups and spoons for the best results.
In a medium-sized mixing bowl, combine the flour and cocoa powder. Use a whisk or a fork to blend these two ingredients together, making sure there aren't any lumps. This step is crucial for smooth, even brownies.
Next, add the sugar and salt to the bowl. Again, use your whisk or fork to mix everything thoroughly. You're aiming for a uniform mixture where all the dry ingredients are evenly distributed.
Once you've finished mixing, set the bowl aside. You'll use this dry mixture later when you're ready to combine it with the wet ingredients. Remember, it's okay if you see some cocoa powder specks in the mix – that's normal and will give your brownies a rich, chocolatey flavor.
Don't forget to wipe any spills on the counter to keep your workspace clean and organized.
Step 3. Melt Butter and Chocolate

With the dry ingredients ready, it's time to turn our attention to the rich, gooey heart of these haunted graveyard brownies. You'll need to melt the butter and chocolate together, creating a smooth, glossy mixture that'll give your brownies their irresistible texture.
Start by choosing a medium-sized, microwave-safe bowl. Cut your butter into small cubes and break the chocolate into chunks. This'll help them melt more evenly. Place both in the bowl and pop it into the microwave. Heat in 30-second intervals, stirring well after each burst. Be careful not to overheat, as chocolate can easily burn. You'll know it's done when the mixture is completely smooth and there are no lumps left.
If you don't have a microwave, don't worry! You can use a double boiler instead. Fill a saucepan with an inch of water and bring it to a simmer. Place a heatproof bowl on top, making sure it doesn't touch the water. Add your butter and chocolate, stirring gently until melted. This method gives you more control over the melting process.
Step 4. Add Eggs and Vanilla
Now that your butter and chocolate mixture is perfectly melted, it's time to add the eggs and vanilla.
Crack three large eggs into a small bowl, making sure no shell pieces sneak in. If you spot any, use a spoon to fish them out. Next, measure one teaspoon of vanilla extract and set it aside.
Before you add the eggs, let your chocolate mixture cool for a minute or two. You don't want to cook the eggs by accident!
Once it's cooled slightly, pour in the eggs one at a time, stirring well after each addition. This helps incorporate them evenly and prevents clumps. As you stir, you'll notice the batter becoming smoother and shinier.
Now, add the vanilla extract and mix it in thoroughly. The vanilla will give your brownies that classic, irresistible aroma.
Keep stirring until everything is well combined, but don't overdo it. Overmixing can make your brownies tough. Your batter should now be glossy and uniform in color, ready for the next step in creating your spooky Haunted Graveyard Brownies.
Step 5. Add Graveyard Decorations

Once your brownie batter is poured into the baking pan, it's time to transform it into a spooky graveyard scene.
Start by placing Milano cookies upright in the batter to create tombstones. You can use white icing to write "RIP" or funny epitaphs on them before insertion.
Next, sprinkle crushed chocolate cookies over parts of the batter to mimic dirt patches.
For a creepy touch, add gummy worms peeking out from the "dirt." Place small skeleton figures or plastic bones around the graveyard for an extra eerie effect.
You can create ghost shapes using marshmallows cut diagonally and placed on top of the batter.
Don't forget to add some candy pumpkins to complete the Halloween scene.
Final Thoughts

These Haunted Graveyard Brownies are sure to be a hit at your next Halloween party. They're not only delicious but also a fun and spooky treat that'll impress your friends and family.
Remember, you can always customize the decorations to fit your style or preferences. If you're not a fan of candy corn, try using other Halloween-themed candies or even small plastic decorations.
Don't forget to store your brownies properly if you're making them ahead of time. Keep them in an airtight container at room temperature for up to three days. If you need to store them longer, you can refrigerate them for up to a week or freeze them for up to three months.
When it's time to serve, consider pairing these brownies with other Halloween-themed snacks or a warm beverage like hot chocolate or apple cider.
You could even create a whole dessert table with various spooky treats. Whatever you decide, these Haunted Graveyard Brownies are sure to be the centerpiece of your Halloween celebration. Enjoy your creepy creation!
Frequently Asked Questions
Can I Use White Chocolate Instead of Dark Chocolate for the Tombstones?
Yes, you can use white chocolate for the tombstones. It'll give a different look and flavor, but it's a suitable alternative. Keep in mind that white chocolate melts differently, so you might need to adjust your technique slightly.
How Long Do Haunted Graveyard Brownies Stay Fresh?
You'll find these treats stay fresh for about 3-4 days at room temperature. If you've stored them in an airtight container, they'll maintain their best quality. For longer shelf life, you can refrigerate them for up to a week.
Are There Any Non-Spooky Variations of This Recipe?
You can easily create non-spooky variations of this recipe. Try using colorful sprinkles, fruit toppings, or festive decorations instead. You'll transform the treat into a cheerful dessert for any occasion while keeping the delicious brownie base intact.
Can I Make These Brownies Gluten-Free?
You can definitely make gluten-free brownies! Simply swap regular flour for a gluten-free alternative like almond or coconut flour. You'll need to adjust the liquid ingredients slightly, but it's an easy substitution that'll give you delicious gluten-free treats.
What's the Best Way to Transport Haunted Graveyard Brownies to a Party?
You'll want to transport them carefully. Use a sturdy container with a tight-fitting lid. Place parchment paper between layers to prevent sticking. Keep them cool and level during transit to avoid melting or shifting decorations.

Claude oversees the development and publication of all content at One Bored Mommy. With a meticulous eye for detail and a passion for storytelling, Claude ensures that every article, guide, and story meets our high standards for quality and relevance.