Pumpkin Patch Pot Pies are a delightful autumn dish that combines the comfort of traditional pot pies with seasonal pumpkin flavors. You'll love making these individual-sized pies, perfect for cozy family dinners or festive gatherings. The recipe features a creamy pumpkin filling with tender vegetables and herbs, all nestled in a flaky, golden crust. You'll start by preparing the pumpkin filling, then make a buttery pie crust from scratch. After assembling the pies in ramekins, you'll bake them until they're bubbling and golden brown. These pot pies are a great way to use leftover pumpkin and impress your guests with your culinary skills. Let's explore how to create this seasonal favorite!
Key Takeaways
- Pumpkin Patch Pot Pies combine traditional pot pie comfort with pumpkin and fall spices for a unique autumn dish.
- These individual-sized pies feature a creamy pumpkin filling, tender vegetables, and herbs in a flaky crust.
- The recipe evolved from early American harvest celebrations, utilizing excess pumpkins and European cooking techniques.
- Preparation includes making a pumpkin filling, creating a flaky pie crust, and assembling pies in ramekins.
- Baking at 375°F (190°C) until golden brown, these pies are ideal for cozy family dinners or festive gatherings.
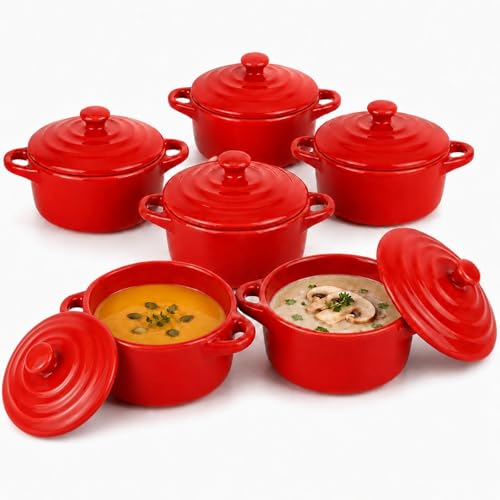
RHBLME 6 Pack French Onion Soup Bowls, 7 Oz Ramekins Oven Safe Mini Cocotte, Red Ramekins with Lids Oven Safe Soup Bowls for Creme Brulee, Pot Pie, Lava Cakes, Pumpkin Soup
PREMIUM MATERIALS: These ramekins with lids are made of high-quality porcelain, are shatter-resistant, stronger than stoneware and ceramics,…
As an affiliate, we earn on qualifying purchases.
As an affiliate, we earn on qualifying purchases.
History

Pumpkin patch pot pies' origins can be traced back to early American harvest celebrations. You'll find that these savory treats were born from the necessity of using up excess pumpkins after the autumn harvest. As settlers adapted to their new environment, they combined European cooking techniques with native ingredients, creating a uniquely American dish.
In the early days, you'd have seen these pies made with a variety of fillings, not just pumpkin. Colonists often mixed in whatever vegetables and meats they'd on hand. The pies were a practical way to stretch food supplies and provide hearty meals during the cold months.
You might be surprised to learn that pumpkin patch pot pies weren't always individual servings. Initially, they were large, family-style pies meant to feed a crowd. It wasn't until the 20th century that the single-serving version became popular.
Today, you'll find these pies as a staple at fall festivals and farm-to-table restaurants, celebrating their rustic roots and seasonal flavors. They've come a long way from their humble beginnings!

Just Add Water, Pie Crust Mix, Flaky Baking Mix for Homemade Pies, Boxes (Pack of 6) 9 oz
Pie Crust Mix, just add water for easy prep Versatile for pies, cookies, noodles and more Makes 2…
As an affiliate, we earn on qualifying purchases.
As an affiliate, we earn on qualifying purchases.
Recipe

Pumpkin Patch Pot Pies are a delightful autumn dish that combines the comforting warmth of traditional pot pies with the seasonal flavors of pumpkin and fall spices. These individual-sized pies feature a creamy pumpkin filling studded with tender vegetables and savory herbs, all encased in a flaky, golden crust.
Perfect for cozy family dinners or festive gatherings, these pot pies offer a unique twist on classic comfort food. The combination of pumpkin, aromatic spices, and hearty vegetables creates a satisfying meal that captures the essence of the autumn season. Whether served as a main course or as part of a larger spread, Pumpkin Patch Pot Pies are sure to become a fall favorite.
- 2 cups pumpkin puree
- 1 cup heavy cream
- 2 eggs
- 1 cup chicken or vegetable broth
- 1 cup diced carrots
- 1 cup diced celery
- 1 cup diced onions
- 2 cloves minced garlic
- 1 teaspoon dried thyme
- 1 teaspoon dried sage
- 1/2 teaspoon ground nutmeg
- Salt and pepper to taste
- 2 pie crusts (homemade or store-bought)
- 1 egg (for egg wash)
Preheat the oven to 375°F (190°C). In a large bowl, whisk together pumpkin puree, heavy cream, eggs, and broth.
Sauté the carrots, celery, onions, and garlic until softened, then add to the pumpkin mixture along with the herbs and spices. Divide the mixture among four individual oven-safe dishes.
Cut the pie crusts to fit the tops of the dishes, crimping the edges to seal. Brush the tops with egg wash and cut small slits for venting. Bake for 35-40 minutes or until the crust is golden brown and the filling is bubbly.
For best results, allow the pot pies to cool for 5-10 minutes before serving. This will help the filling set and make it easier to eat.
If you prefer a vegetarian version, you can substitute the chicken broth with vegetable broth and add extra vegetables like peas or diced potatoes.
To make ahead, assemble the pot pies and refrigerate for up to 24 hours before baking, adding an extra 5-10 minutes to the baking time if cooking from chilled.
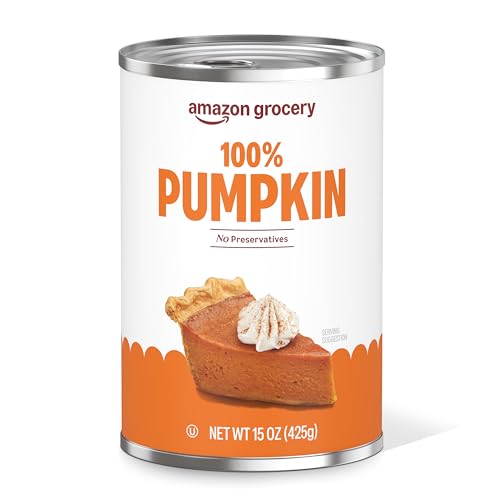
Amazon Grocery, Pumpkin, 15 Oz
One 15-ounce can of 100% pumpkin purée
As an affiliate, we earn on qualifying purchases.
As an affiliate, we earn on qualifying purchases.
Cooking Steps

You're about to embark on a cozy culinary adventure with these Pumpkin Patch Pot Pies!
First, you'll preheat your oven and whip up a savory pumpkin filling that'll make your kitchen smell like autumn.
Then, you'll craft a flaky pie crust, assemble your mini pies in ramekins, and pop them in the oven until they're golden brown and irresistible.
[DIRECTIONS]:Step 1. Preheat Oven to 375°F

Before diving into the filling preparation, it's crucial to preheat your oven to 375°F (190°C). This step might seem simple, but it's essential for ensuring your pot pies cook evenly and achieve that perfect golden-brown crust.
While your oven's warming up, you'll have time to gather your ingredients and start on the filling.
Don't forget to position your oven rack in the center. This placement allows for optimal heat circulation around your pot pies. If you're using a convection oven, you might want to lower the temperature by about 25°F, as these ovens tend to cook food faster.
Remember, every oven is a bit different. If you know yours runs hot or cool, adjust accordingly. It's always a good idea to use an oven thermometer to double-check the temperature. This way, you'll be sure your pumpkin patch pot pies are baking at just the right heat.
While you're waiting for the oven to reach temperature, you can start prepping your baking dish or individual ramekins. A light coating of non-stick spray will make serving easier later on.
Step 2. Prepare Pumpkin Filling

Now that your oven is preheating, it's time to tackle the heart of your pot pies: the pumpkin filling.
Start by peeling and cubing a small sugar pumpkin, about 2 pounds in weight. Don't worry if you can't find a sugar pumpkin; butternut squash works great too!
Place the cubes in a large pot and cover them with water. Bring the water to a boil, then reduce the heat and let it simmer for about 15 minutes, or until the pumpkin is tender when pierced with a fork.
While the pumpkin cooks, chop up some onions, carrots, and celery. These veggies will add flavor and texture to your filling.
Once the pumpkin is done, drain it well and return it to the pot. Add your chopped veggies, along with some minced garlic, sage, and thyme.
Pour in some vegetable broth and a splash of cream for richness. Season with salt and pepper to taste.
Let this mixture simmer for another 10 minutes, stirring occasionally. The pumpkin will start to break down, creating a creamy base for your pot pies.
Step 3. Prepare Flaky Pie Crust

The foundation of any great pot pie is a flaky, buttery crust. To achieve this, you'll need cold butter, all-purpose flour, salt, and ice water.
Start by cutting the cold butter into small cubes and placing them in the freezer for a few minutes. In a large bowl, mix the flour and salt.
Add the chilled butter cubes to the flour mixture and use a pastry cutter or your fingers to work the butter into the flour until it resembles coarse crumbs.
Gradually add ice water, a tablespoon at a time, mixing gently with a fork until the dough starts to come together. Be careful not to overwork the dough, as this can make it tough.
Once the dough holds together when squeezed, shape it into a disc and wrap it in plastic wrap. Chill the dough in the refrigerator for at least an hour before rolling it out. This resting period allows the gluten to relax, resulting in a more tender crust.
When you're ready to use it, roll the dough out on a lightly floured surface to fit your pot pie dish.
Step 4. Assemble Pies in Ramekins

With your flaky pie crust prepared, it's time to assemble the pumpkin patch pot pies in individual ramekins. First, lightly grease six 8-ounce ramekins with butter.
Roll out your pie crust and cut circles slightly larger than the ramekins. Press these circles into the dishes, letting the excess hang over the edges.
Next, spoon your pumpkin filling into each crust-lined ramekin. Don't overfill them; leave about a half-inch of space at the top.
For a fun twist, use a small pumpkin-shaped cookie cutter to cut out decorative shapes from the remaining dough. Place these cute pumpkins on top of the filling.
Now, brush the edges of the crust with beaten egg to help seal the pies. Carefully fold the overhanging dough inward, crimping the edges to create a neat border.
Brush the entire top surface with more egg wash for a golden finish. Finally, use a sharp knife to cut a few small slits in the top crust. This'll let steam escape and keep your pies from getting soggy.
Your pumpkin patch pot pies are now ready for baking!
Step 5. Bake Until Golden Brown

After assembling your pumpkin patch pot pies, it's time to bake them to golden-brown perfection. Preheat your oven to 375°F (190°C) and place the ramekins on a baking sheet. This will catch any spills and make it easier to move the pies in and out of the oven.
Before baking, brush the tops of your pot pies with an egg wash. Mix one beaten egg with a tablespoon of water and gently brush it over the pastry. This will give your pies a beautiful, glossy finish. If you'd like, you can sprinkle some extra seeds or herbs on top for added texture and flavor.
Slide the baking sheet into the preheated oven and set a timer for 25 minutes. Keep an eye on your pies as they bake. You'll know they're done when the crust is golden brown and the filling is bubbling around the edges. If the tops are browning too quickly, loosely cover them with aluminum foil.
Once they're out of the oven, let the pies cool for 5-10 minutes. This will help the filling set and prevent burned tongues!
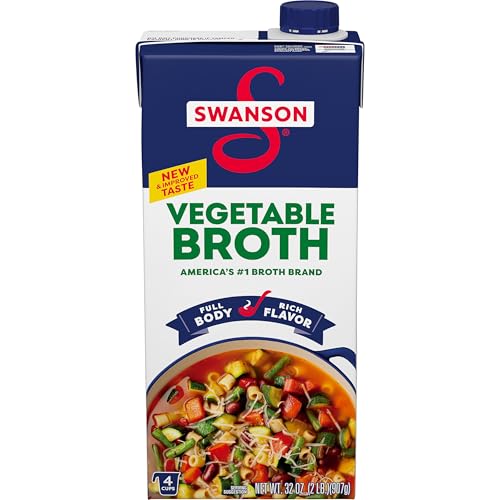
SWANSON S Vegetable Broth, 32 oz Carton
Swanson Vegetable Broth is made with quality ingredients for a rich homemade taste
As an affiliate, we earn on qualifying purchases.
As an affiliate, we earn on qualifying purchases.
Final Thoughts

Three key takeaways make these Pumpkin Patch Pot Pies a must-try recipe. First, they're a perfect way to use up leftover pumpkin, giving you a delicious and seasonal meal.
Second, you can easily customize the filling to suit your taste, adding more veggies or swapping out ingredients as you like.
Third, these pot pies are a fun and impressive dish to serve at autumn gatherings, sure to wow your friends and family.
Remember, practice makes perfect when it comes to baking. Don't worry if your first attempt isn't picture-perfect; the taste is what really matters.
You'll find that each time you make these pies, you'll get better at handling the dough and creating that lovely golden-brown crust.
Lastly, don't forget to have fun with the presentation. You can use cookie cutters to make cute pumpkin shapes for the top crust or get creative with fall-themed designs.
The possibilities are endless, and it's a great way to show off your personality in the kitchen. Happy baking!
Frequently Asked Questions
Can I Use Store-Bought Pie Crust Instead of Making My Own?
Yes, you can use store-bought pie crust instead of making your own. It's a convenient time-saver that'll work well in most recipes. However, homemade crusts often taste better and allow you to control the ingredients.
How Long Do These Pot Pies Stay Fresh in the Refrigerator?
You can store your pot pies in the refrigerator for up to 3-4 days. Make sure you keep them in an airtight container to maintain freshness. For longer storage, you'll want to freeze them instead.
Are There Any Vegetarian Alternatives for the Filling?
You've got plenty of vegetarian options for pot pie fillings! Try a mix of roasted veggies like carrots, potatoes, and peas. You can also use mushrooms, lentils, or plant-based meat substitutes for a heartier texture. Get creative!
Can I Freeze These Pot Pies for Later Consumption?
Yes, you can freeze pot pies for later consumption. They'll keep well for up to 3 months. Wrap them tightly in plastic wrap and foil before freezing. When you're ready, thaw overnight and reheat in the oven.
What Side Dishes Pair Well With Pumpkin Patch Pot Pies?
You'll love pairing your pot pies with roasted root vegetables, a crisp autumn salad, or crusty bread. Don't forget cranberry sauce for a tart contrast. For drinks, try apple cider or a light white wine.