The Spiderweb Chocolate Tart is a visually stunning dessert that's perfect for Halloween or any special occasion. You'll create a rich chocolate ganache filling in a buttery tart shell, topped with an intricate white chocolate web design. This treat originated in the early 2000s and has become a popular Halloween staple. You'll need dark chocolate for the ganache and white chocolate for the web. The process involves making the crust, preparing the filling, and carefully piping the spiderweb pattern. Don't worry if your first attempt isn't perfect; practice makes perfect! With a few simple steps, you'll be on your way to mastering this impressive dessert.
Key Takeaways
- A Spiderweb Chocolate Tart combines a chocolate ganache filling with a decorative white chocolate web design.
- The dessert originated in the early 2000s as a Halloween-inspired treat and gained popularity through online sharing.
- Key ingredients include dark chocolate for the ganache, white chocolate for the web, and a buttery tart shell.
- The spiderweb design is created by piping white chocolate in a spiral and dragging lines outward with a toothpick.
- Chilling the tart for at least 2 hours is crucial for setting the ganache and maintaining the web pattern.
History

The origins of the Spiderweb Chocolate Tart can be traced back to the early 2000s when creative bakers began experimenting with Halloween-inspired desserts. You might be surprised to learn that this spooky treat didn't exist in its current form before then.
As people started sharing recipe ideas online, the concept of a chocolate tart with a decorative web pattern gained popularity.
The tart's design was inspired by the intricate patterns of real spiderwebs, which bakers cleverly recreated using white chocolate or icing. It's a perfect example of how food can be both delicious and visually stunning.
Over the years, you've probably seen variations of this tart pop up at Halloween parties and autumn gatherings.
What's cool about the Spiderweb Chocolate Tart is how it combines traditional baking techniques with a modern, playful twist. The chocolate base is a classic tart recipe, but the spiderweb decoration adds that extra wow factor.
As more people discovered this eye-catching dessert, it quickly became a Halloween staple, loved by both kids and adults alike.
Recipe

This Spiderweb Chocolate Tart is a show-stopping dessert that combines rich, velvety chocolate with a spooky Halloween twist. The dark chocolate ganache filling is perfectly complemented by the crisp, buttery tart shell, creating a luxurious texture contrast that will delight your taste buds.
The intricate spiderweb design on top is easier to achieve than it looks, making this an impressive yet accessible recipe for bakers of all skill levels. Whether you're hosting a Halloween party or simply want to indulge in a decadent chocolate treat, this tart is sure to be a crowd-pleaser.
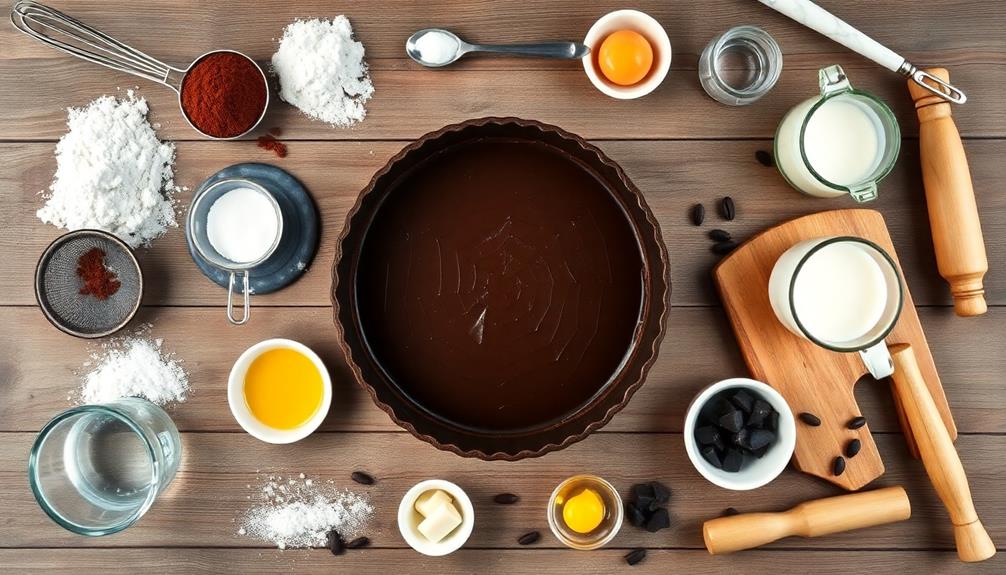
- 1 1/2 cups all-purpose flour
- 1/4 cup cocoa powder
- 1/4 cup powdered sugar
- 1/2 teaspoon salt
- 1/2 cup cold unsalted butter, cubed
- 1 large egg yolk
- 2-3 tablespoons ice water
- 12 oz dark chocolate, chopped
- 1 1/4 cups heavy cream
- 2 tablespoons unsalted butter
- 1/4 cup white chocolate, melted
To make the tart, start by preparing the chocolate crust. Combine the dry ingredients, then cut in the cold butter until the mixture resembles coarse crumbs. Add the egg yolk and ice water, mixing until the dough comes together.
Press the dough into a tart pan and chill for 30 minutes. Bake the crust at 375°F (190°C) for 15-20 minutes, then let it cool. For the filling, heat the cream and pour it over the chopped dark chocolate. Stir until smooth, then add the butter.
Pour the ganache into the cooled crust and refrigerate until set. To create the spiderweb design, drizzle melted white chocolate in concentric circles on top of the tart, then use a toothpick to draw lines from the center outward, creating a web pattern.
For best results, allow the tart to come to room temperature before serving to ensure the ganache is perfectly smooth and creamy. If you're having trouble creating clean lines with the white chocolate, try putting it in a small piping bag or zip-top bag with a corner snipped off for more precise control.
Don't worry if your spiderweb isn't perfect – slight imperfections will only add to the spooky charm of this Halloween-inspired dessert.
Cooking Steps

You'll love creating this spooky yet elegant Spiderweb Chocolate Tart!
Start by preparing the tart crust and filling it with a rich chocolate ganache.
Once that's done, you'll use melted white chocolate to create an intricate spiderweb design on top, chill the tart, and finish with a sprinkle of edible glitter for a magical touch.
Step 1. Prepare the Tart Crust
Kicking off the crust preparation, you'll need to gather your ingredients and equipment.
You'll want a mixing bowl, a food processor, and a 9-inch tart pan with a removable bottom. For the crust, you'll use graham crackers, melted butter, and a pinch of salt.
Start by crushing the graham crackers in your food processor until they're fine crumbs. If you don't have a food processor, no worries! You can put the crackers in a zip-top bag and crush them with a rolling pin. It's a fun way to release some energy, too!
Once you've got your crumbs, mix them with the melted butter and salt in your bowl. The mixture should look like wet sand and hold together when you squeeze it.
Now, press this mixture firmly into your tart pan, making sure to cover the bottom and sides evenly. Use the back of a spoon or your fingers to really pack it down.
Step 2. Make Chocolate Ganache Filling

Once your crust is ready, it's time to create the luscious chocolate ganache filling.
Start by chopping 8 ounces of dark chocolate into small pieces and placing them in a heatproof bowl. In a saucepan, heat 1 cup of heavy cream until it's just about to boil. You'll see small bubbles forming around the edges when it's ready.
Pour the hot cream over the chopped chocolate and let it sit for a minute. Then, gently stir the mixture until the chocolate is completely melted and smooth. If you're having trouble getting all the chocolate to melt, you can place the bowl over a pot of simmering water for a few seconds.
Now, add 2 tablespoons of unsalted butter to the ganache and stir until it's fully incorporated. This will give your filling a silky texture and beautiful sheen.
Finally, pour the ganache into your prepared tart crust, making sure it's evenly distributed. Give the tart a gentle shake to smooth out the surface.
Now, you're ready to move on to the next step: creating the spiderweb design!
Step 3. Create Spiderweb Design

With the ganache filling set, it's time to create the spooky spiderweb design that will transform your chocolate tart into a Halloween showstopper.
You'll need white chocolate and a piping bag to get started. First, melt about 2 ounces of white chocolate in the microwave, stirring every 15 seconds until smooth. Let it cool slightly, then transfer it to a piping bag with a small round tip.
Now, you're ready to unleash your inner spider artist! Start by piping a spiral on top of the ganache, beginning at the center and working your way outward.
Don't worry if it's not perfect – spiderwebs are naturally a bit messy. Once you've completed the spiral, it's time for the magic trick. Take a toothpick and, starting from the center, drag it outward through the white chocolate lines.
Repeat this process, creating "spokes" around the tart. The white chocolate will blend slightly with the dark ganache, creating a realistic web effect.
For an extra creepy touch, you can add a plastic spider decoration to complete your masterpiece.
Step 4. Chill Before Serving

After creating your spooky spiderweb design, it's crucial to chill the tart before serving. Place the tart carefully in the refrigerator for at least 2 hours, or overnight if you've got the time. This cooling period allows the chocolate to set properly, ensuring a firm texture and clean slices when you're ready to dig in.
While you wait, resist the temptation to peek! Keeping the refrigerator door closed helps maintain a consistent temperature. If you're in a hurry, you can pop the tart in the freezer for about 30 minutes, but be careful not to freeze it solid.
Once chilled, your tart will be easier to handle and slice. Before serving, let it sit at room temperature for 10-15 minutes to take the edge off the chill. This brings out the chocolate's rich flavor and makes it easier to eat.
Step 5. Garnish With Edible Glitter

Edible glitter adds a final touch of sparkle to your spooky spiderweb chocolate tart. Once your tart has chilled completely, it's time to give it that extra pizzazz.
You'll want to choose an edible glitter that complements your tart's color scheme. Silver or gold are classic choices, but don't be afraid to get creative with orange, purple, or even black for a truly haunting effect.
To apply the glitter, you've got a few options. You can use a small, clean paintbrush to dust it lightly over specific areas, like the web's strands or around the tart's edges.
For a more even distribution, try sprinkling the glitter through a fine-mesh sieve held above the tart. If you're feeling extra fancy, you can mix a tiny bit of glitter with clear alcohol (it'll evaporate) to create a "paint" and use it to highlight certain features.
Final Thoughts

This Spiderweb Chocolate Tart is sure to impress your guests with its striking appearance and decadent flavor. You've put in the effort to create a visually stunning dessert that's as delicious as it looks.
Remember, practice makes perfect, so don't worry if your first attempt isn't flawless. With each try, you'll become more confident in your skills.
As you serve this tart, take a moment to appreciate the artistry you've created. The rich chocolate filling, the delicate spiderweb design, and the sparkling edible glitter all come together to form a truly special treat.
You can customize this recipe to fit different occasions by changing the colors or adding seasonal decorations.
Don't forget to store any leftovers properly in an airtight container in the refrigerator. The tart will keep for up to three days, though it's best enjoyed fresh. You can also freeze individual slices for future indulgence.
Whether you're making this for a Halloween party or just to satisfy a chocolate craving, this Spiderweb Chocolate Tart is sure to become a favorite in your dessert repertoire.
Frequently Asked Questions
Can I Use Milk Chocolate Instead of Dark Chocolate for This Recipe?
You can use milk chocolate instead of dark chocolate, but it'll result in a sweeter, less intense flavor. Keep in mind that milk chocolate melts differently, so you may need to adjust the recipe slightly for the best texture.
How Long Does the Spiderweb Chocolate Tart Stay Fresh After Baking?
You'll want to eat your spiderweb chocolate tart within 3-4 days for the best taste and texture. Keep it refrigerated in an airtight container. It's freshest on the first day, but you can enjoy it longer if stored properly.
Is It Possible to Make a Gluten-Free Version of This Tart?
Yes, you can make a gluten-free version of this tart. You'll need to swap the regular flour for a gluten-free alternative in the crust. Try almond flour or a gluten-free flour blend for best results.
What's the Best Way to Create Intricate Web Designs on the Tart?
To create intricate web designs, you'll want to use melted white chocolate in a piping bag. Start by drawing concentric circles, then drag a toothpick from the center outward to create the web effect. It's easier than you'd think!
Can I Freeze the Spiderweb Chocolate Tart for Later Consumption?
Yes, you can freeze the tart for later enjoyment. Wrap it tightly in plastic wrap and foil before freezing. It'll keep for up to 3 months. Thaw in the refrigerator overnight before serving for best results.